In this guide, you have a step-by-step walkthrough you can take when installing an eSIM on your Google Device.
Installing an eSIM using a QR Code
Before attempting to install the eSIM, there are three main things you will need:
- A strong internet connection - Ideally, you will need to be connected to Wi-fi or have a good 4G signal.
- An eSIM compatible device - If you are unsure, here's a list of compatible devices: List of compatible devices
- The device isn't locked to one Mobile Network - If you are unsure whether or not your device is locked to a certain network, have a look at our article on how to check if your device is "locked/unlocked" Locked/unlocked devices
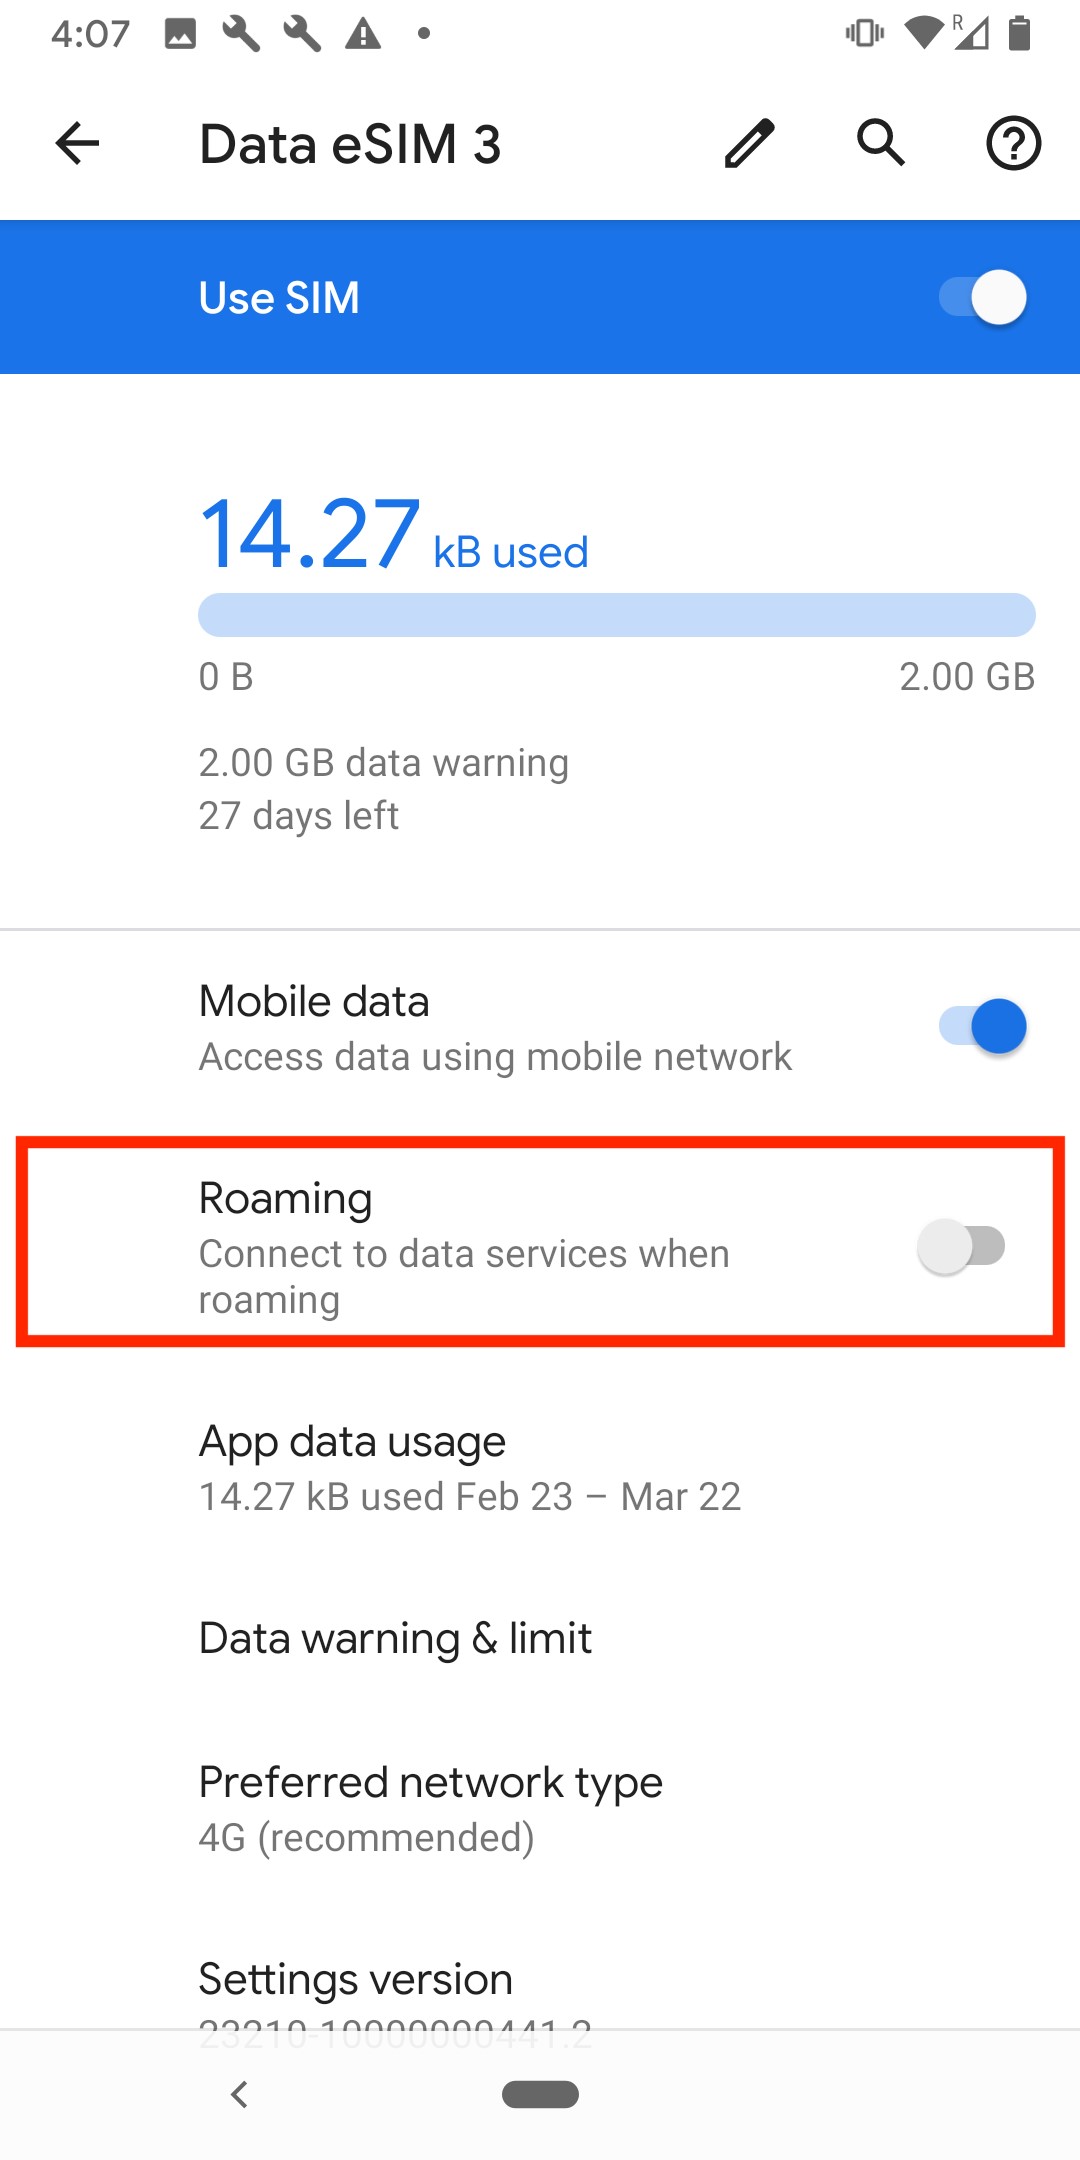
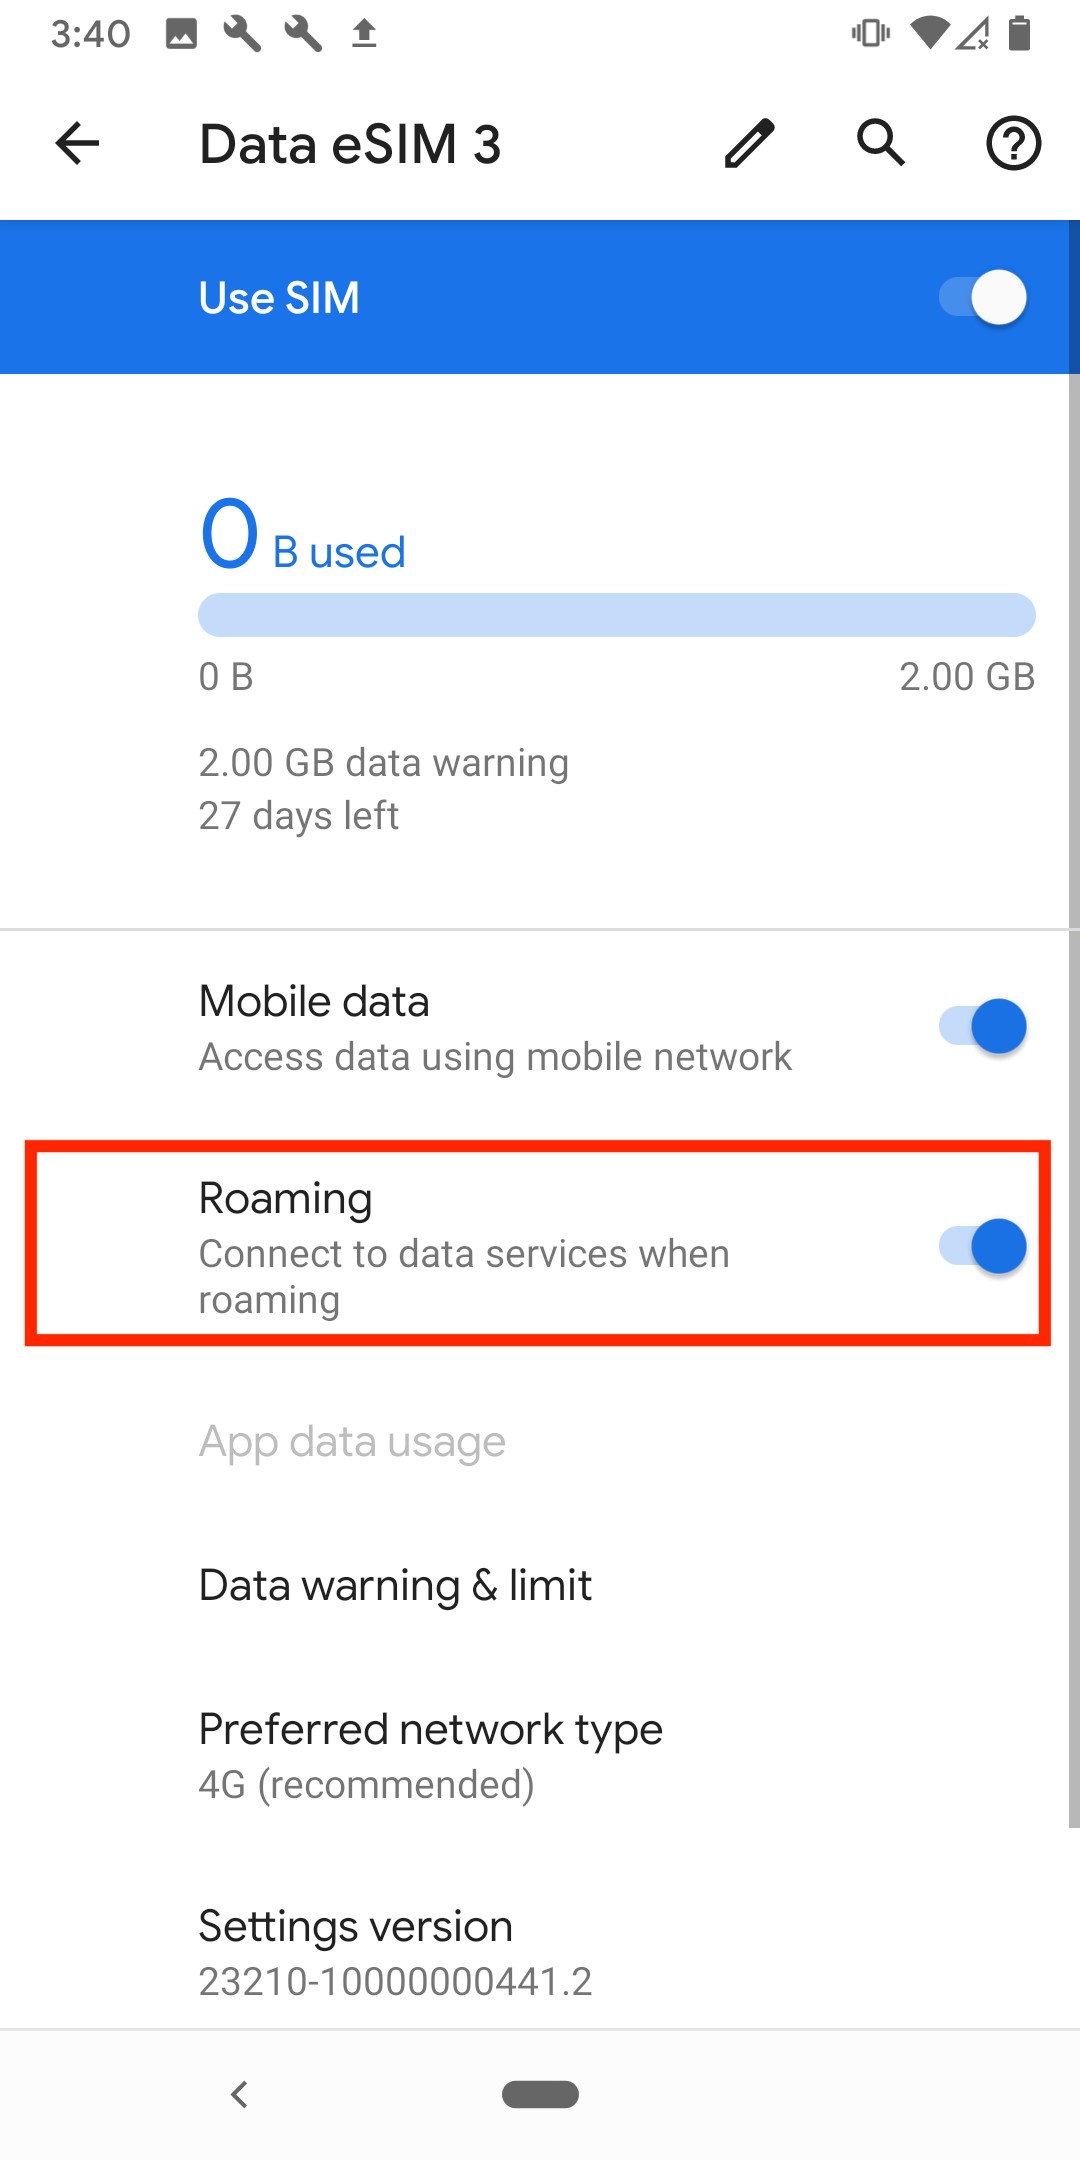
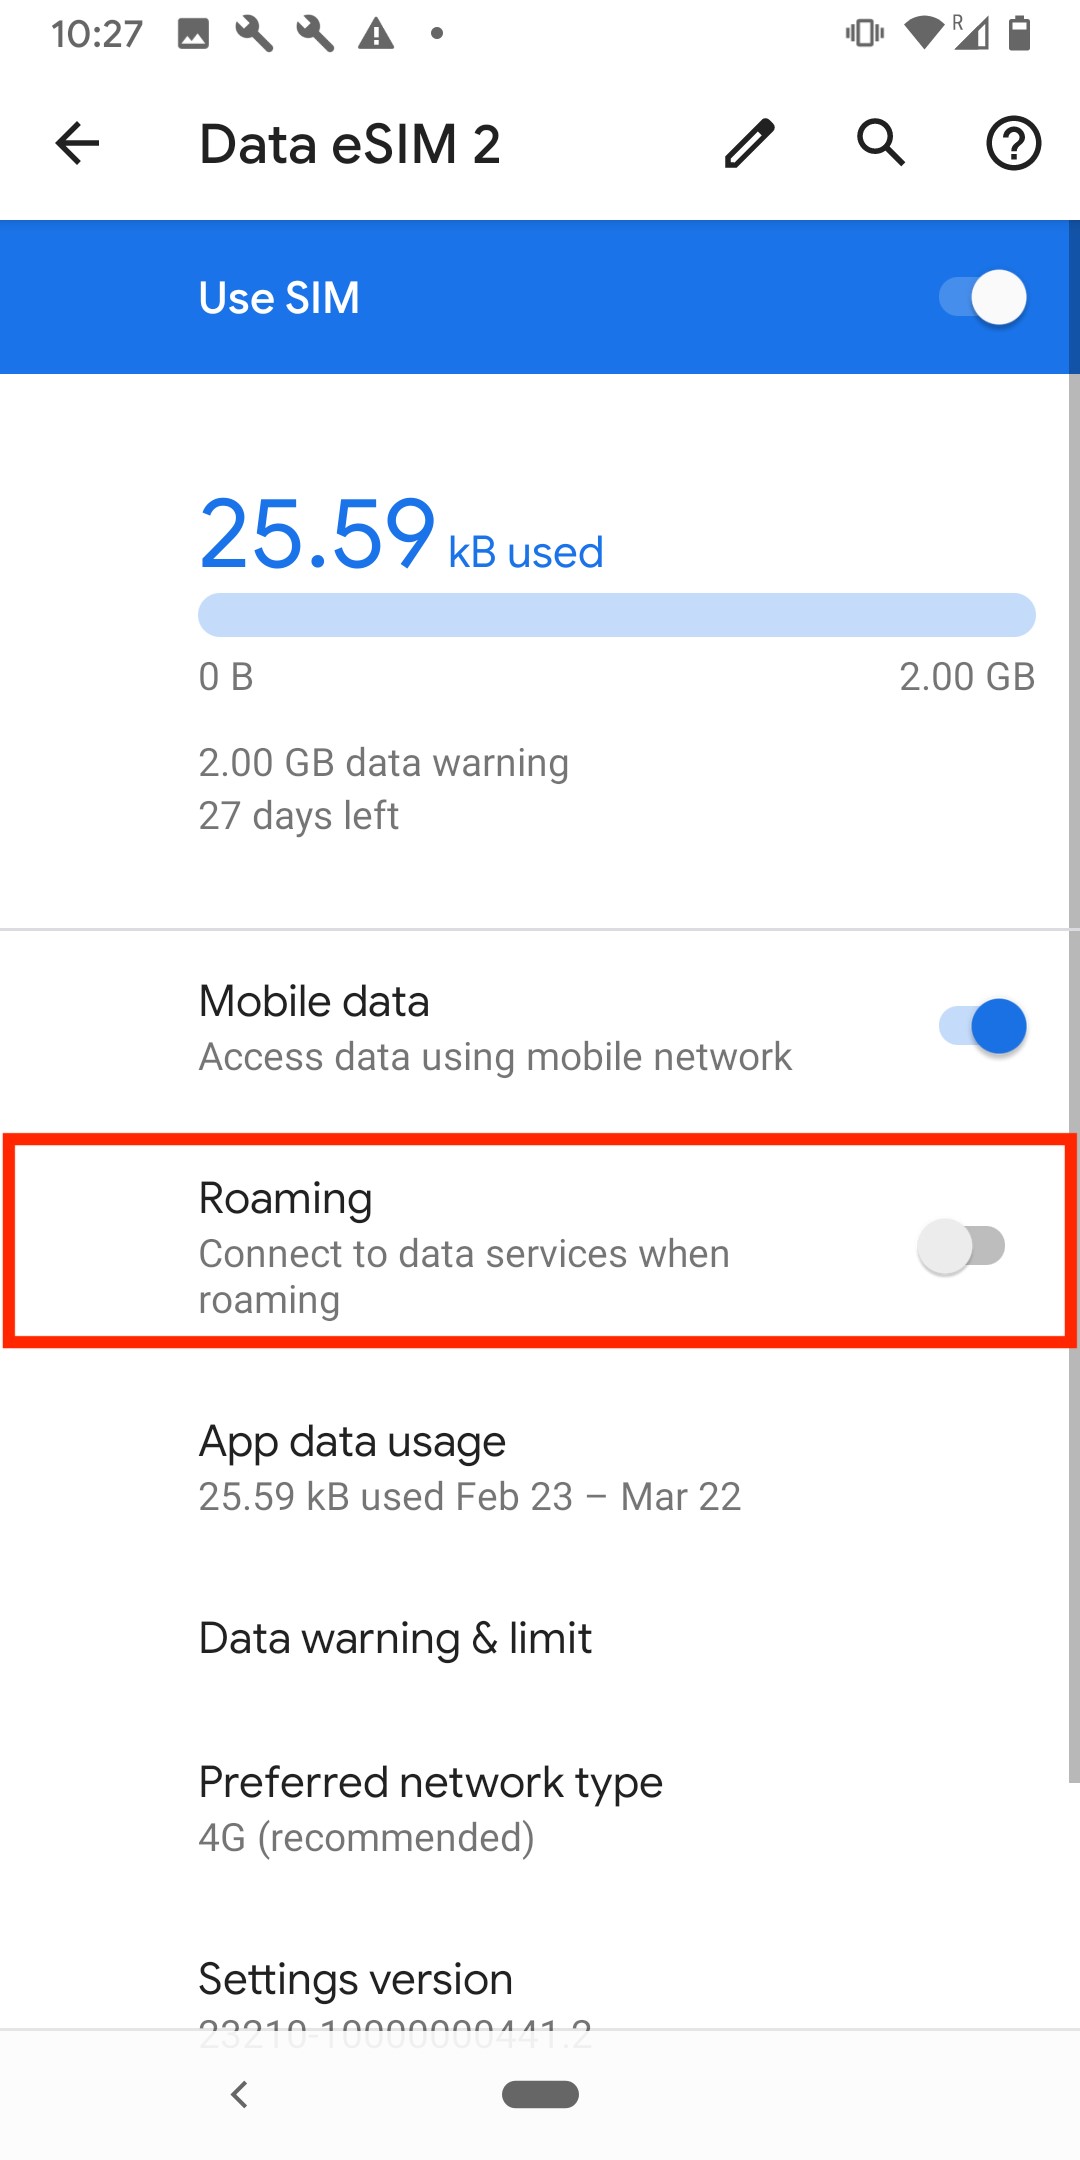
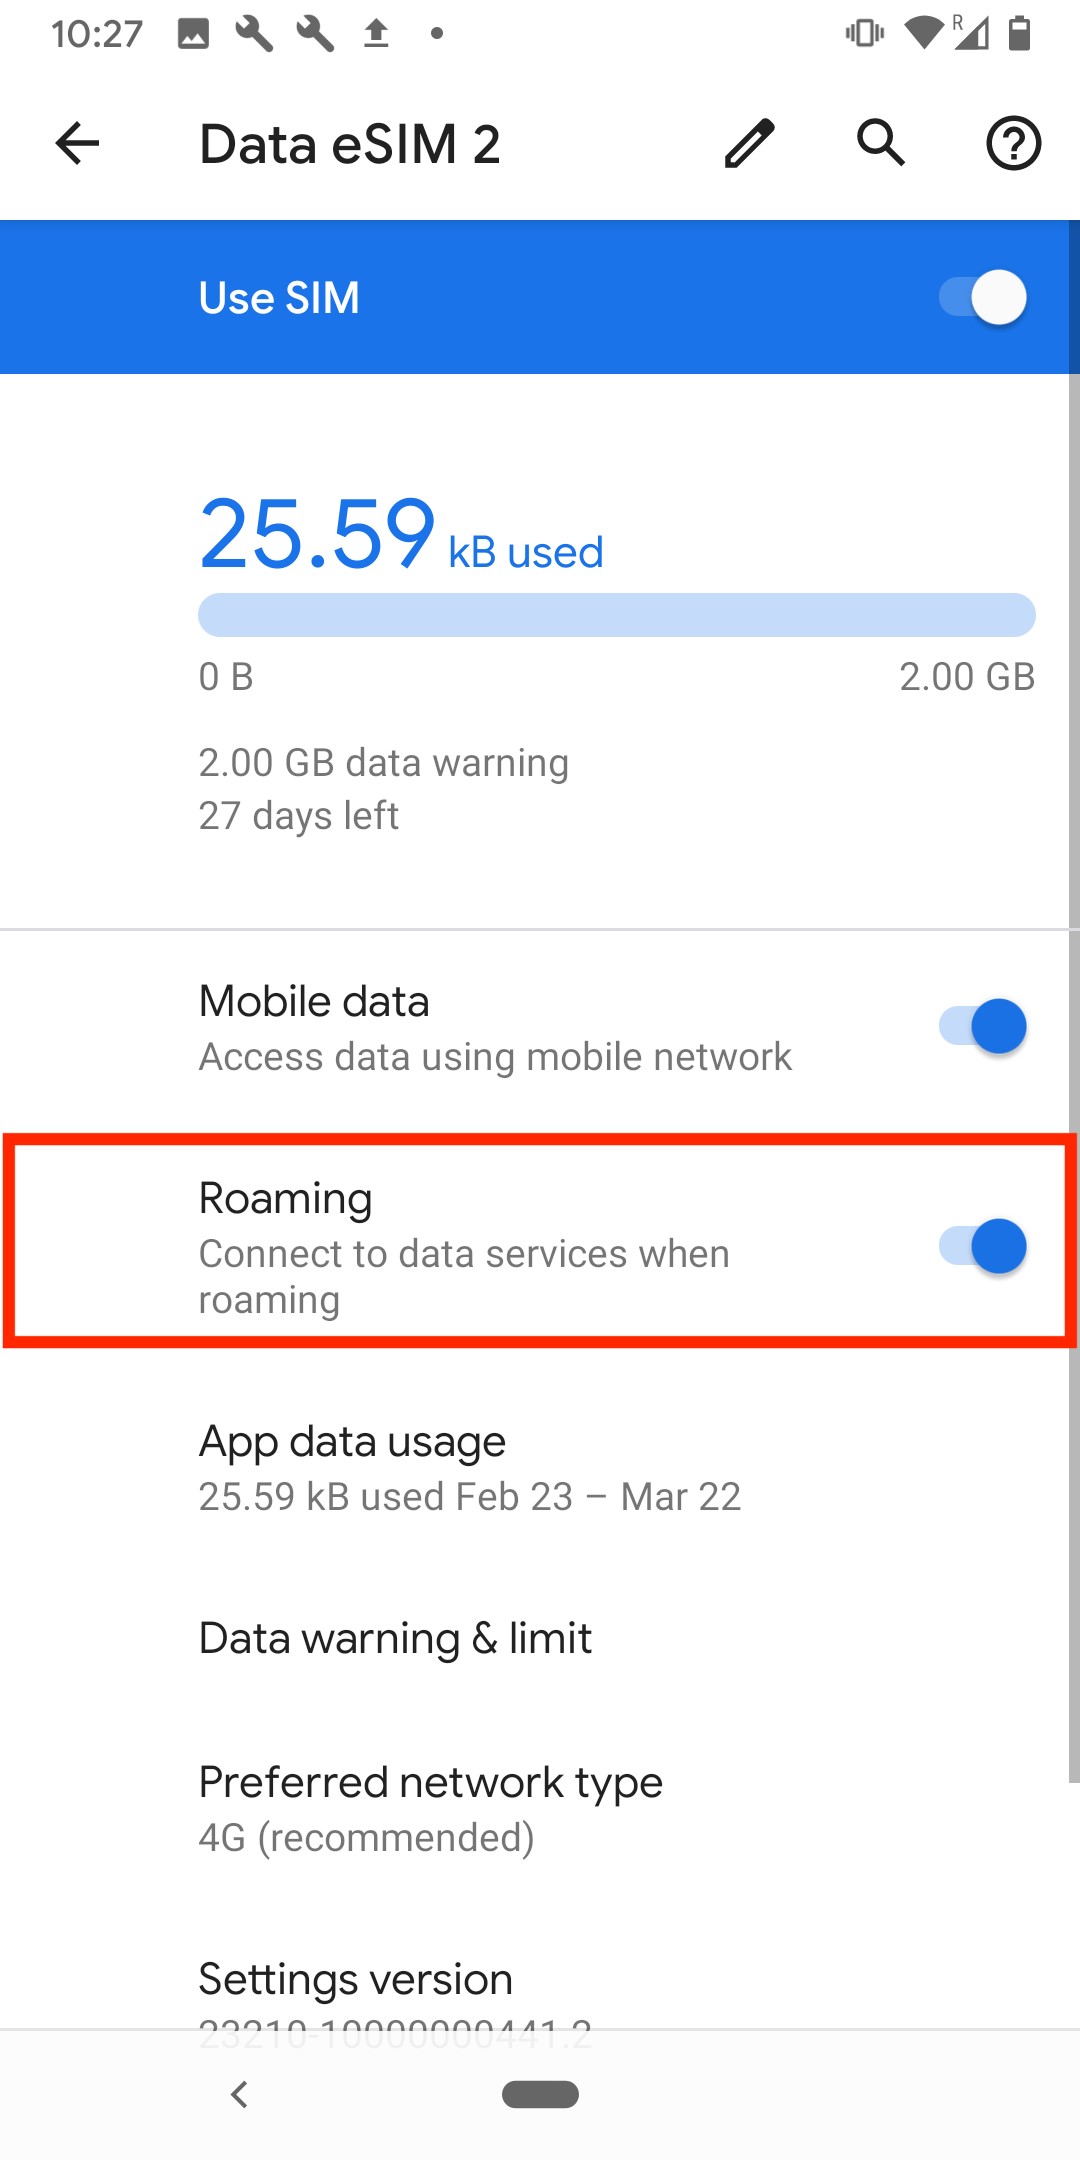
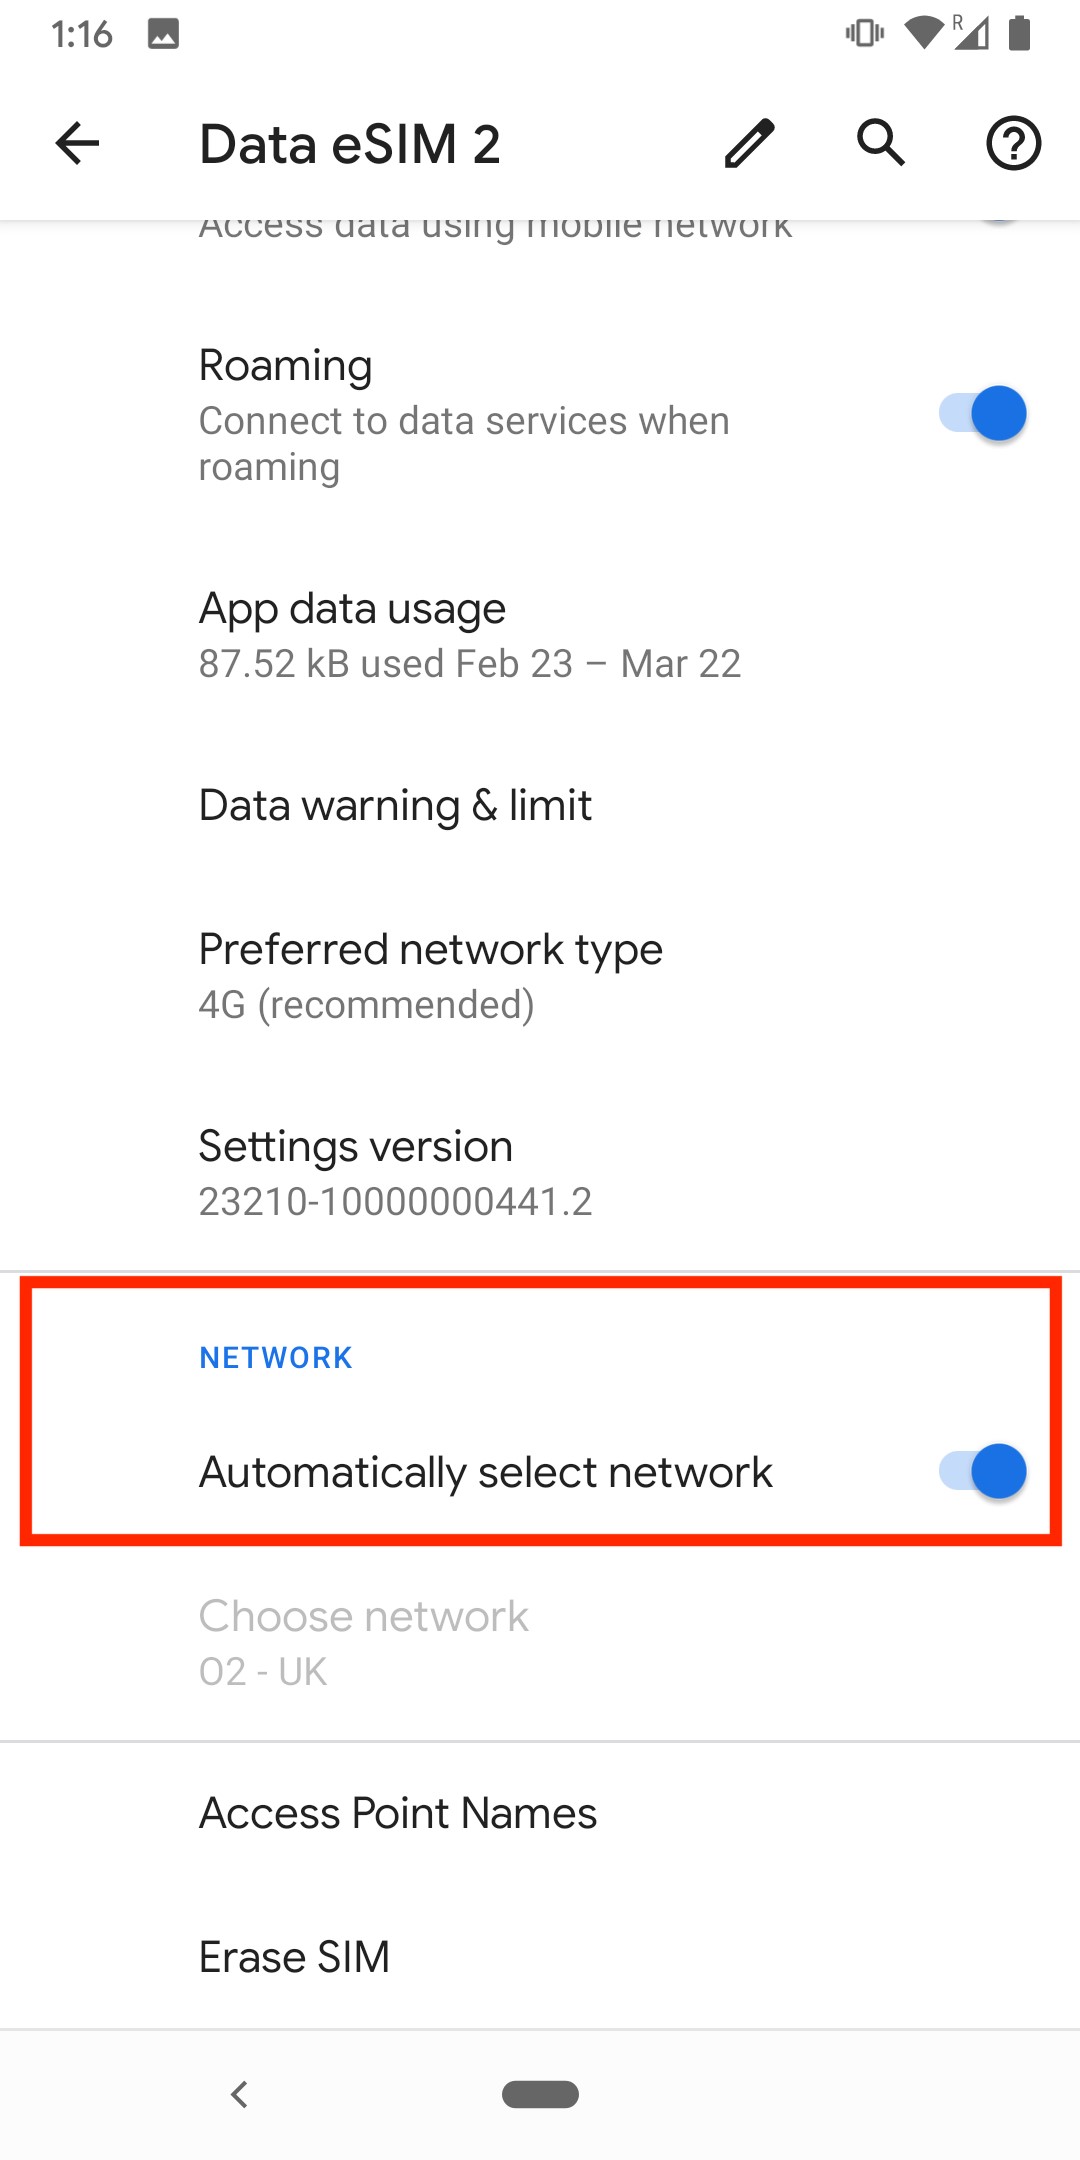
Do not forget to turn on "Data Roaming" once the installation is complete.
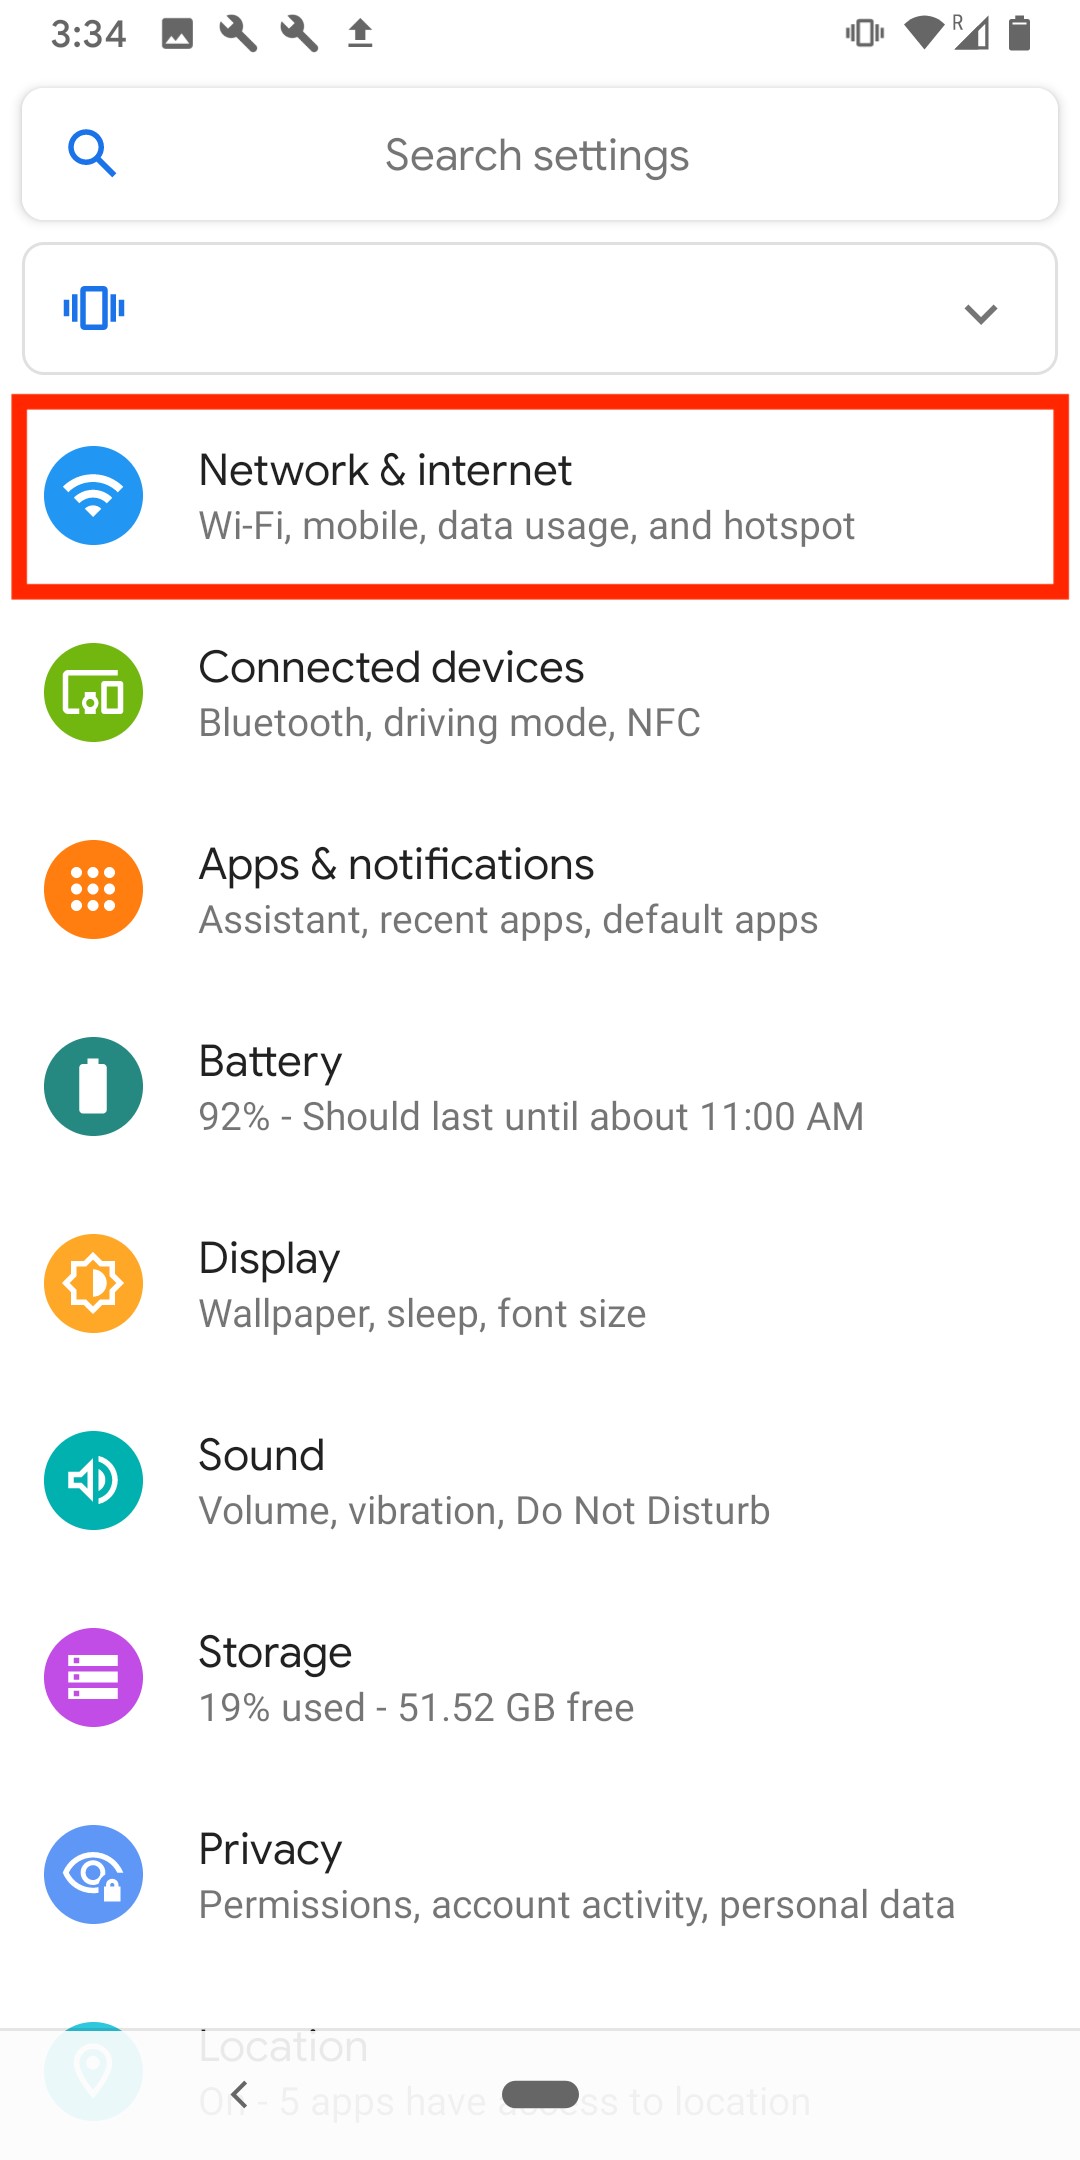
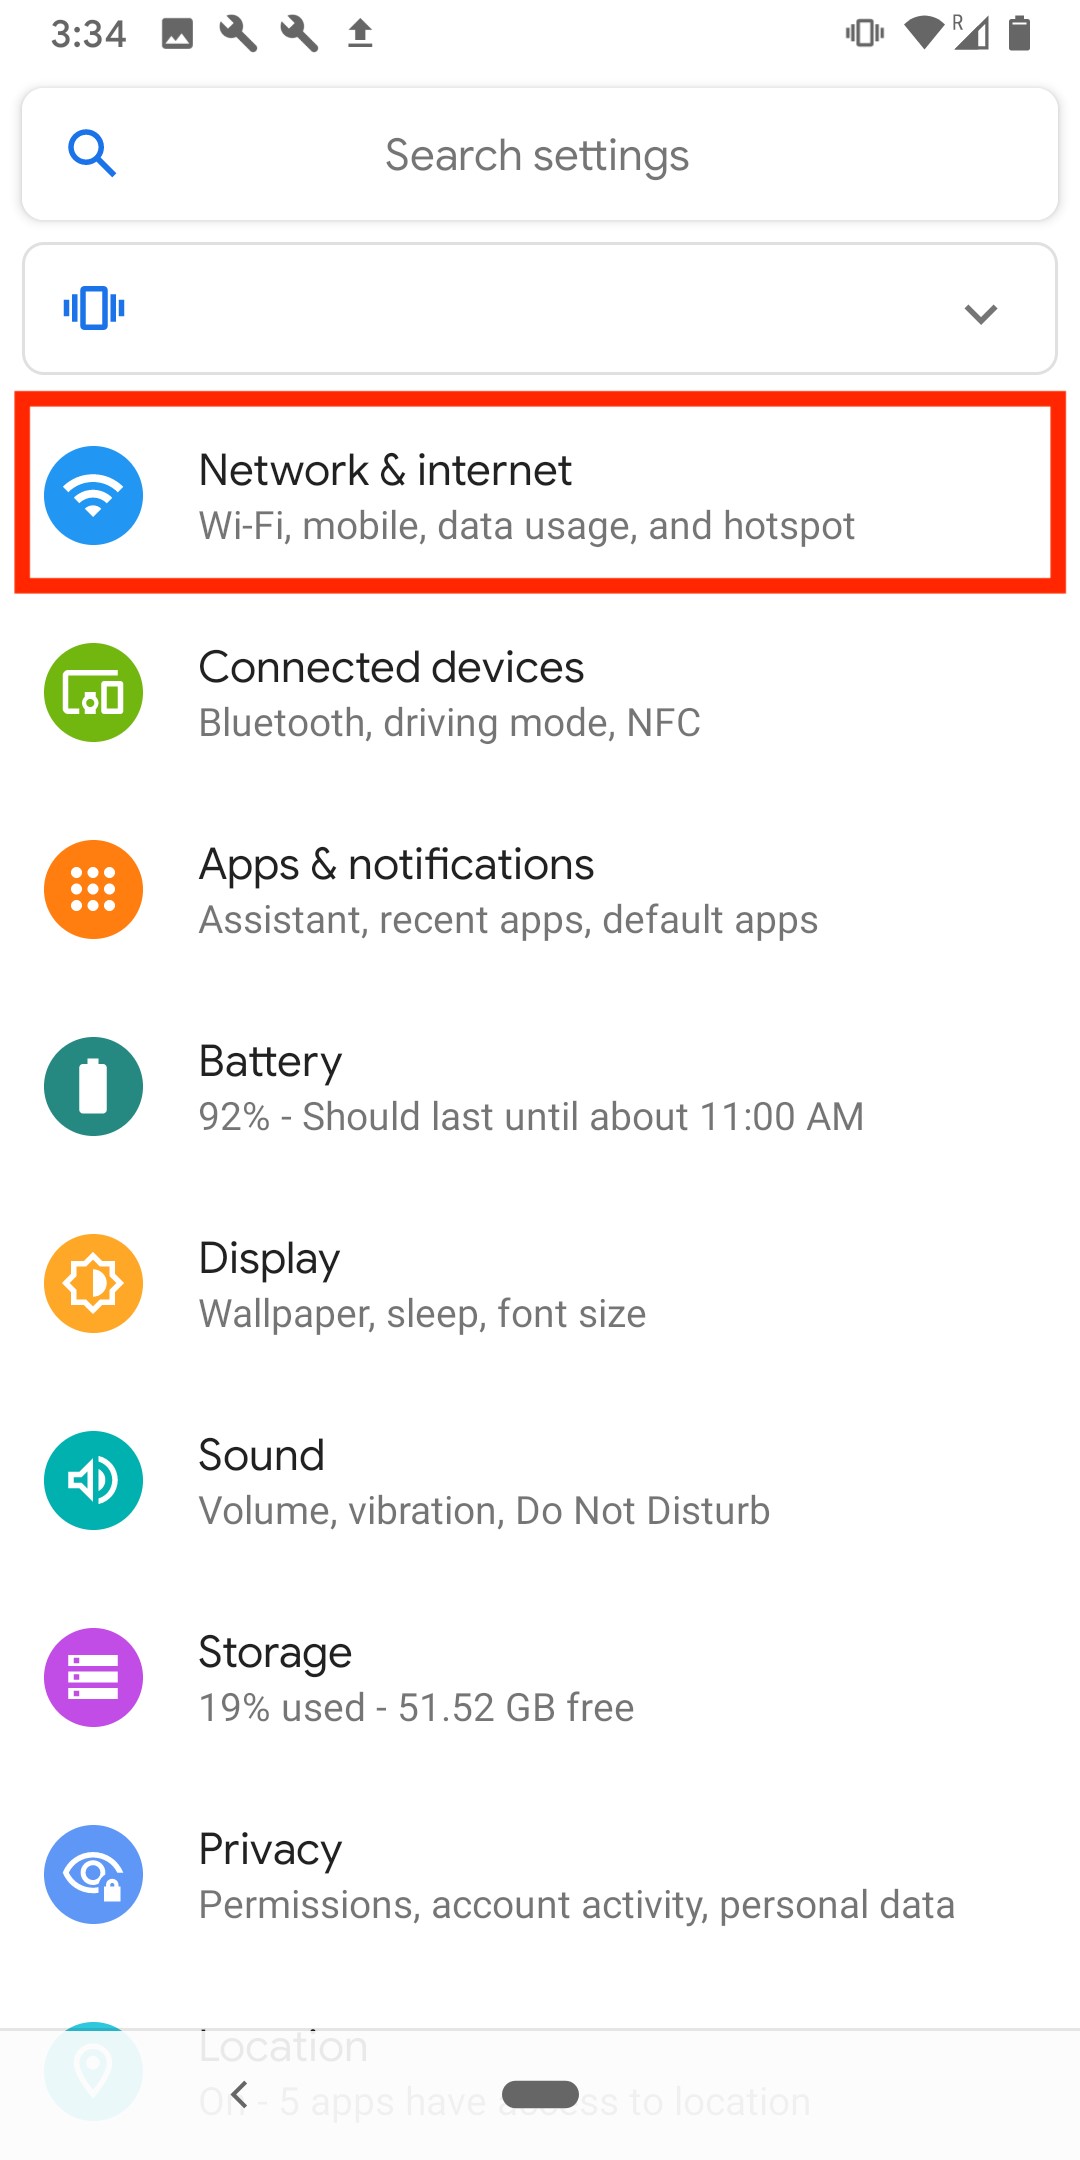
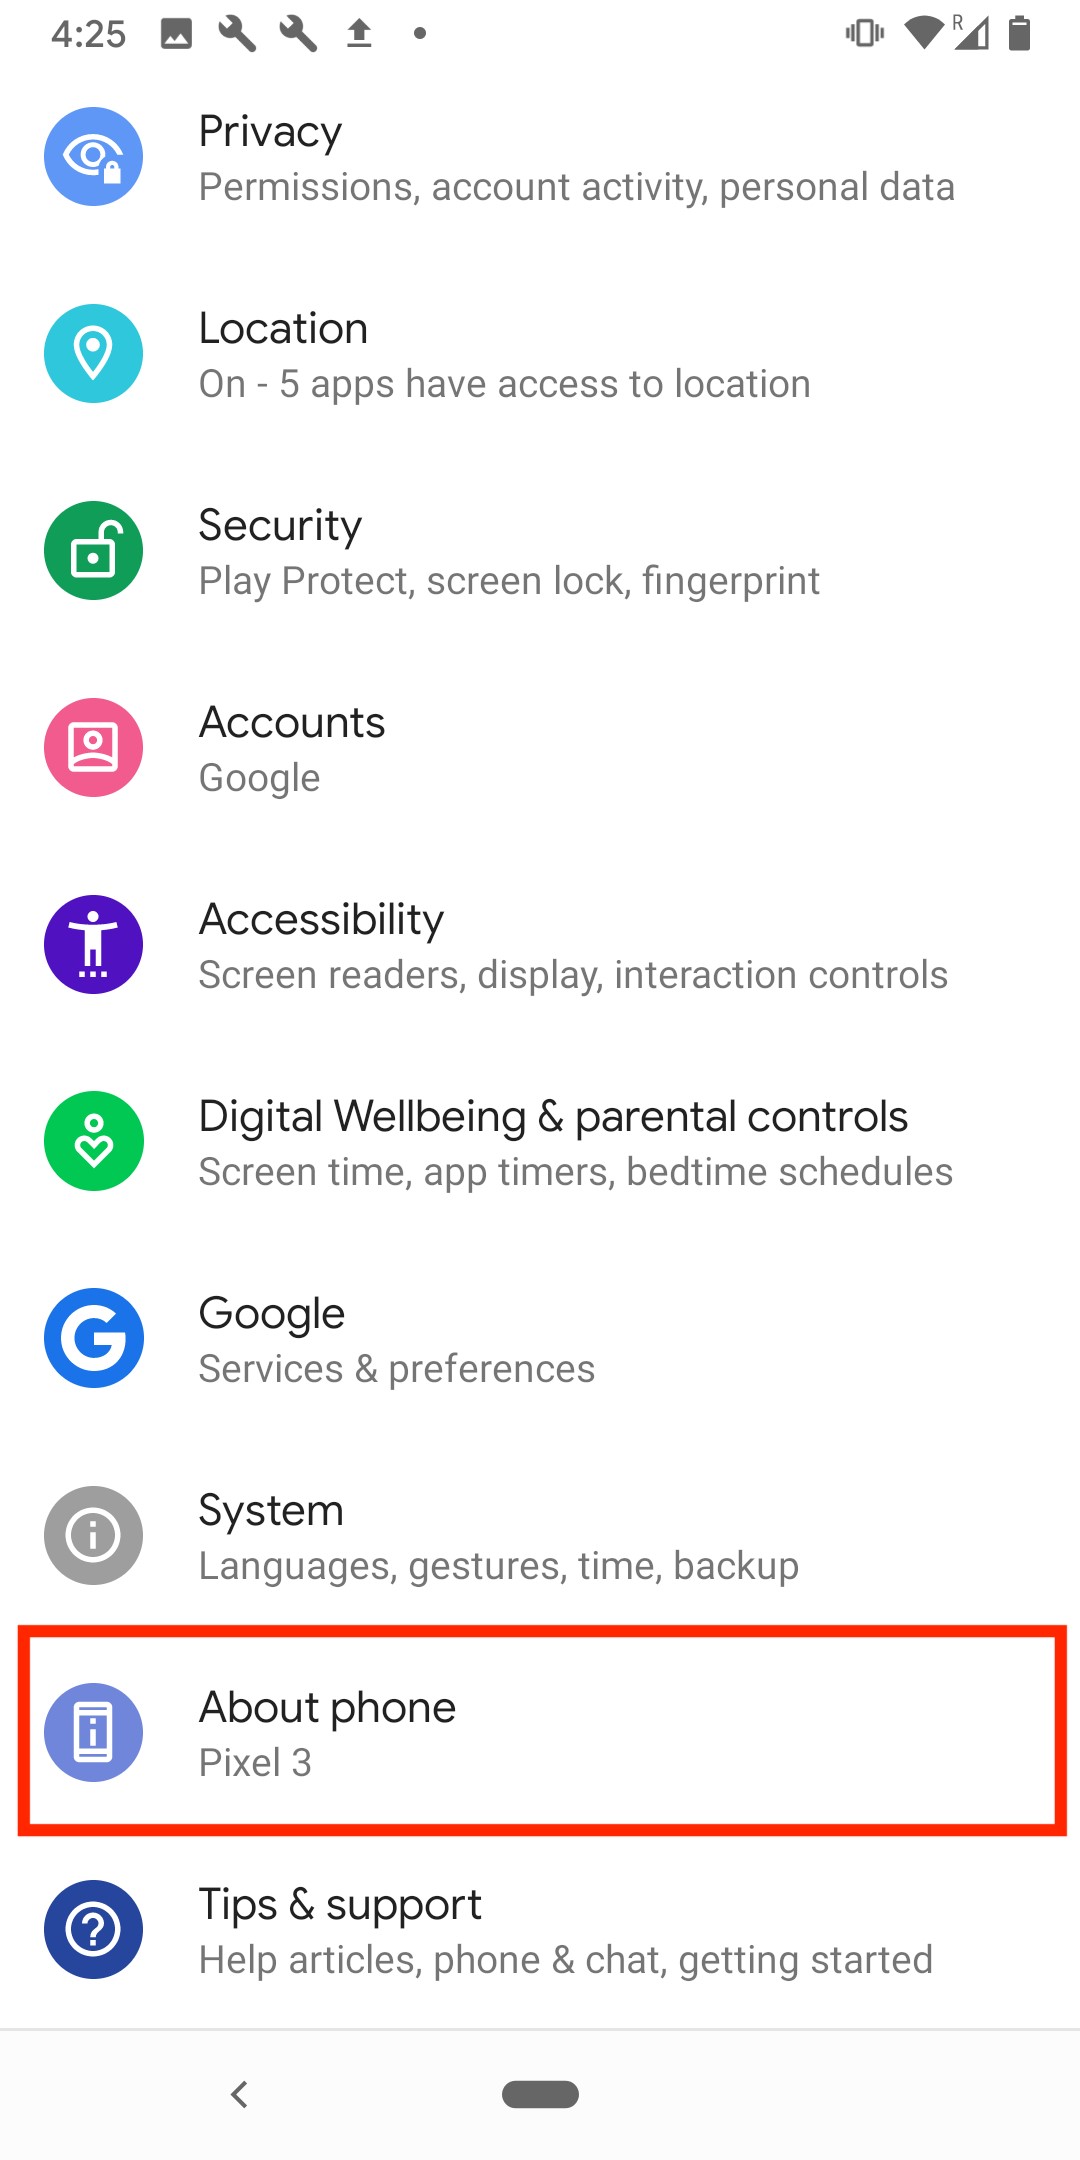
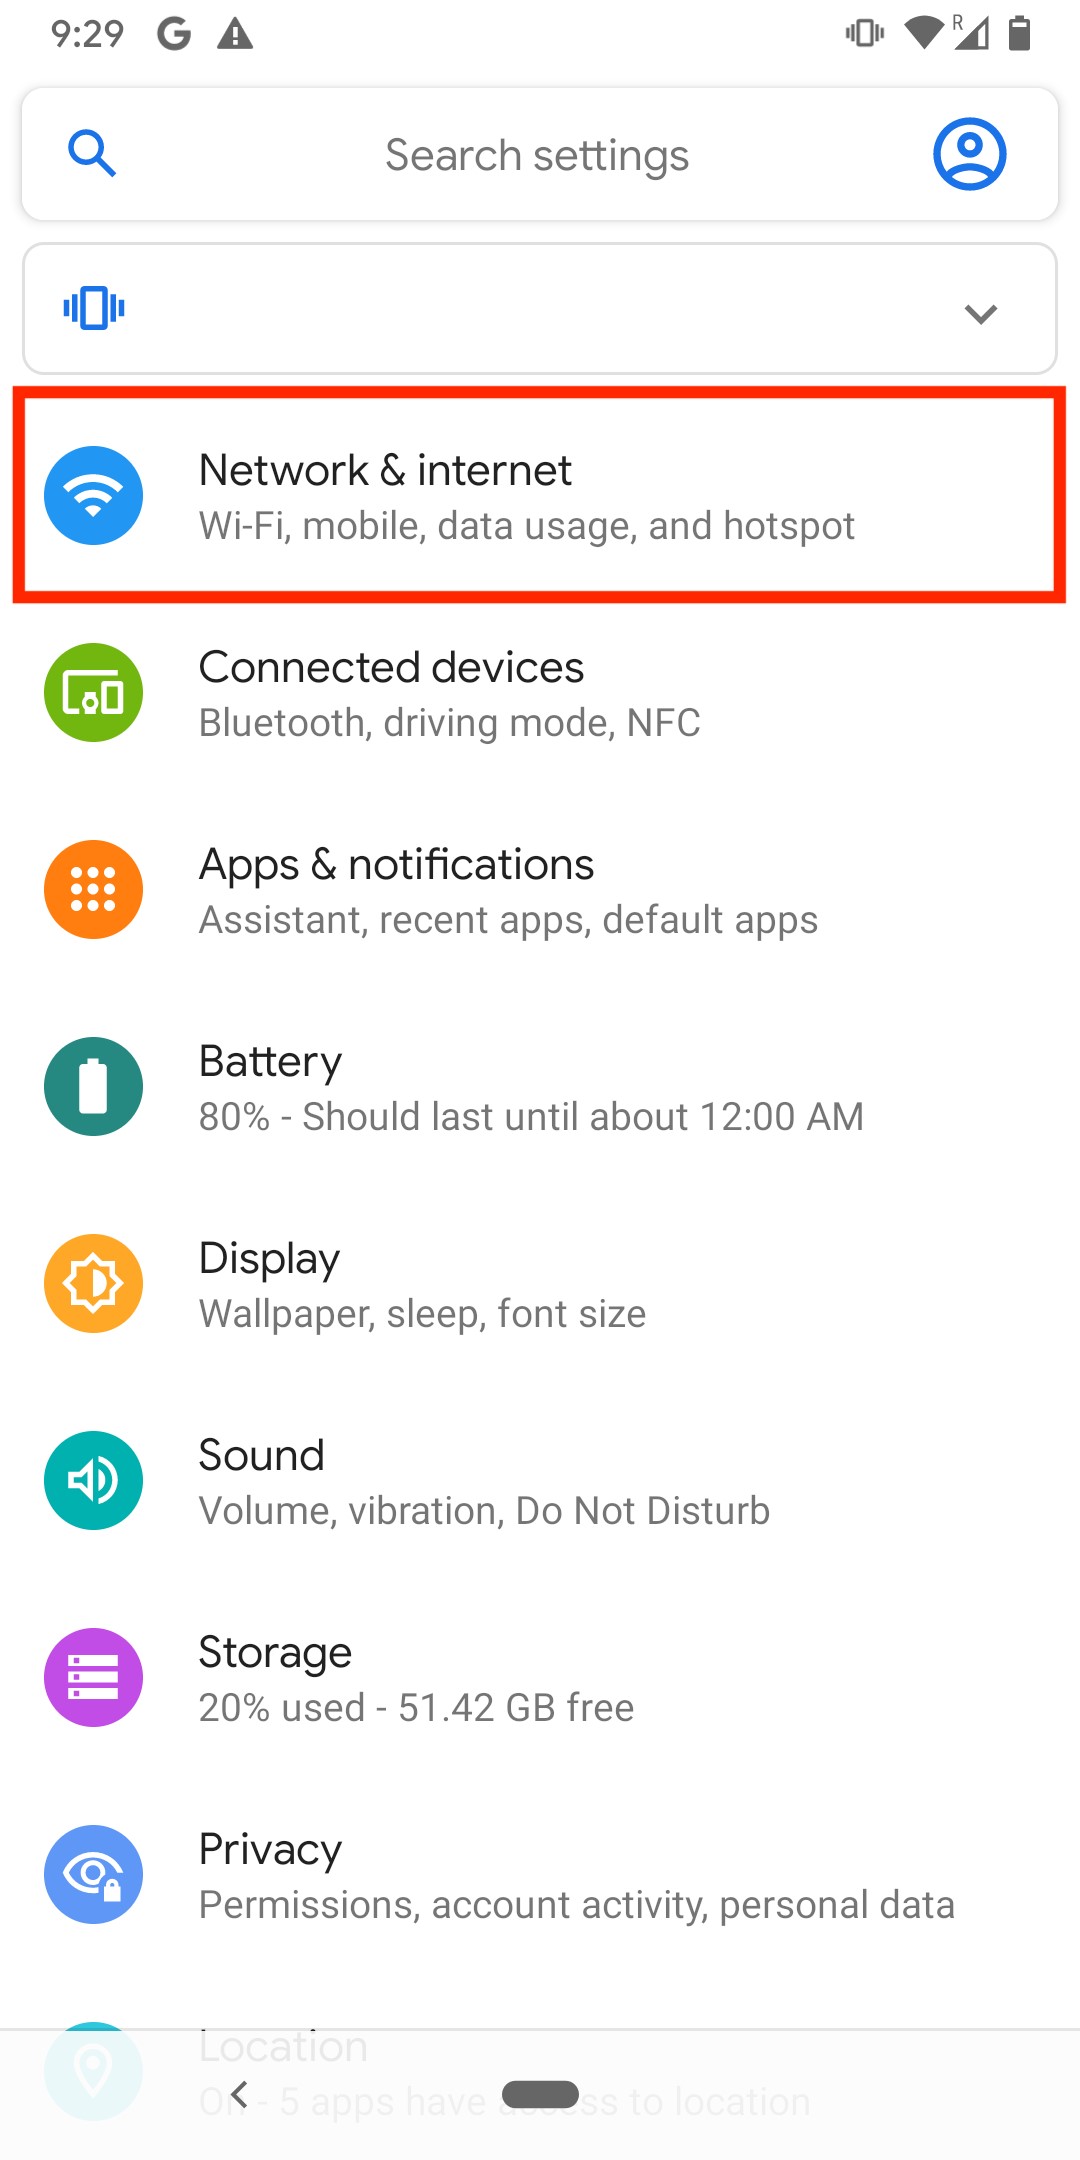
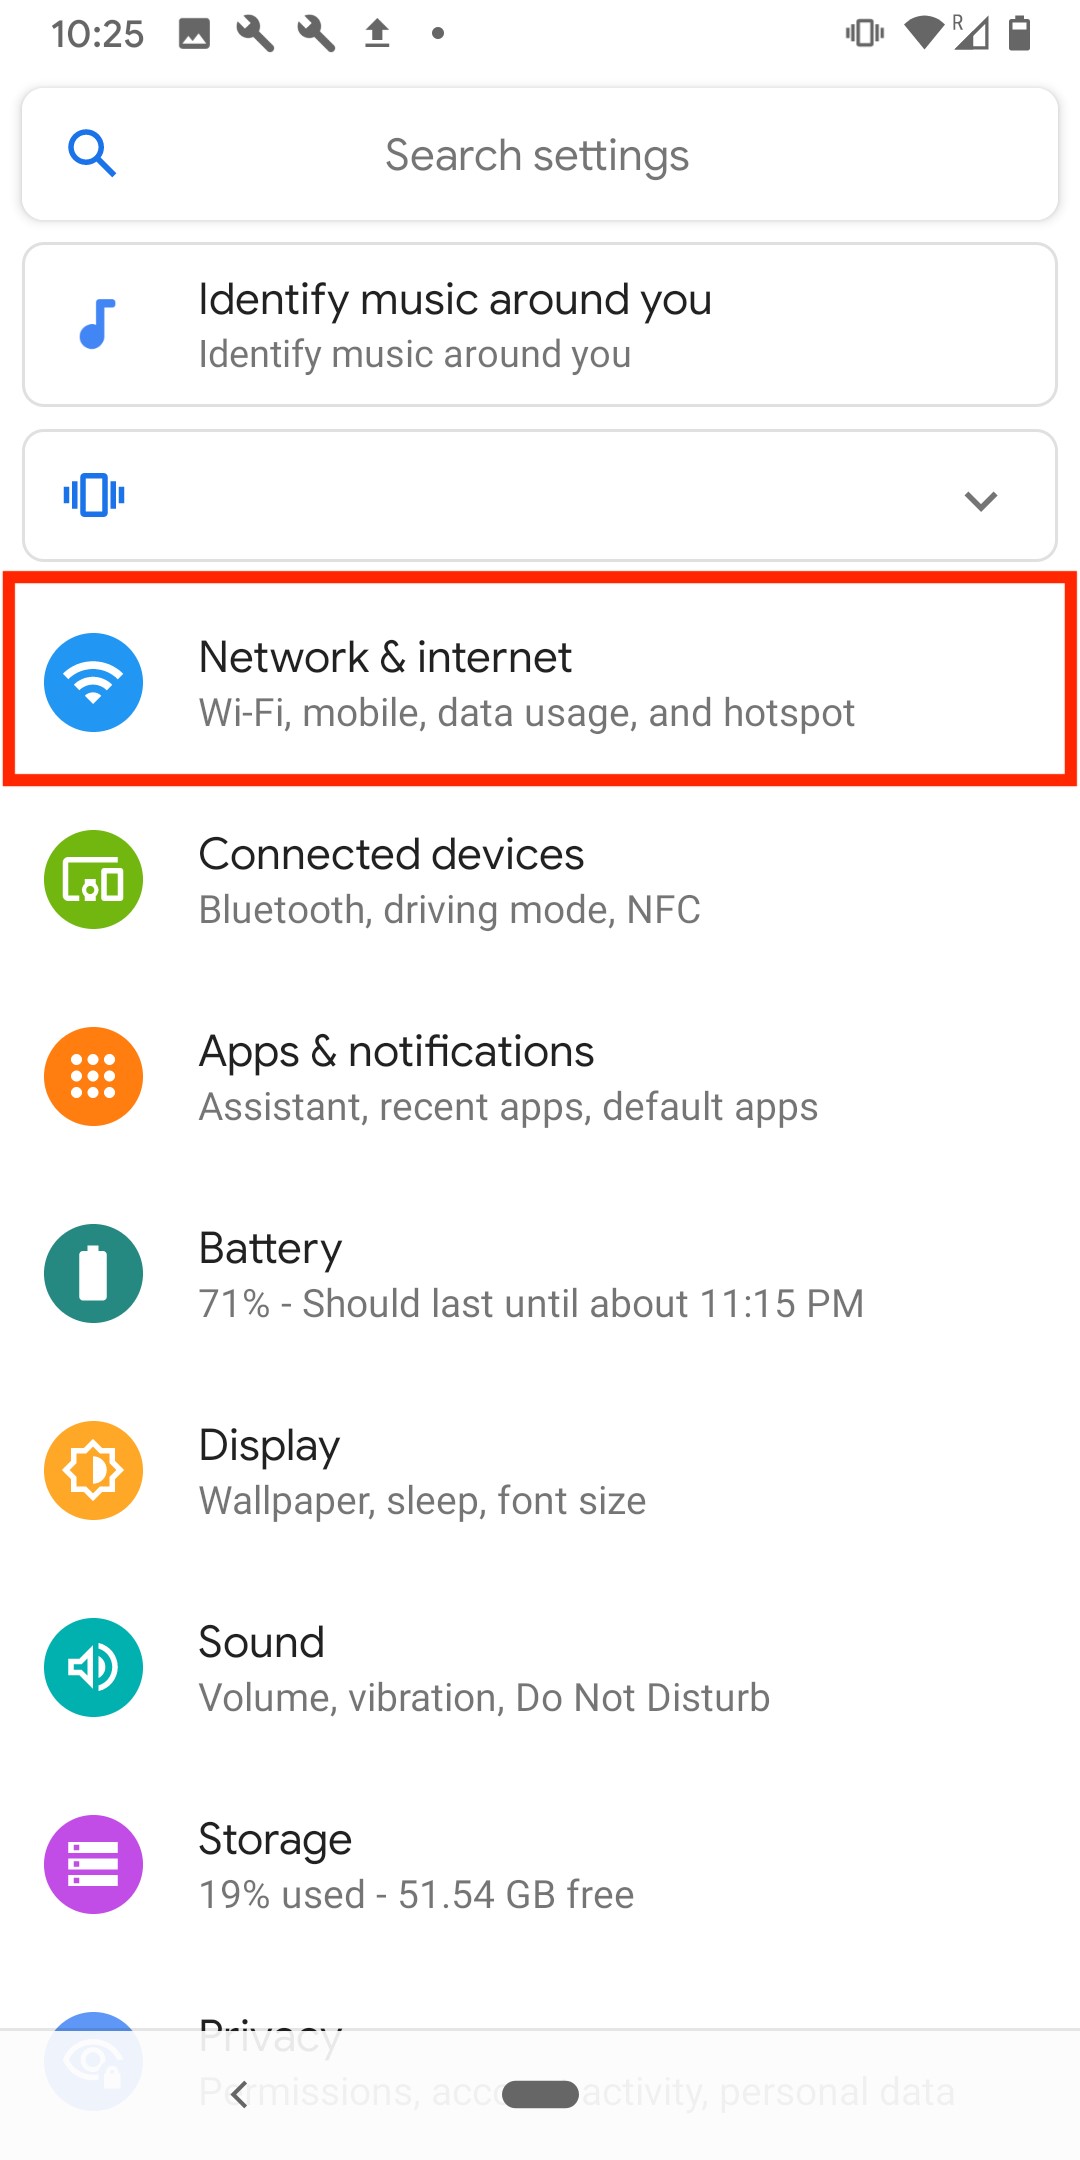
1. Go into your Settings.
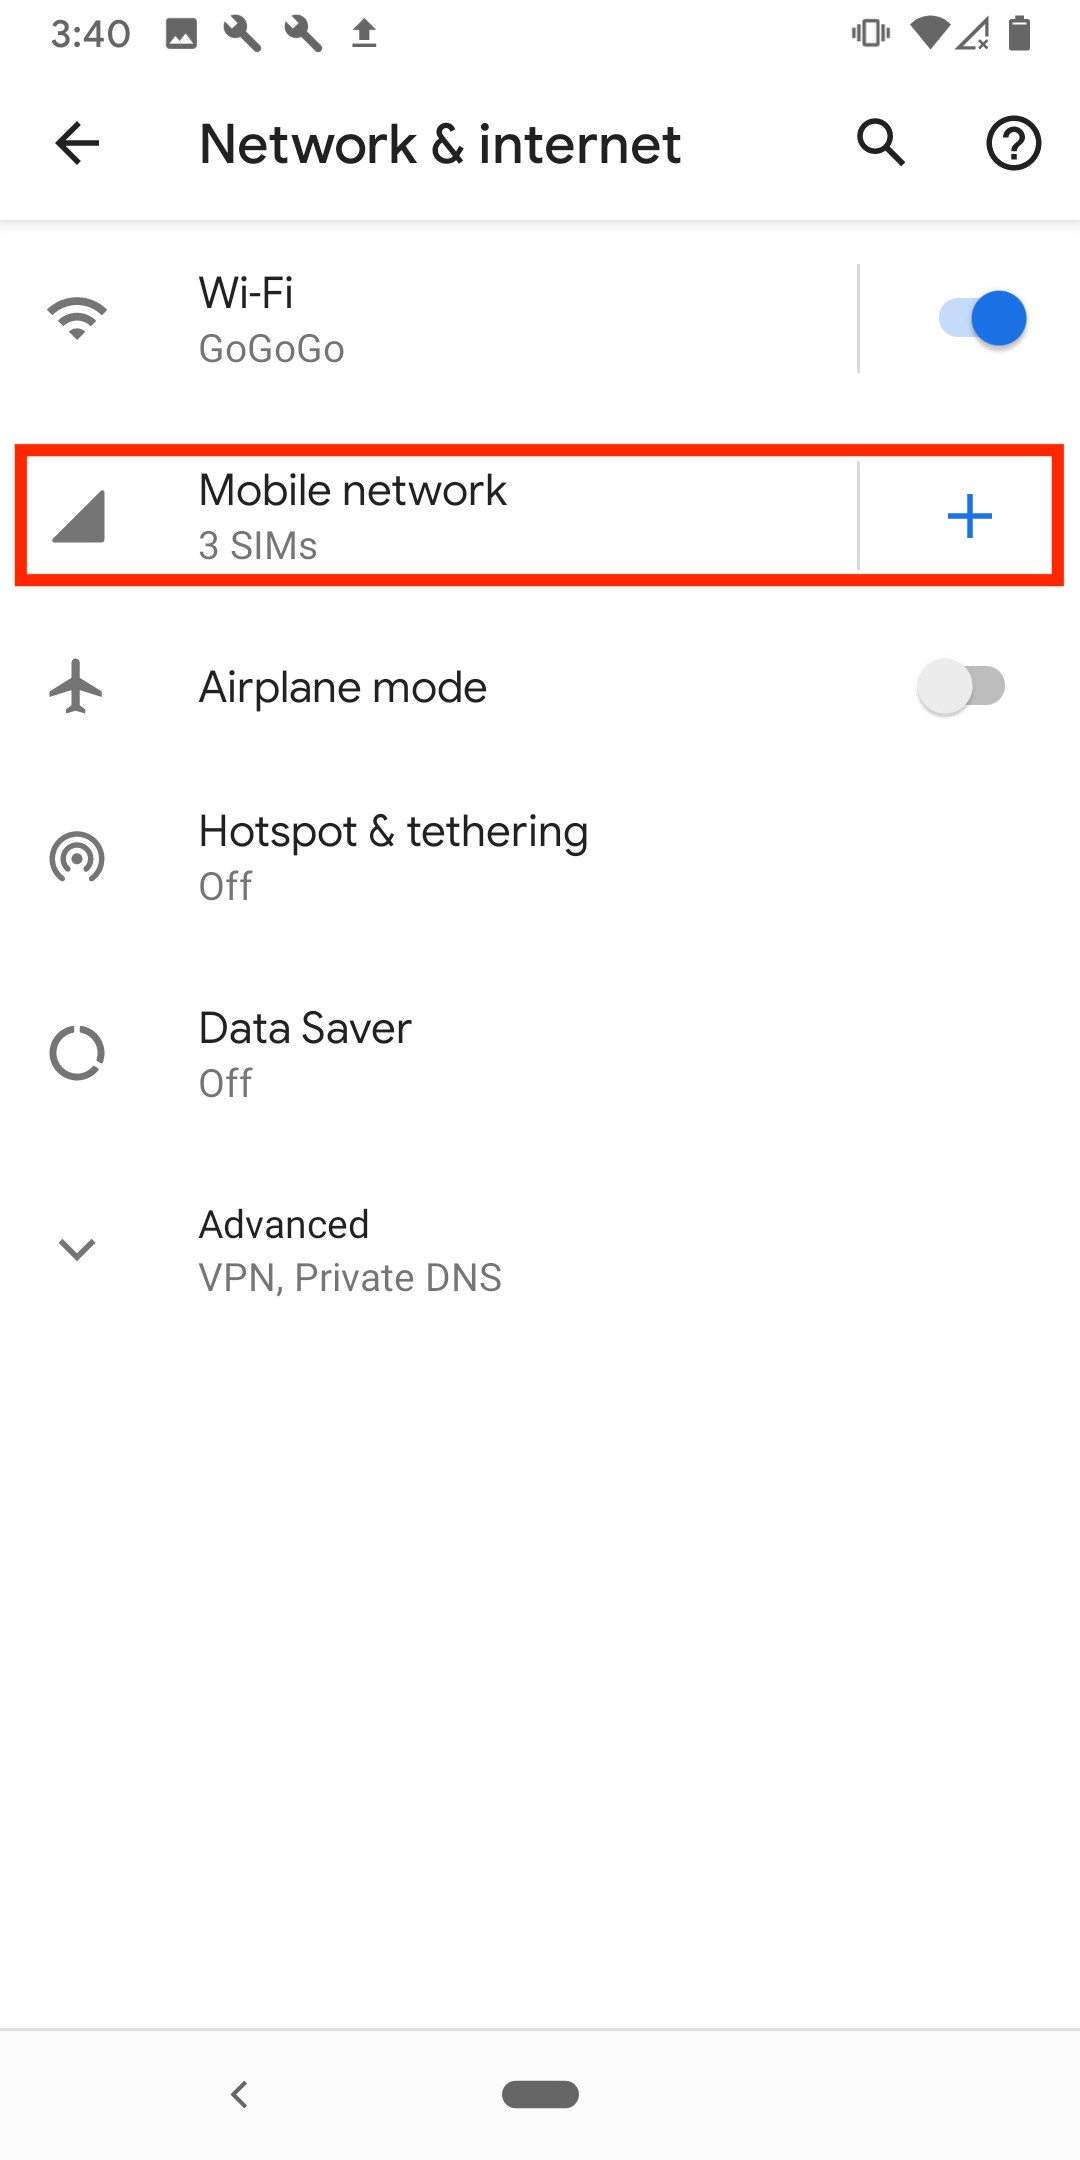
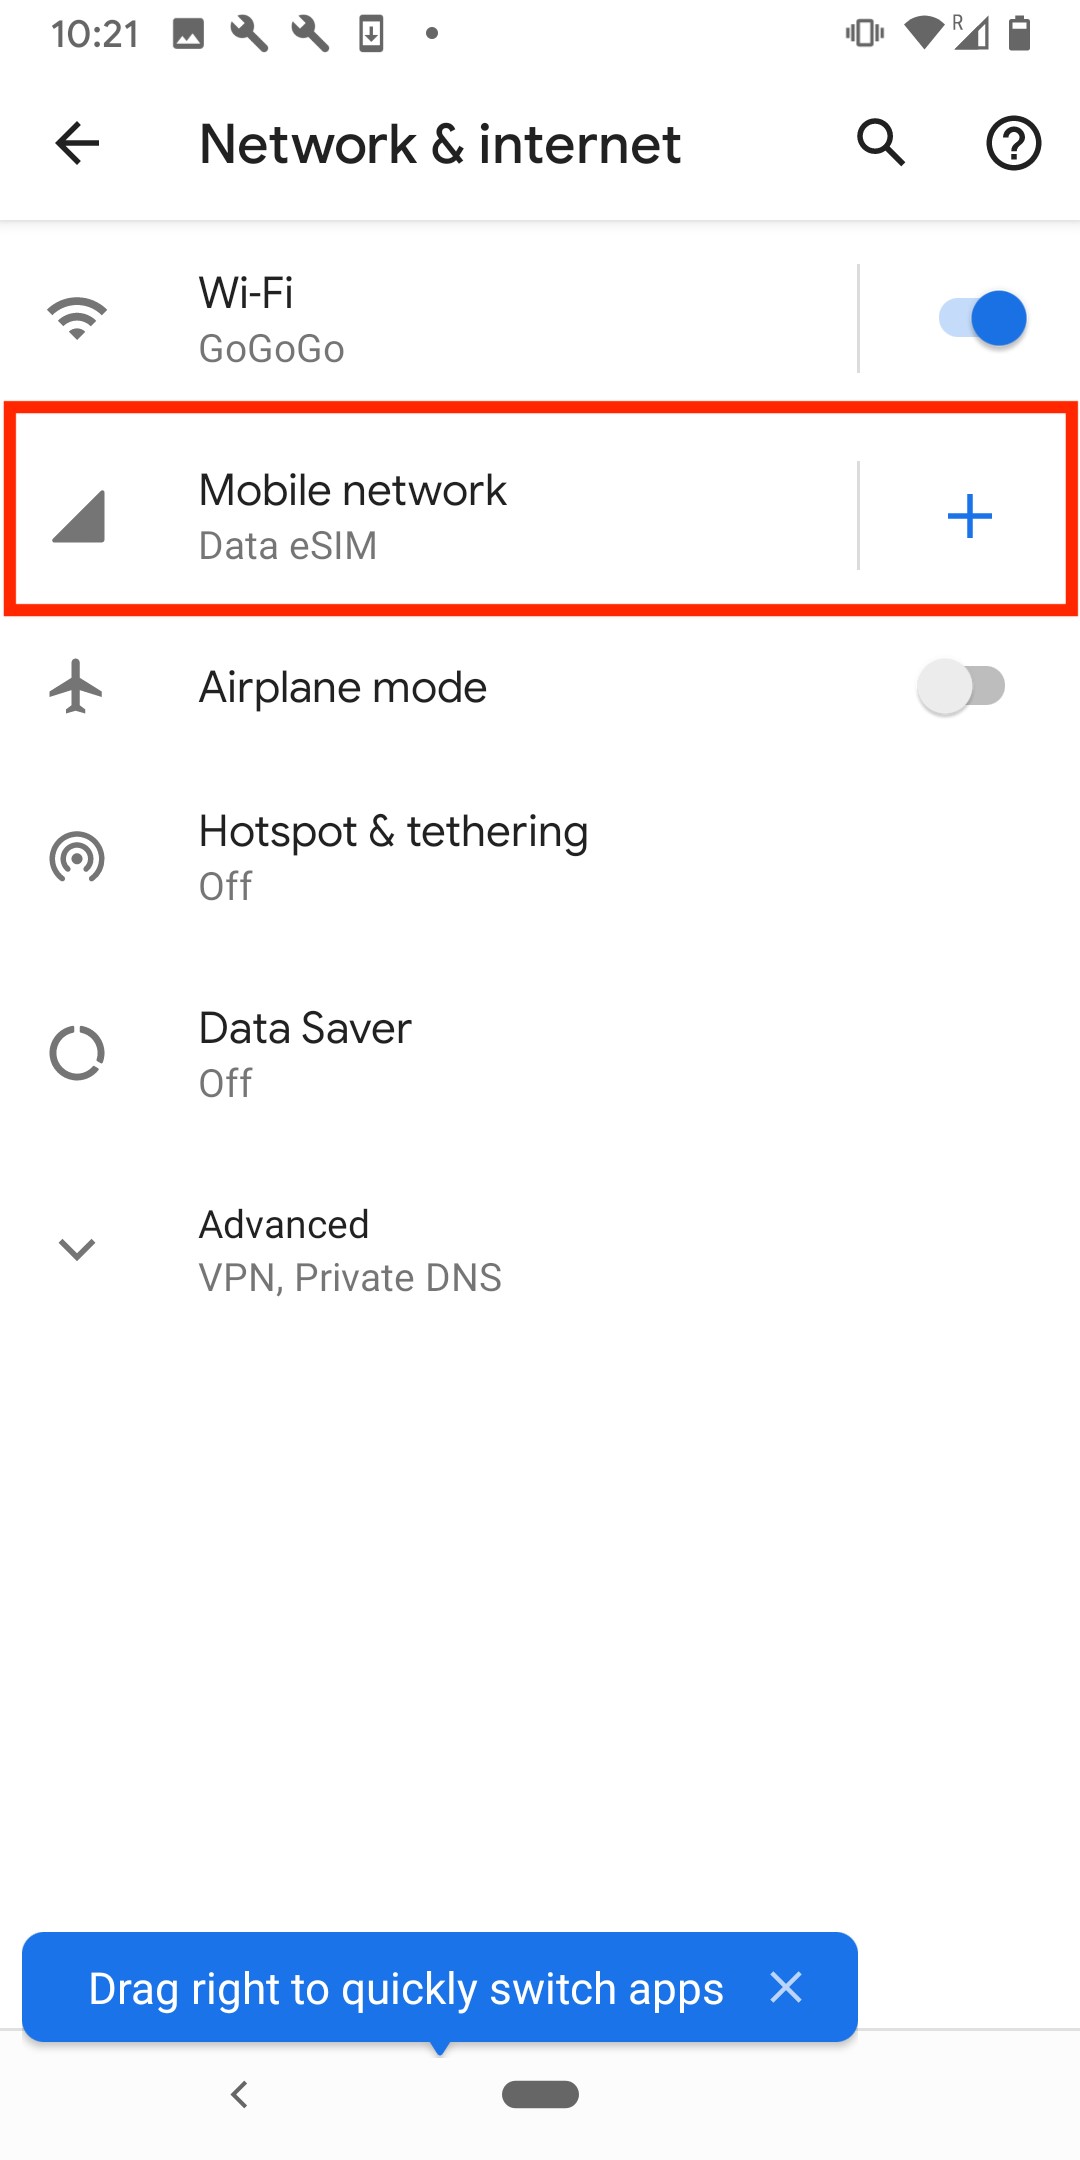
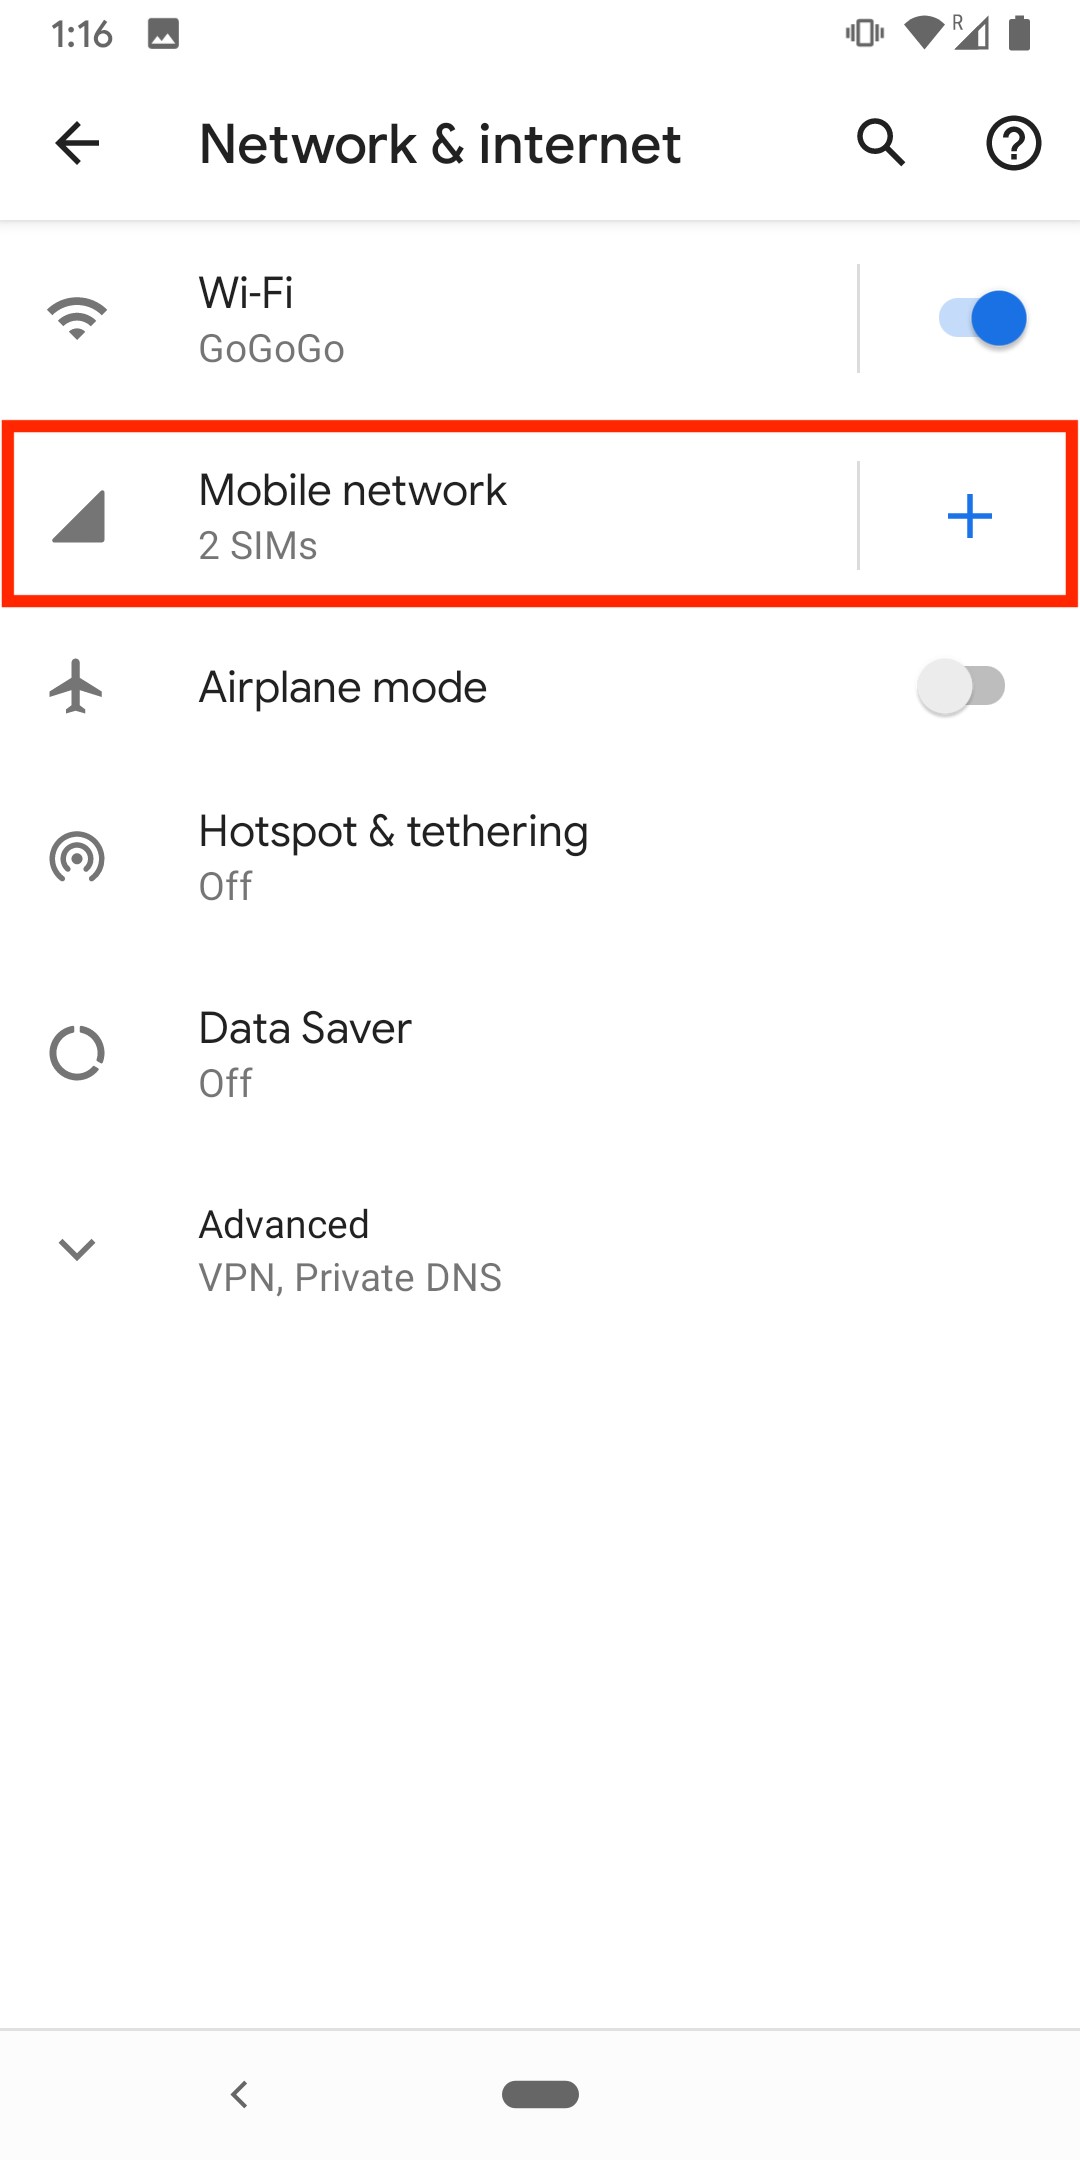
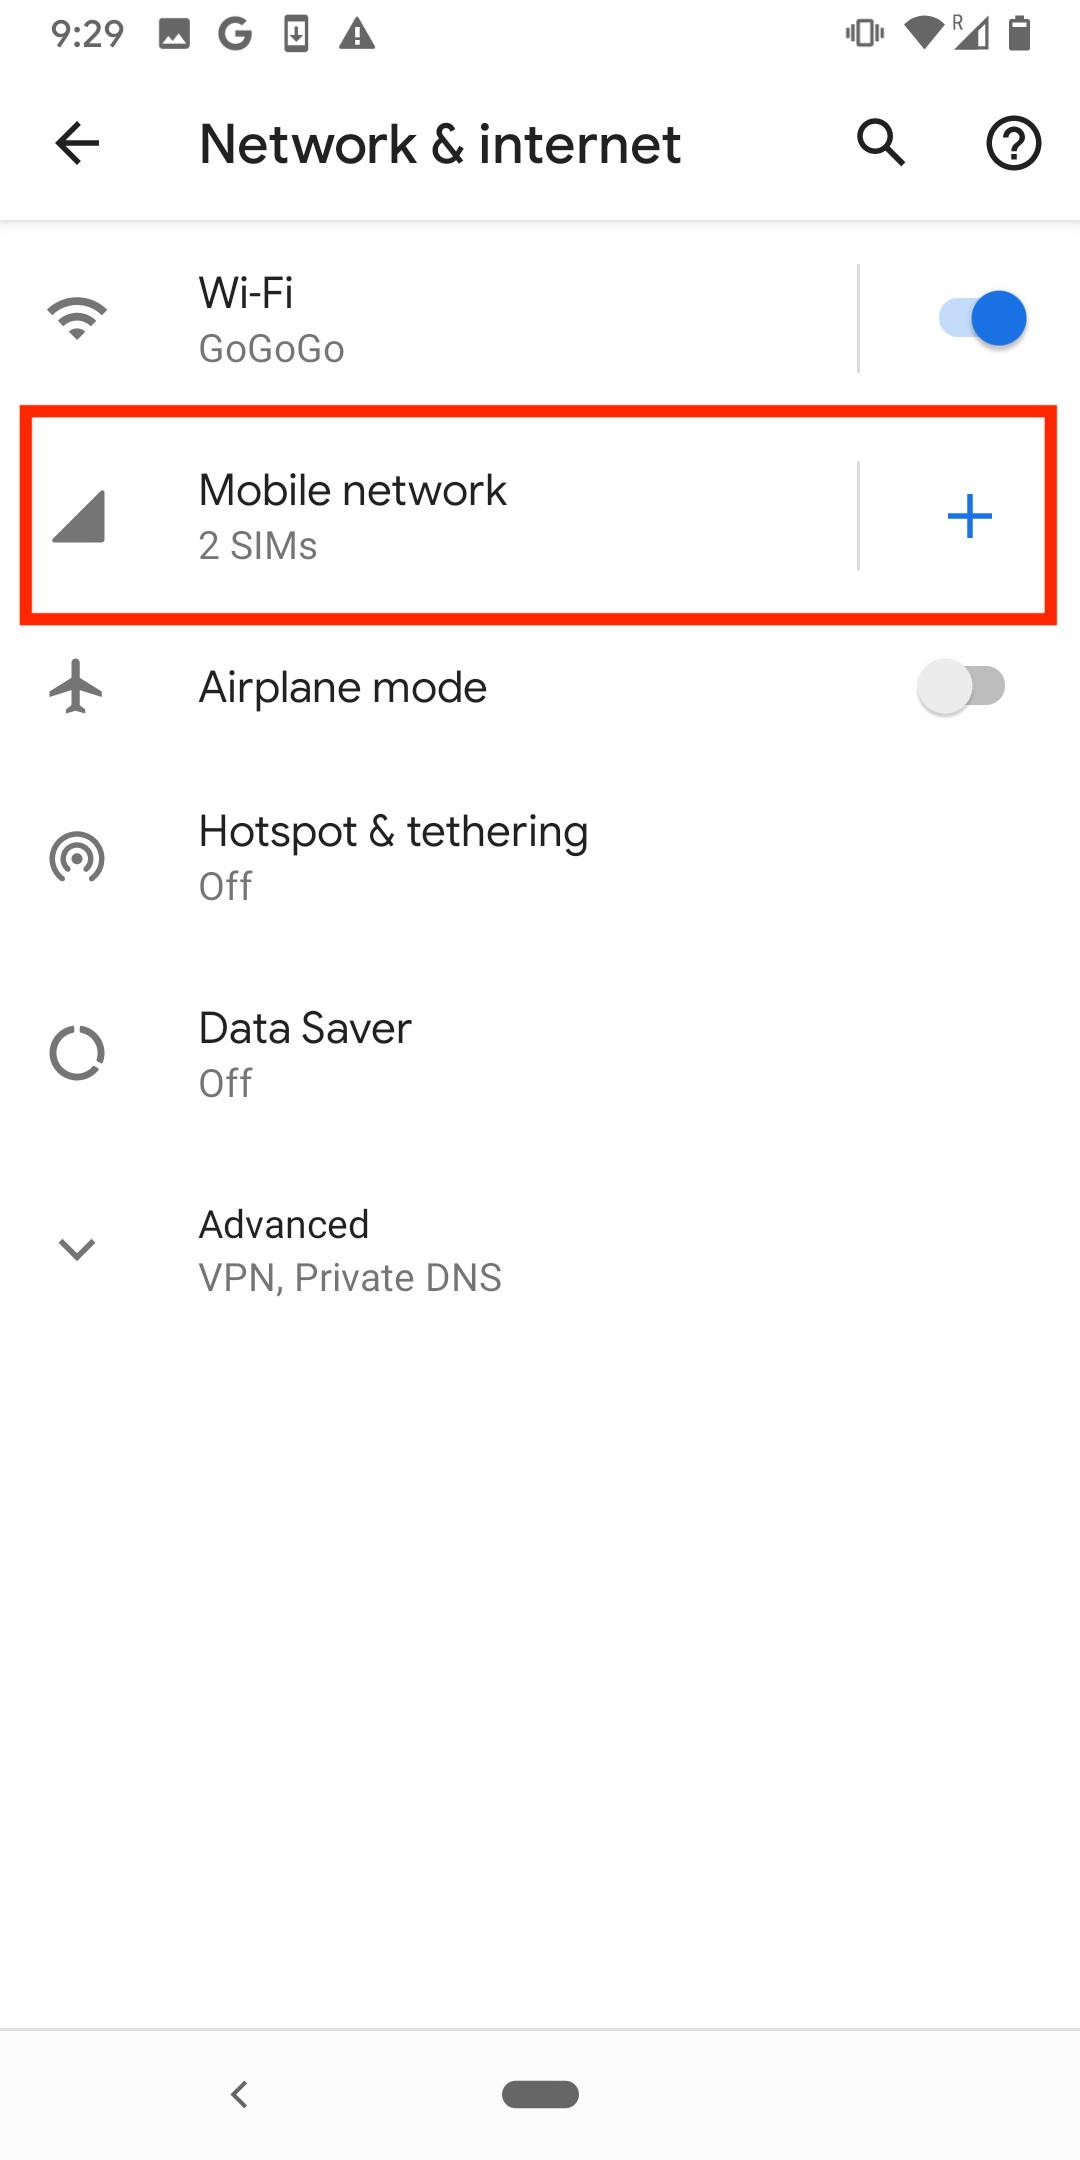
2. Click on "Network and Internet".
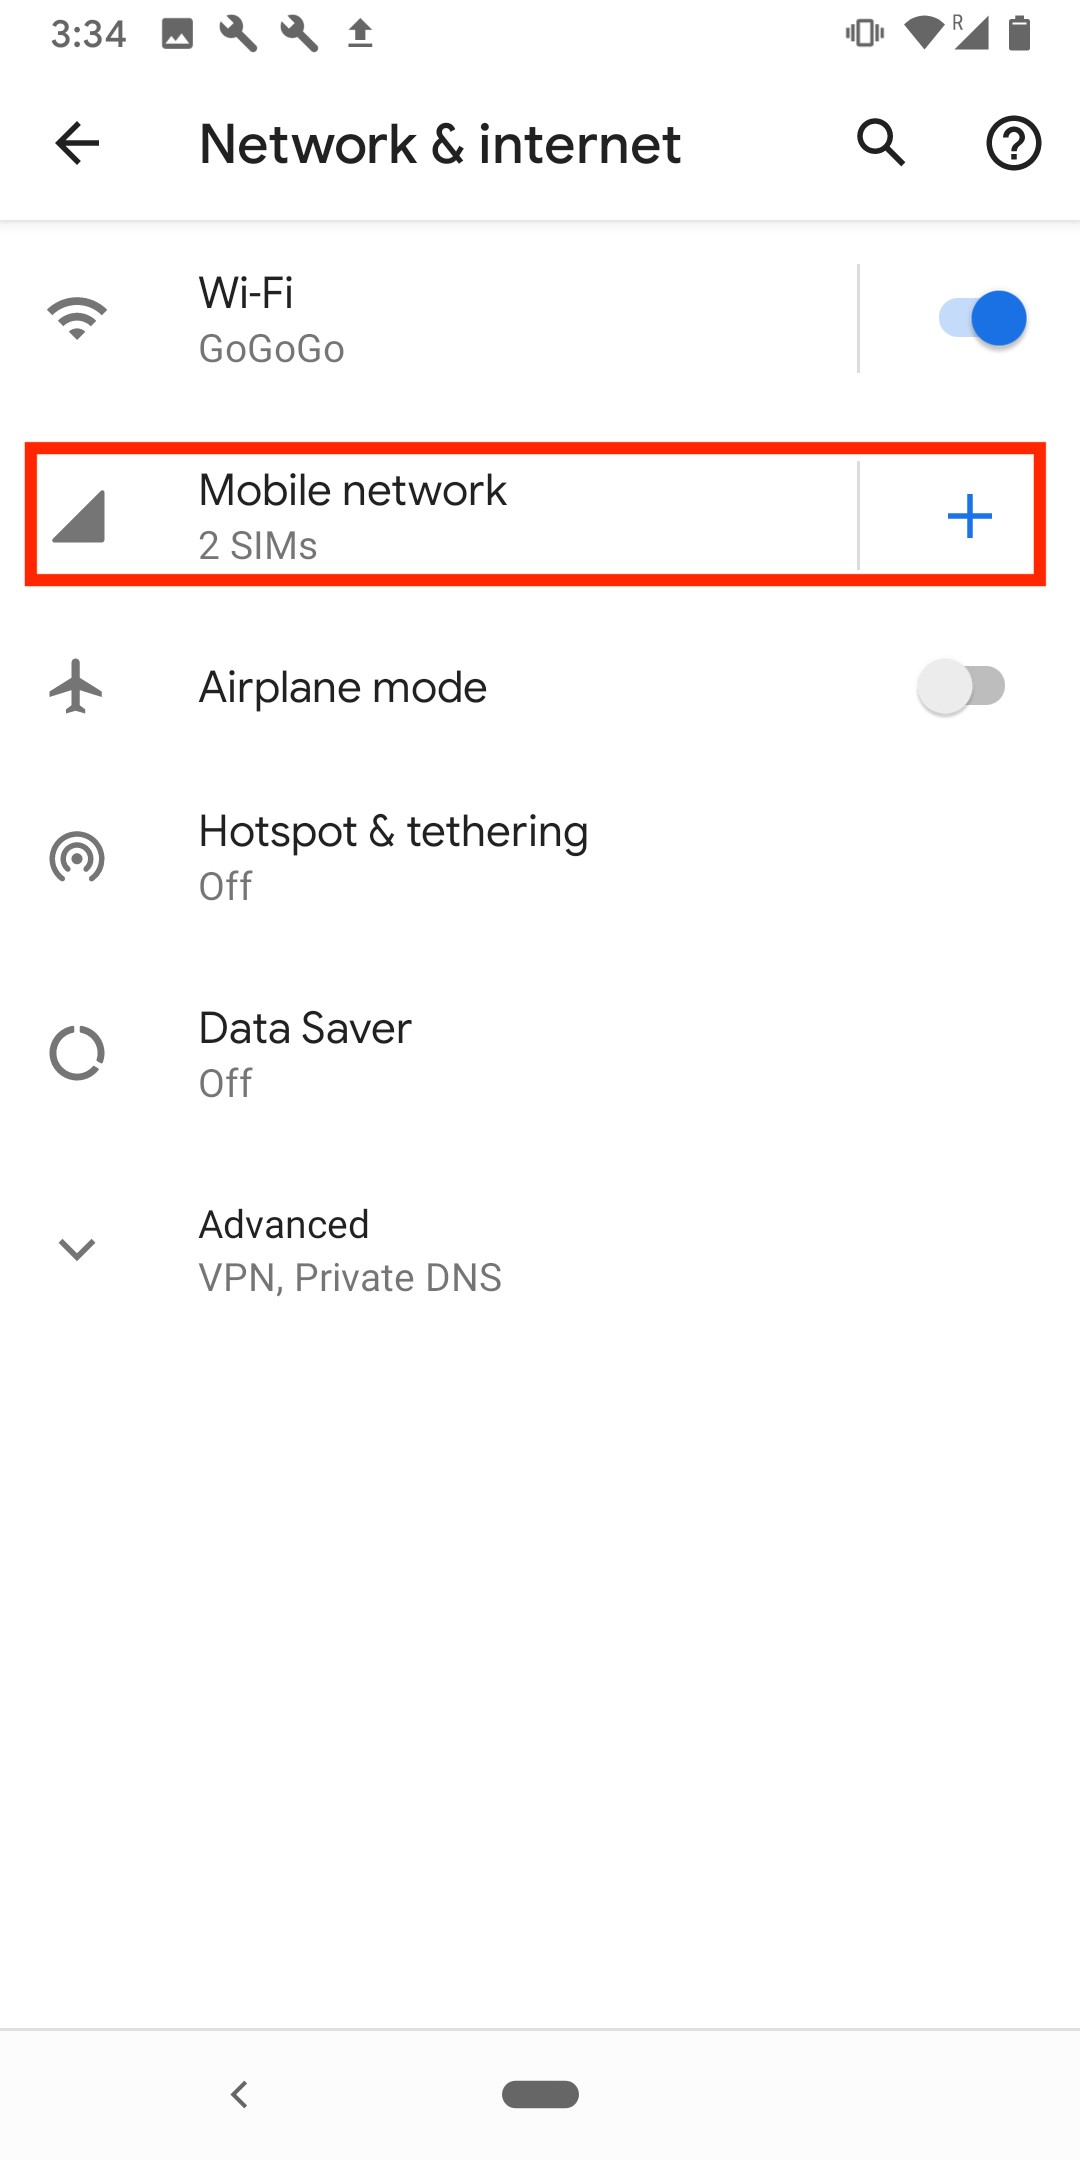
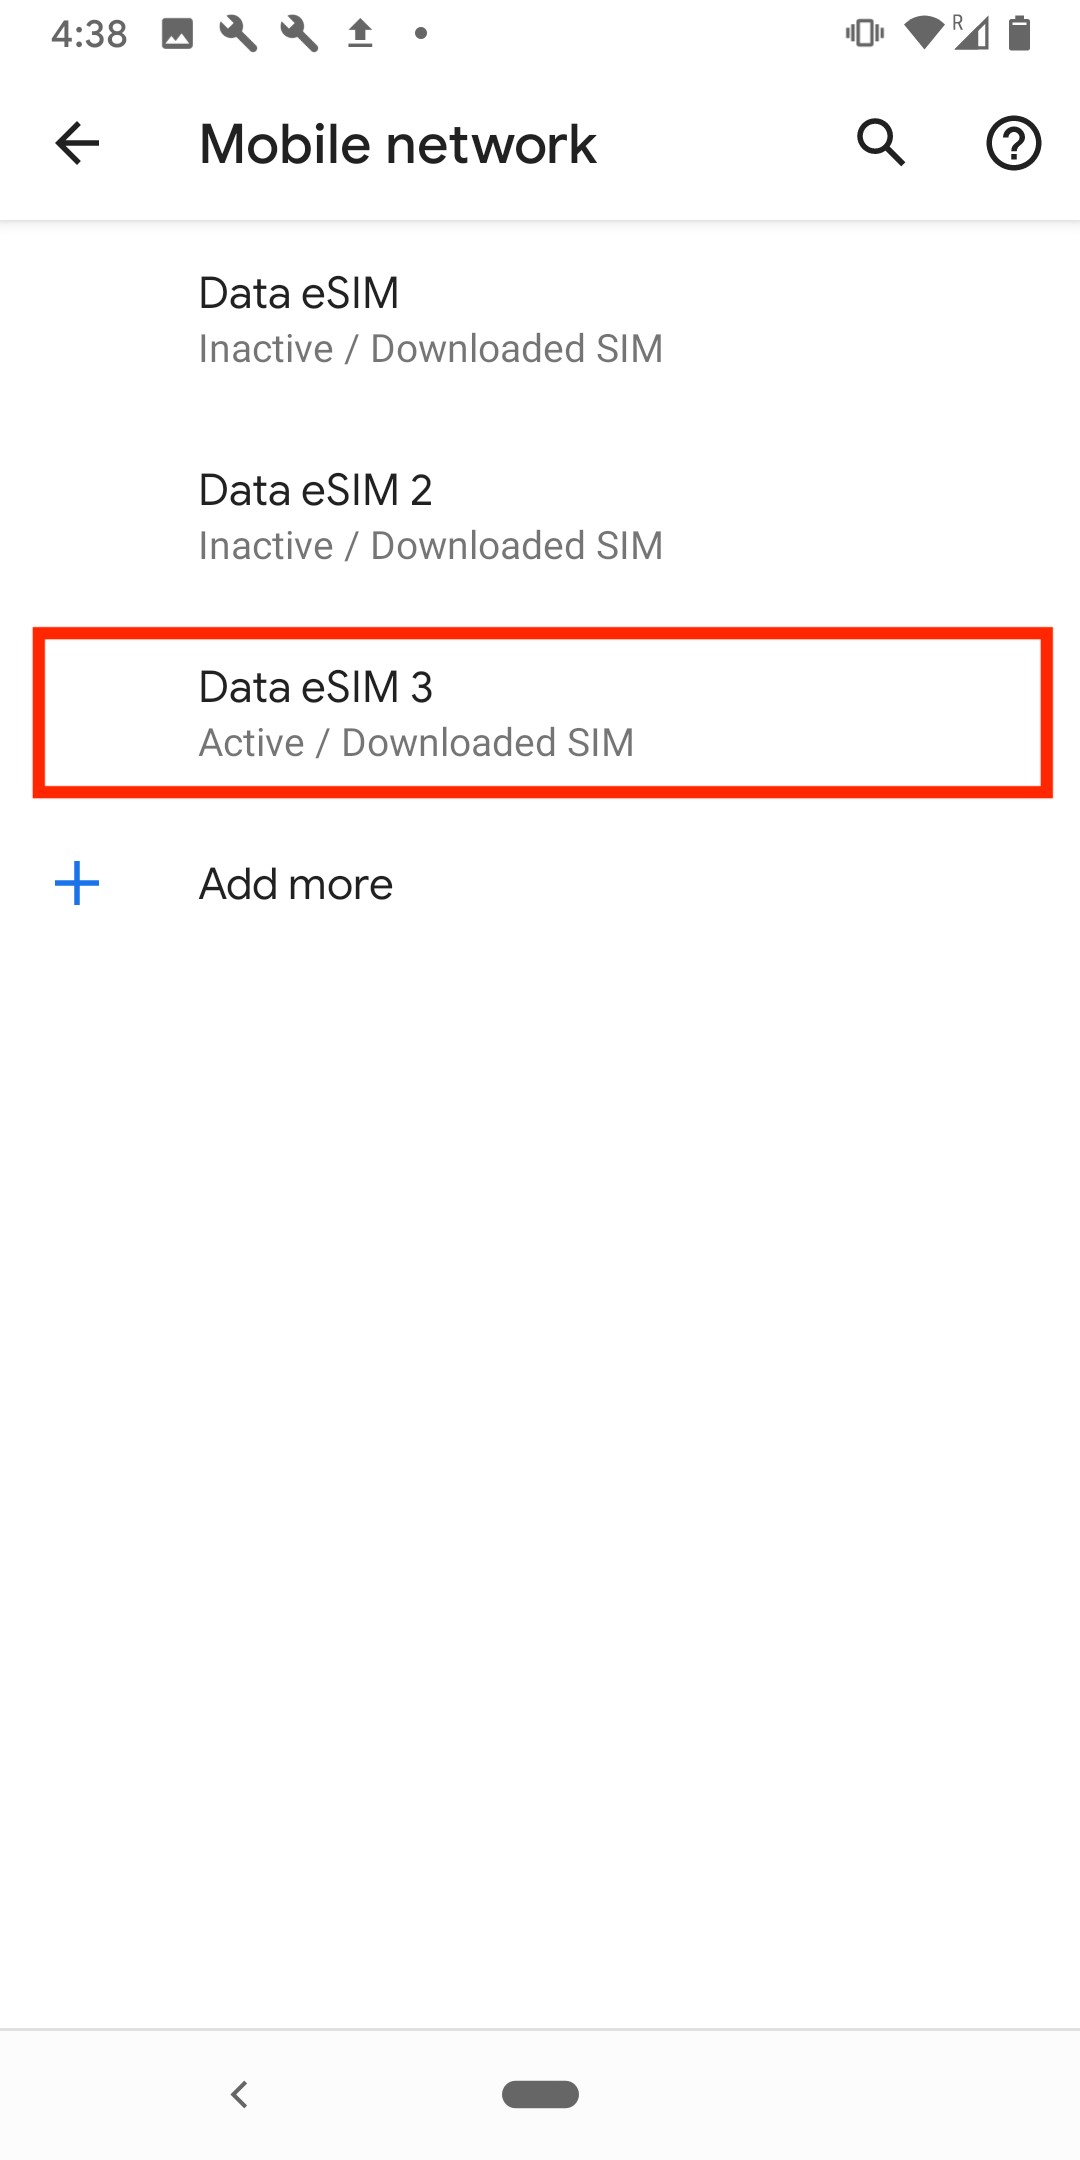
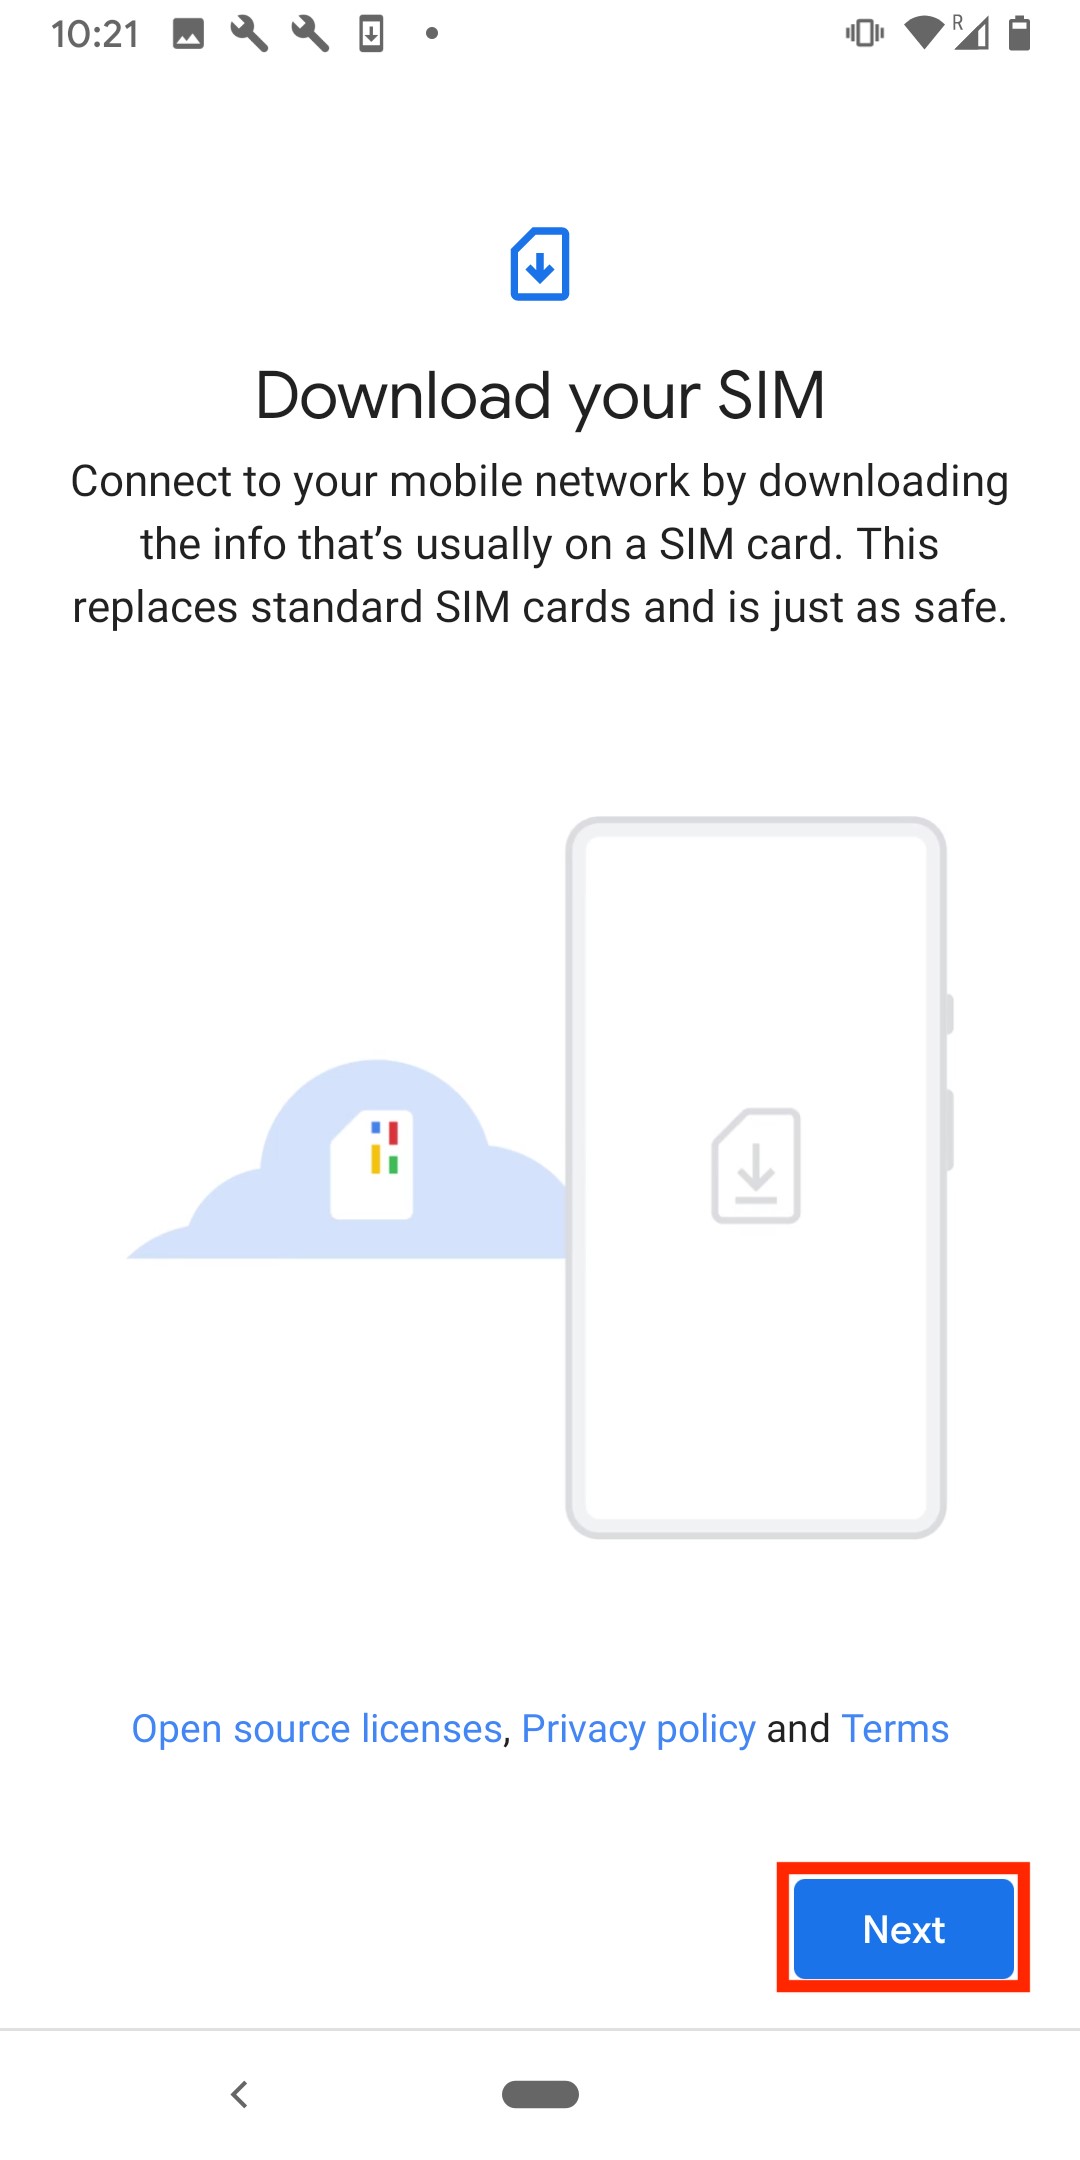
3. Click the "+" next to "Mobile network".

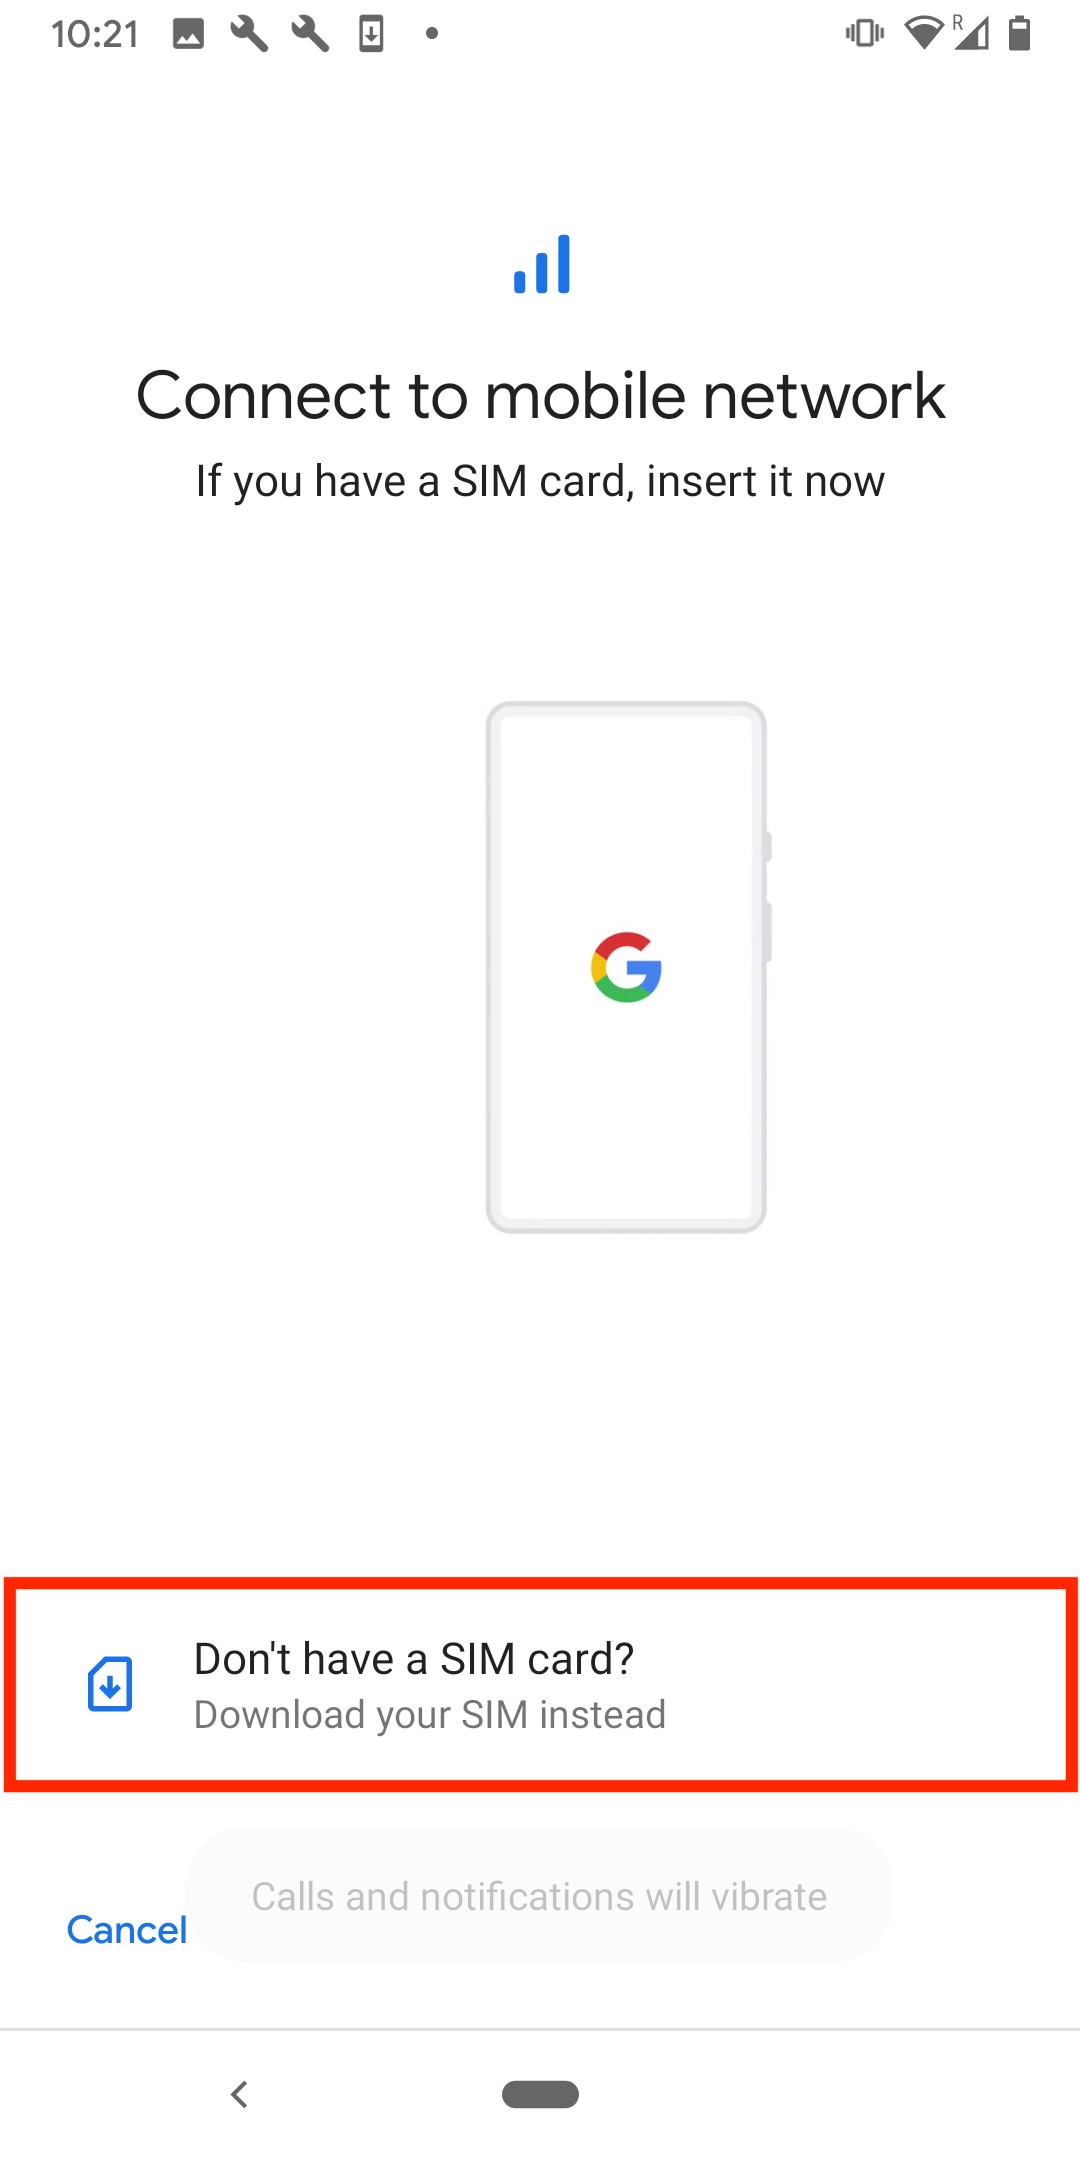
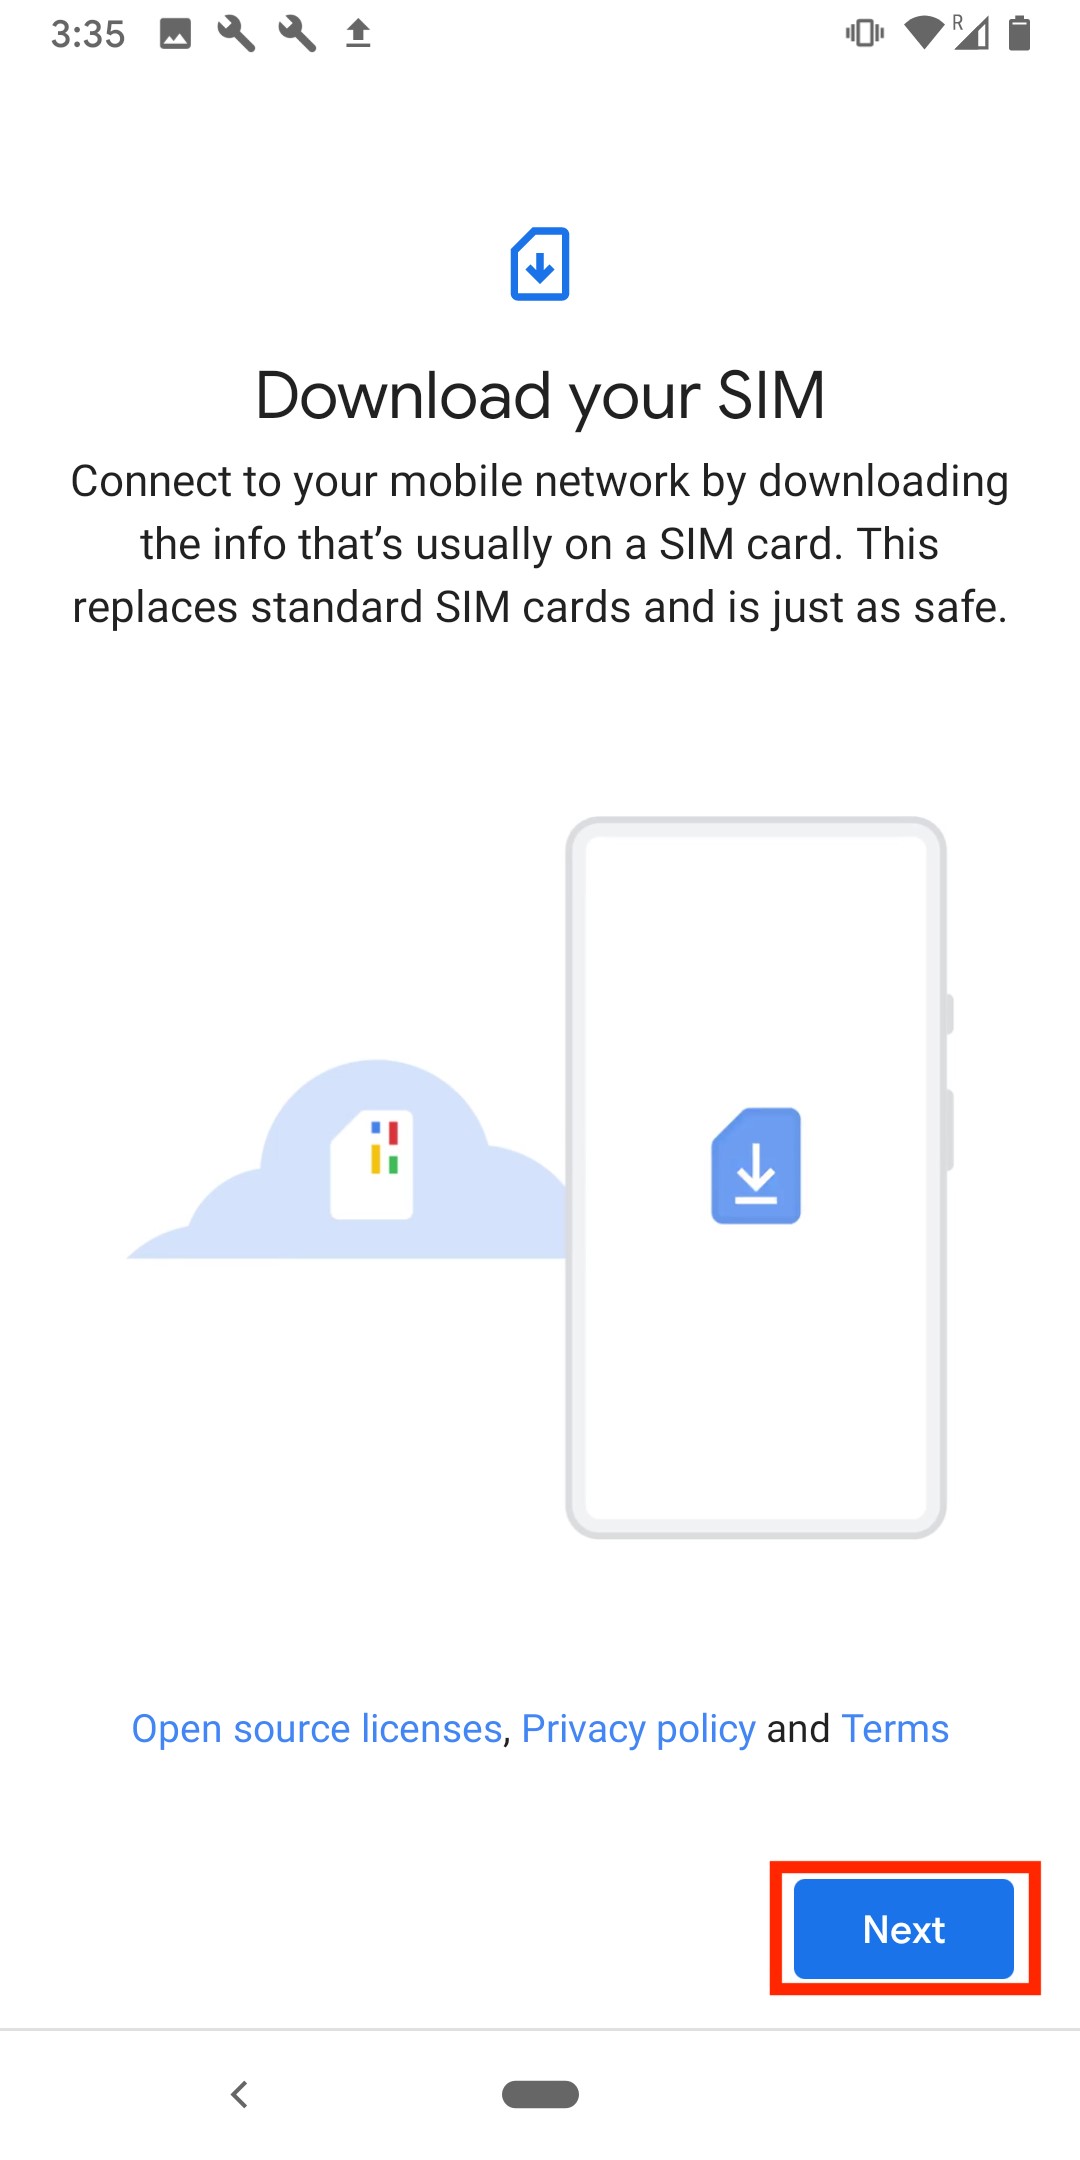
4. On this screen, tap "Don't have a SIM card?" > Click "Next".

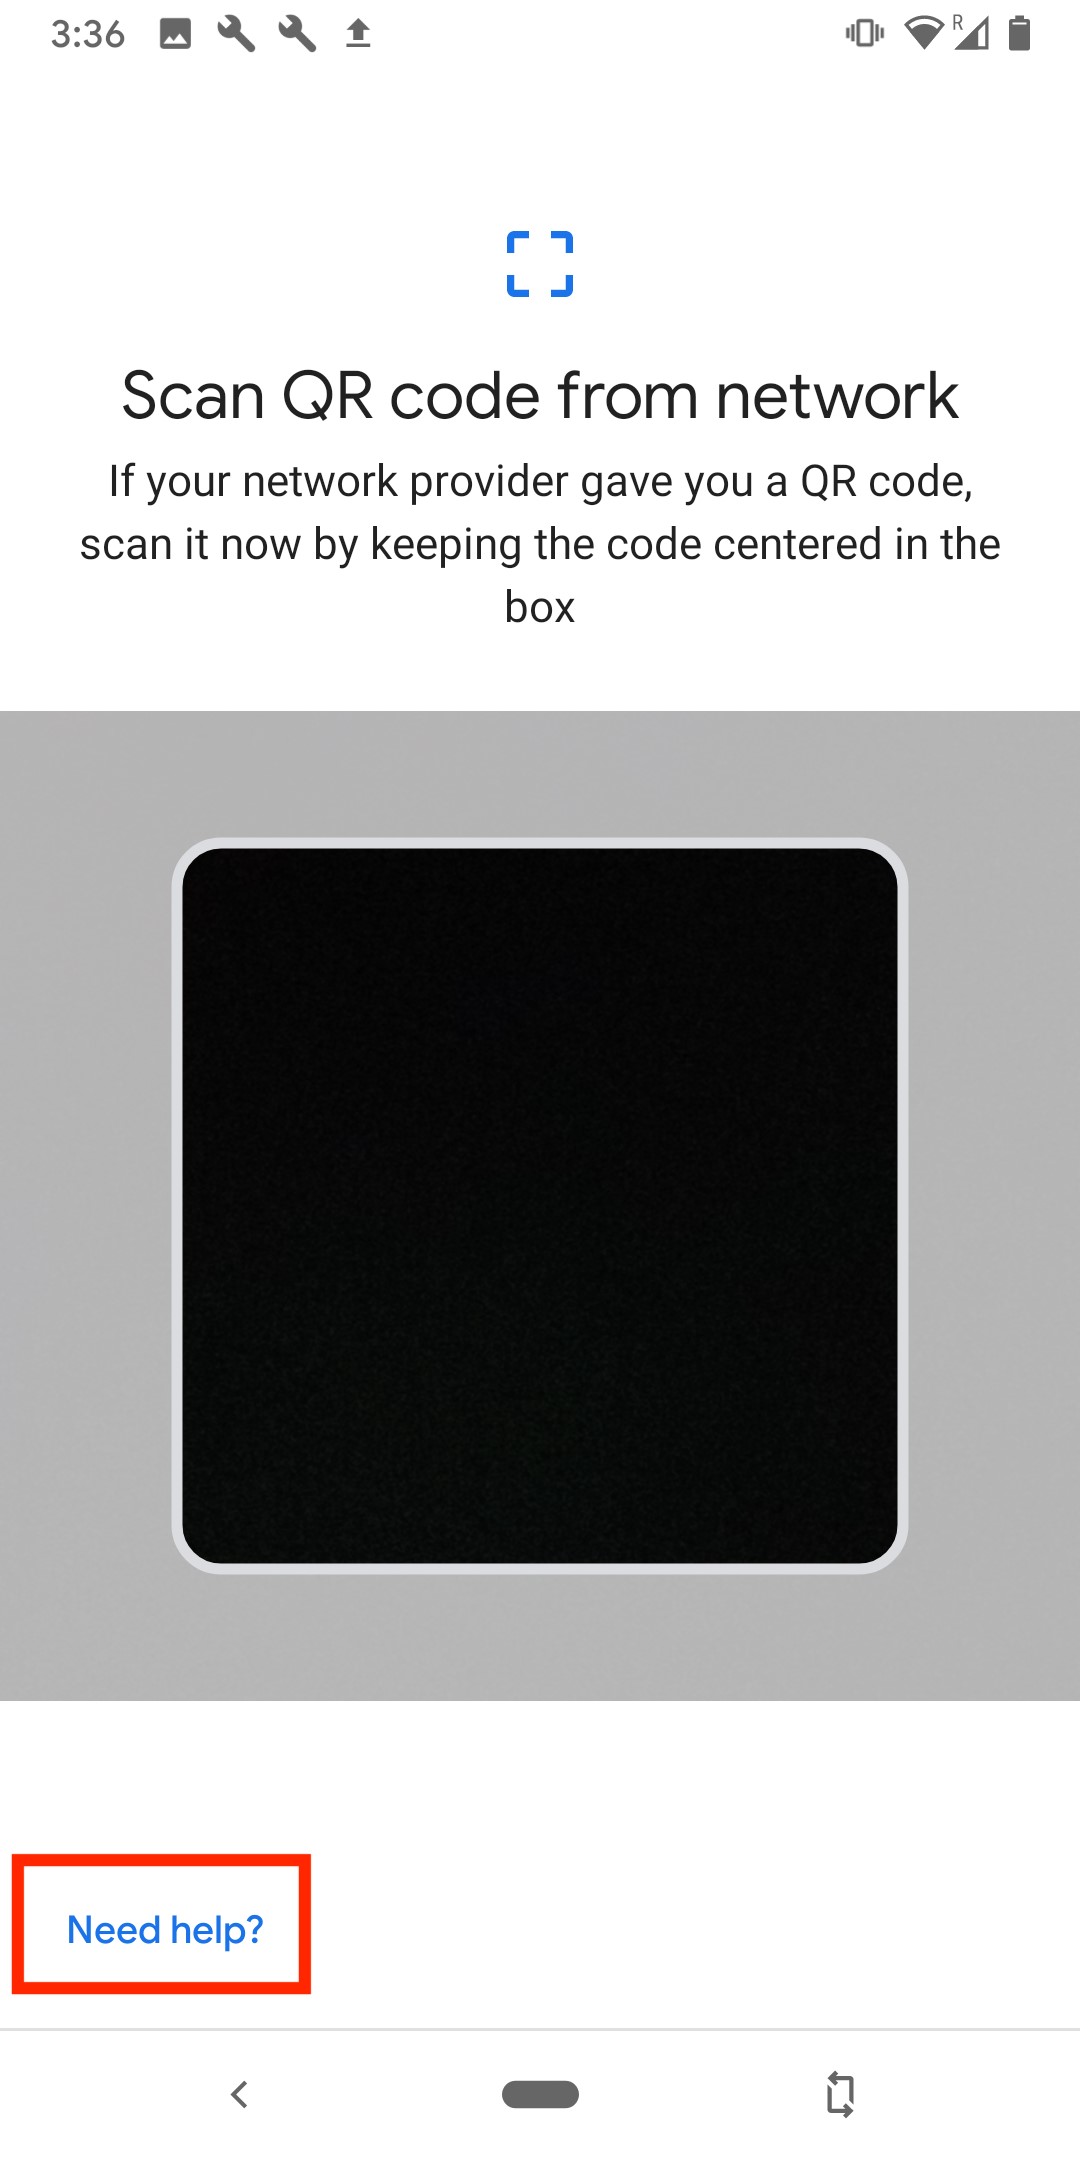
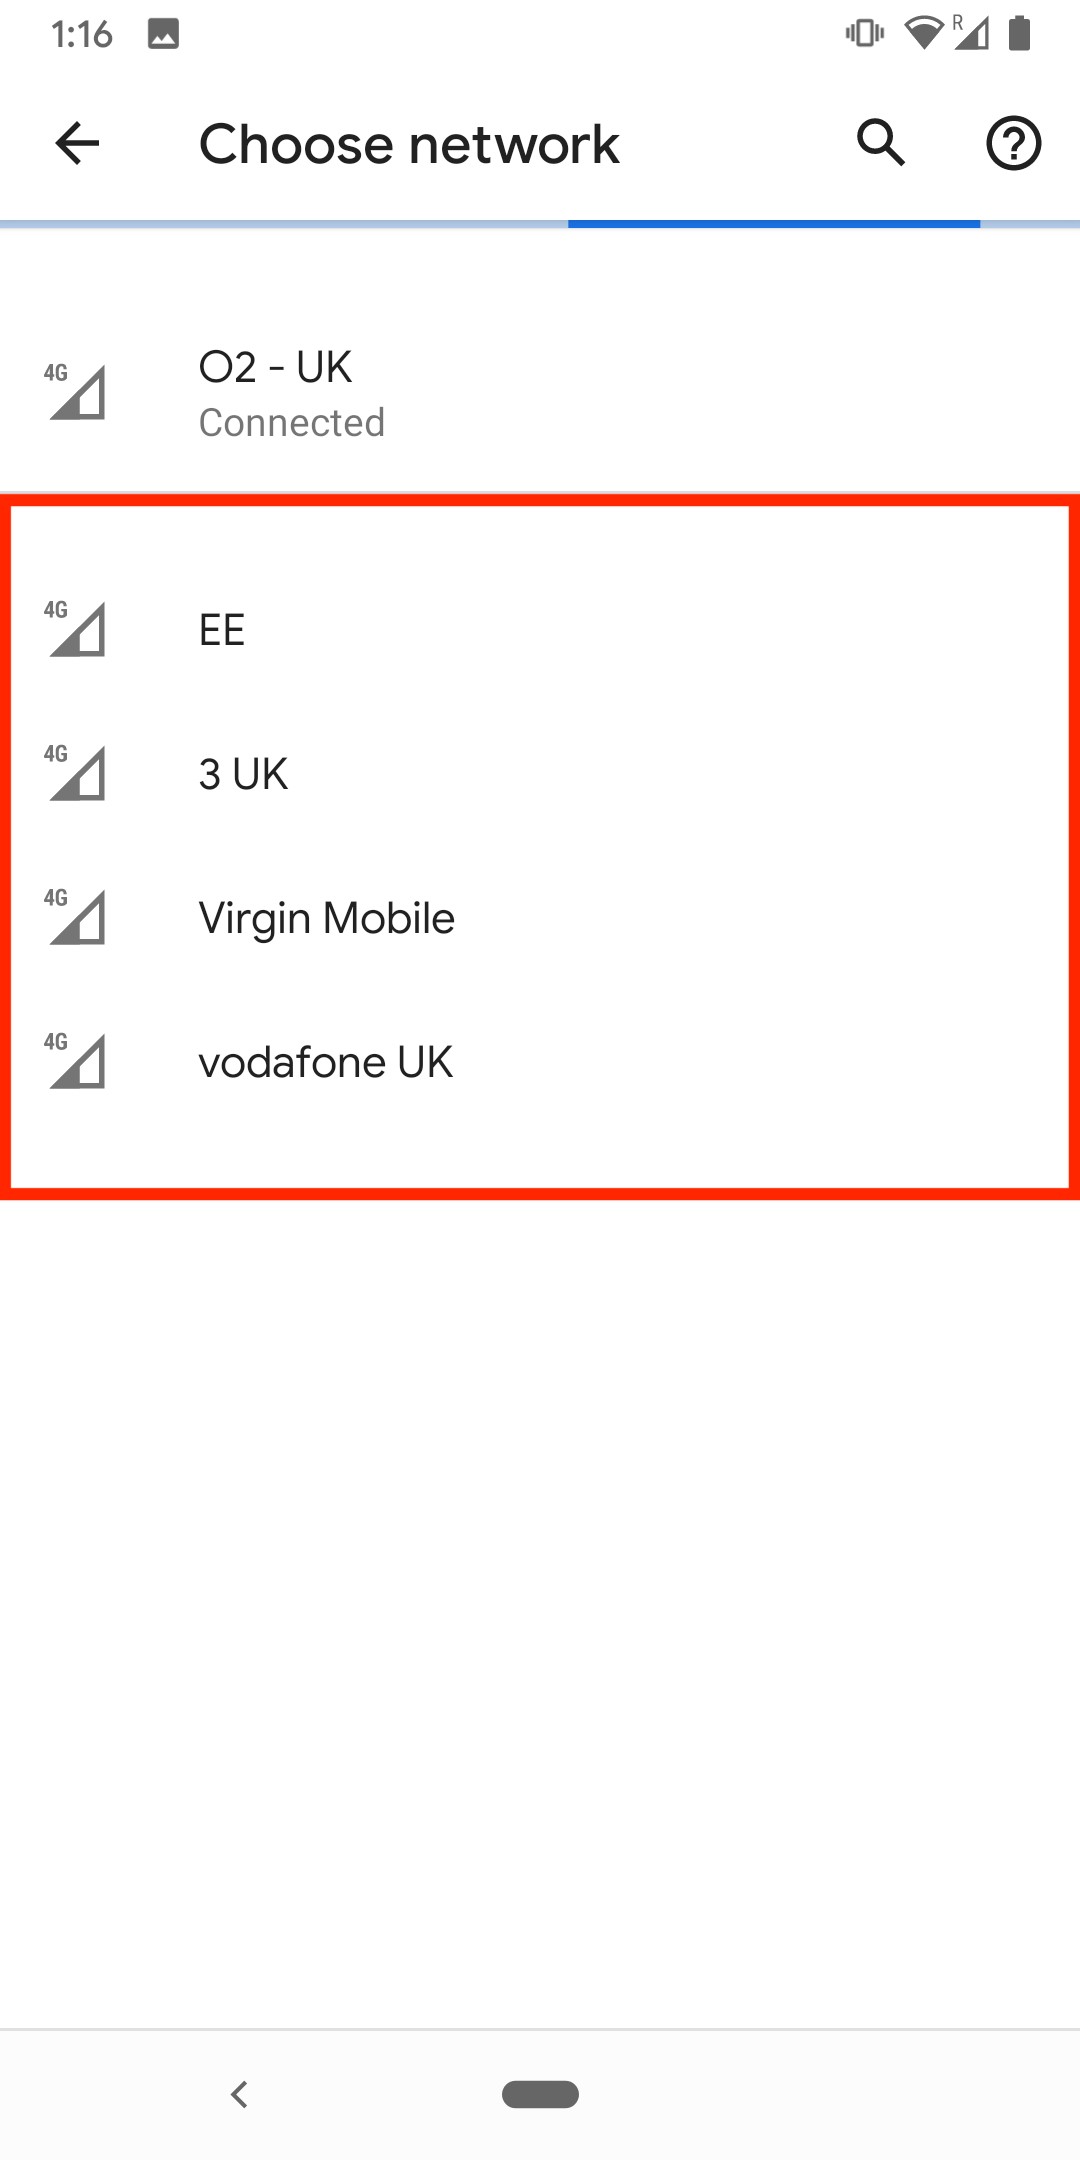
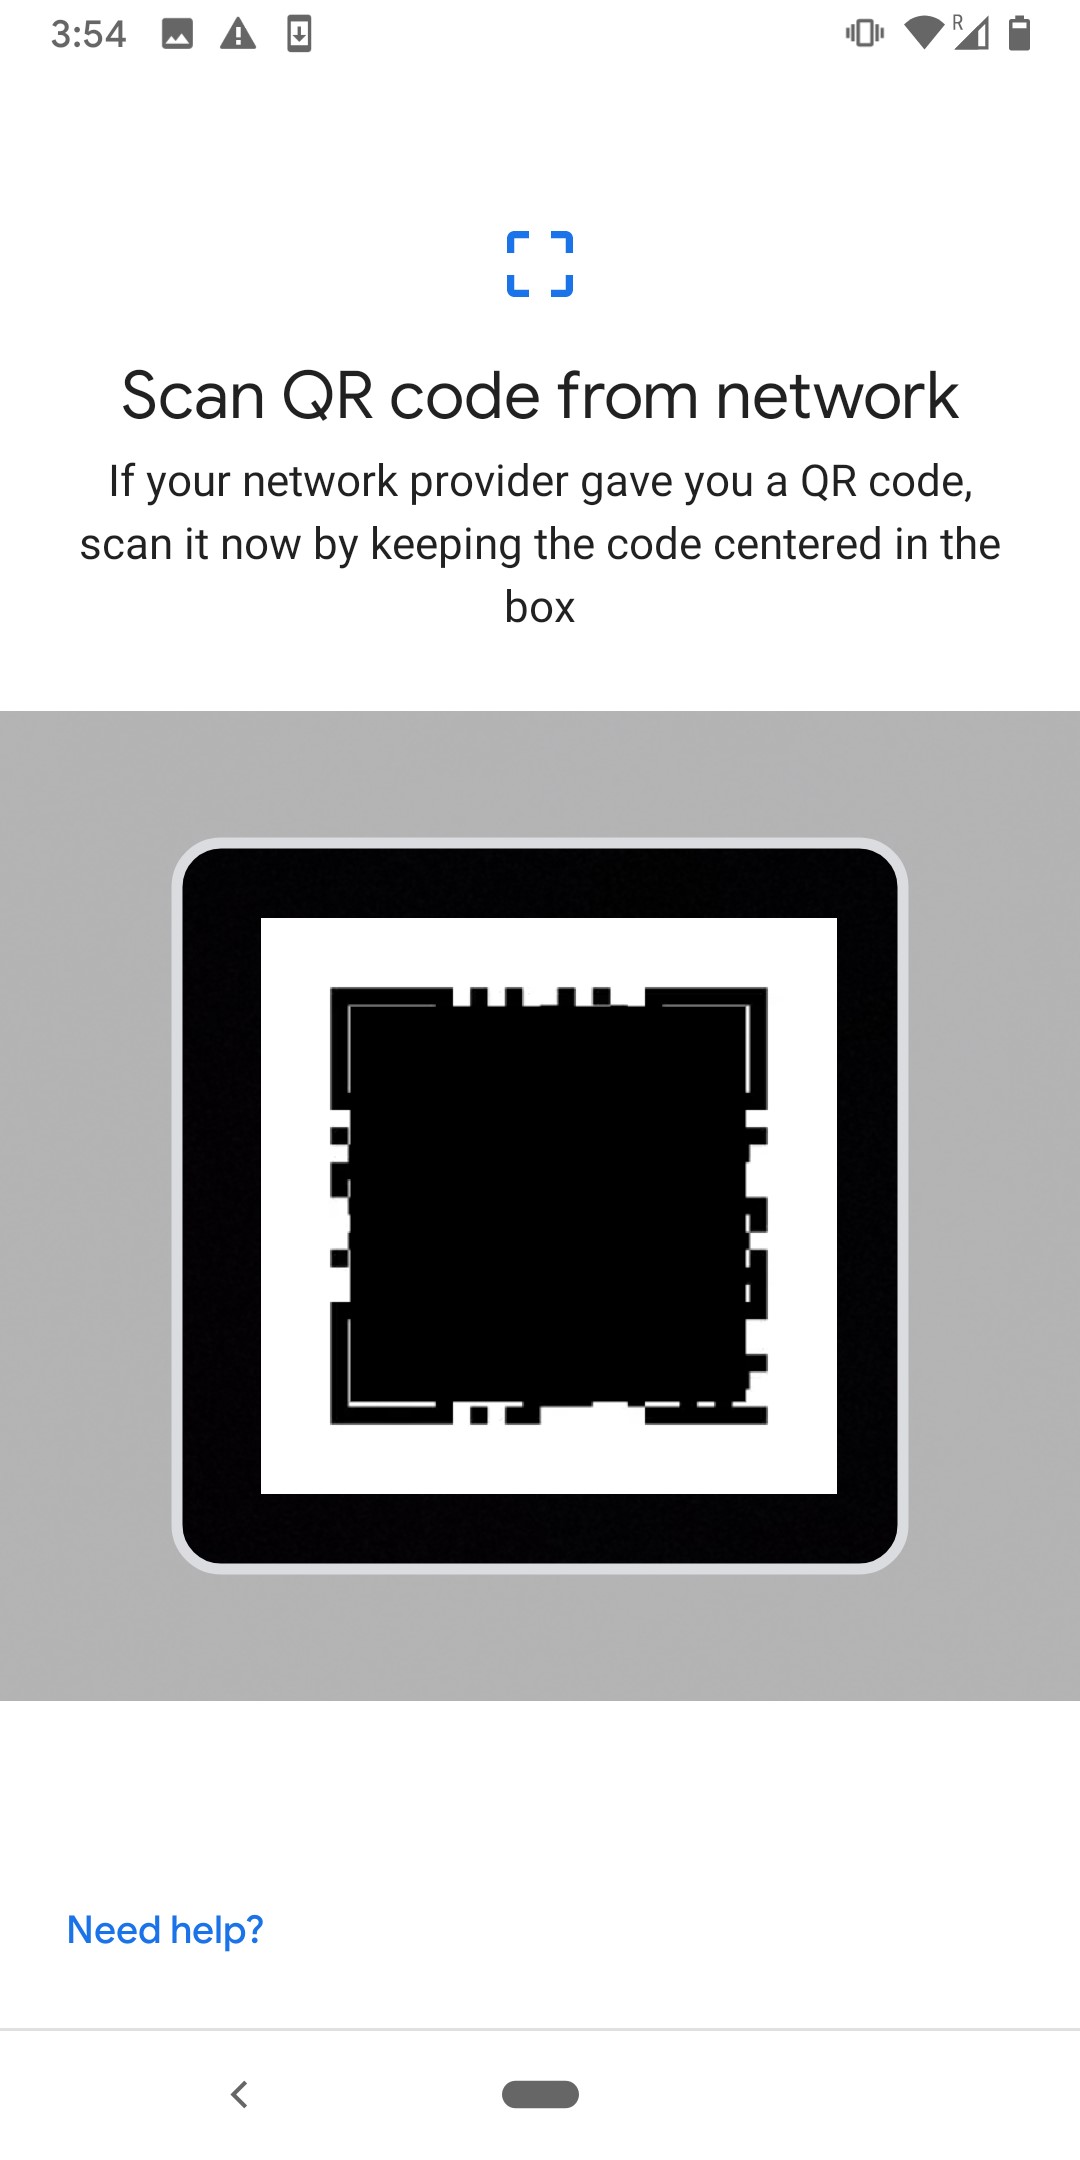
5. Scan the "QR Code" you can view in your eSIM Bundles account.
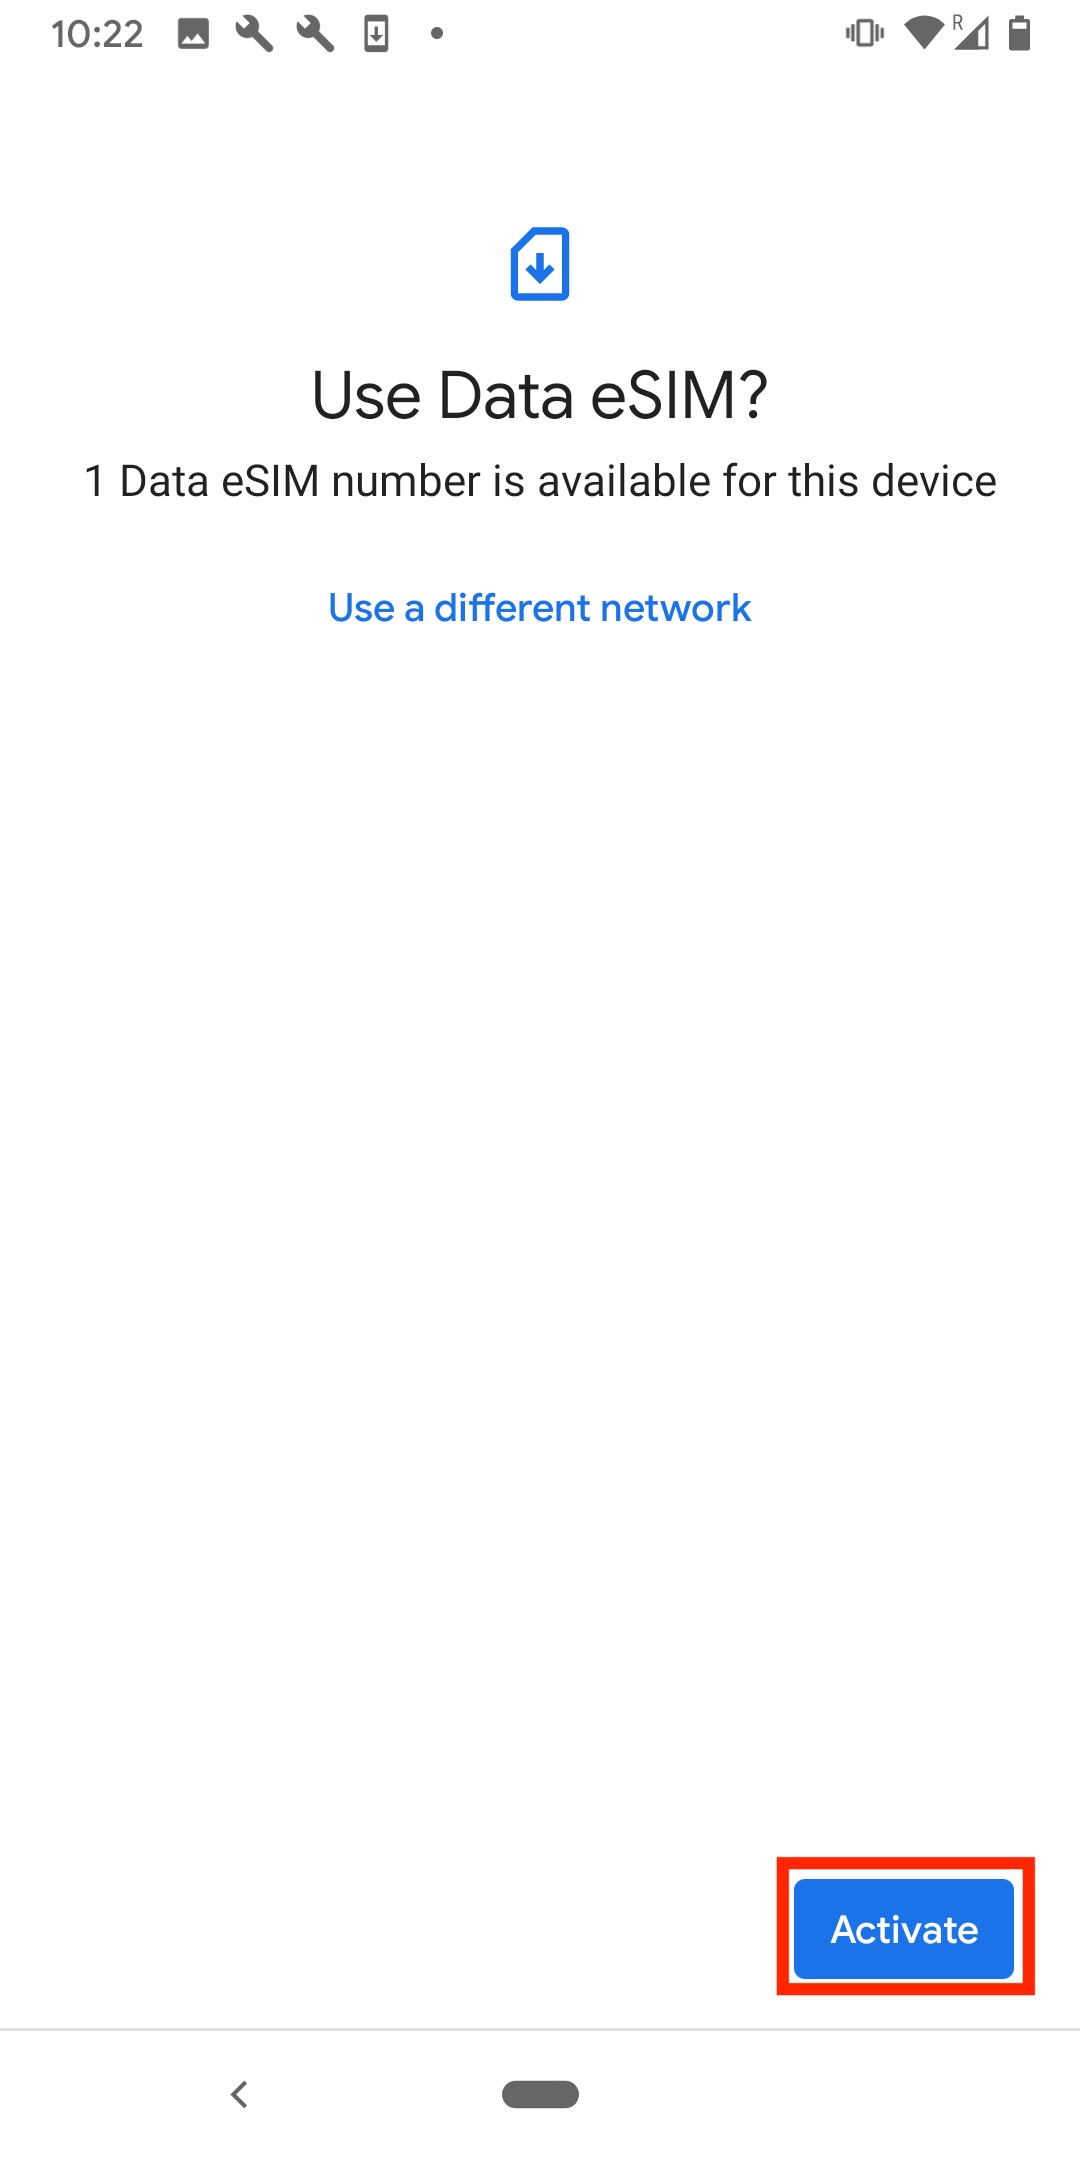
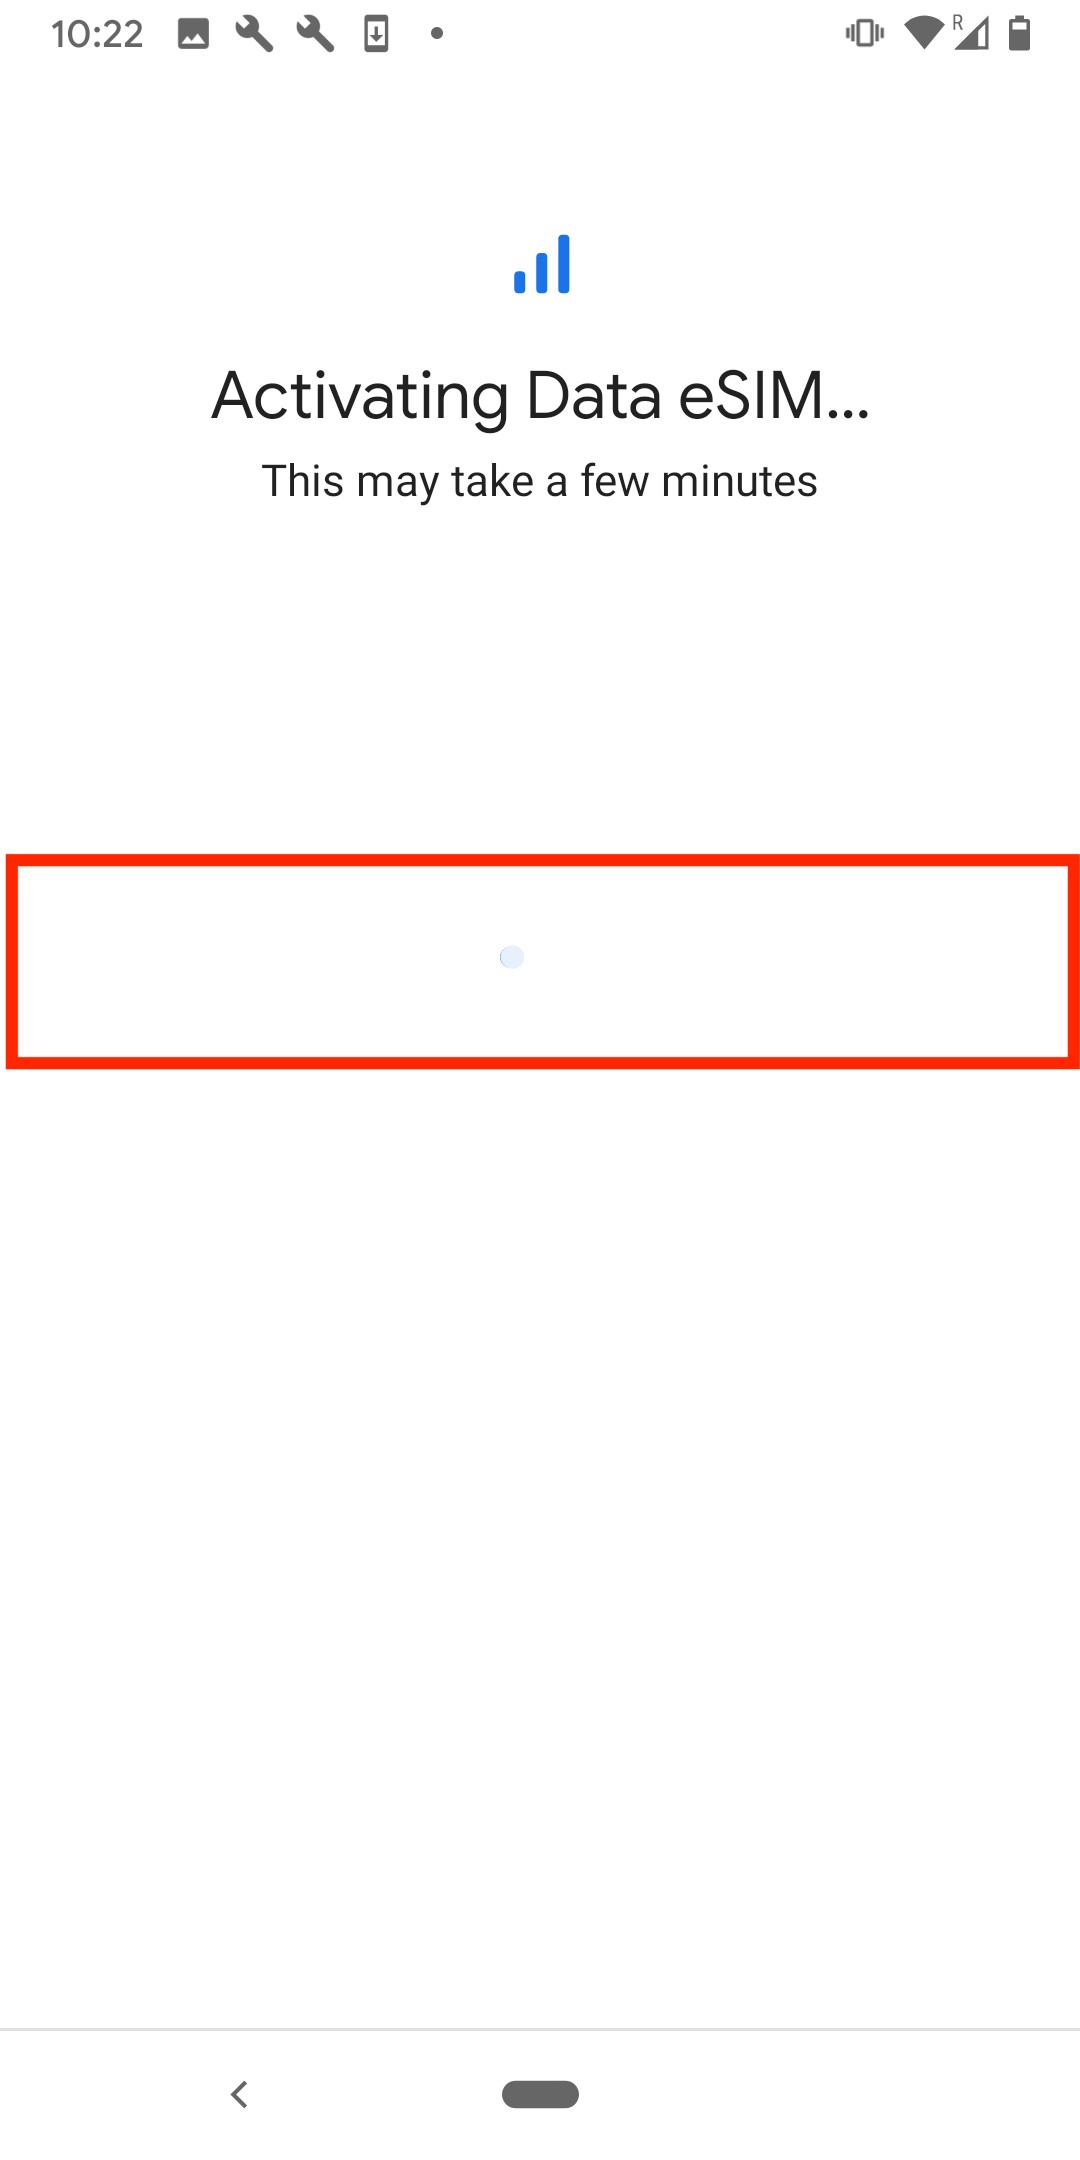
6. On the "Data eSIM" screen, click "Activate" > Wait for it to finish.
Note: Allow up to 10 minutes for this to complete, please do NOT close this, or the installation will stop.

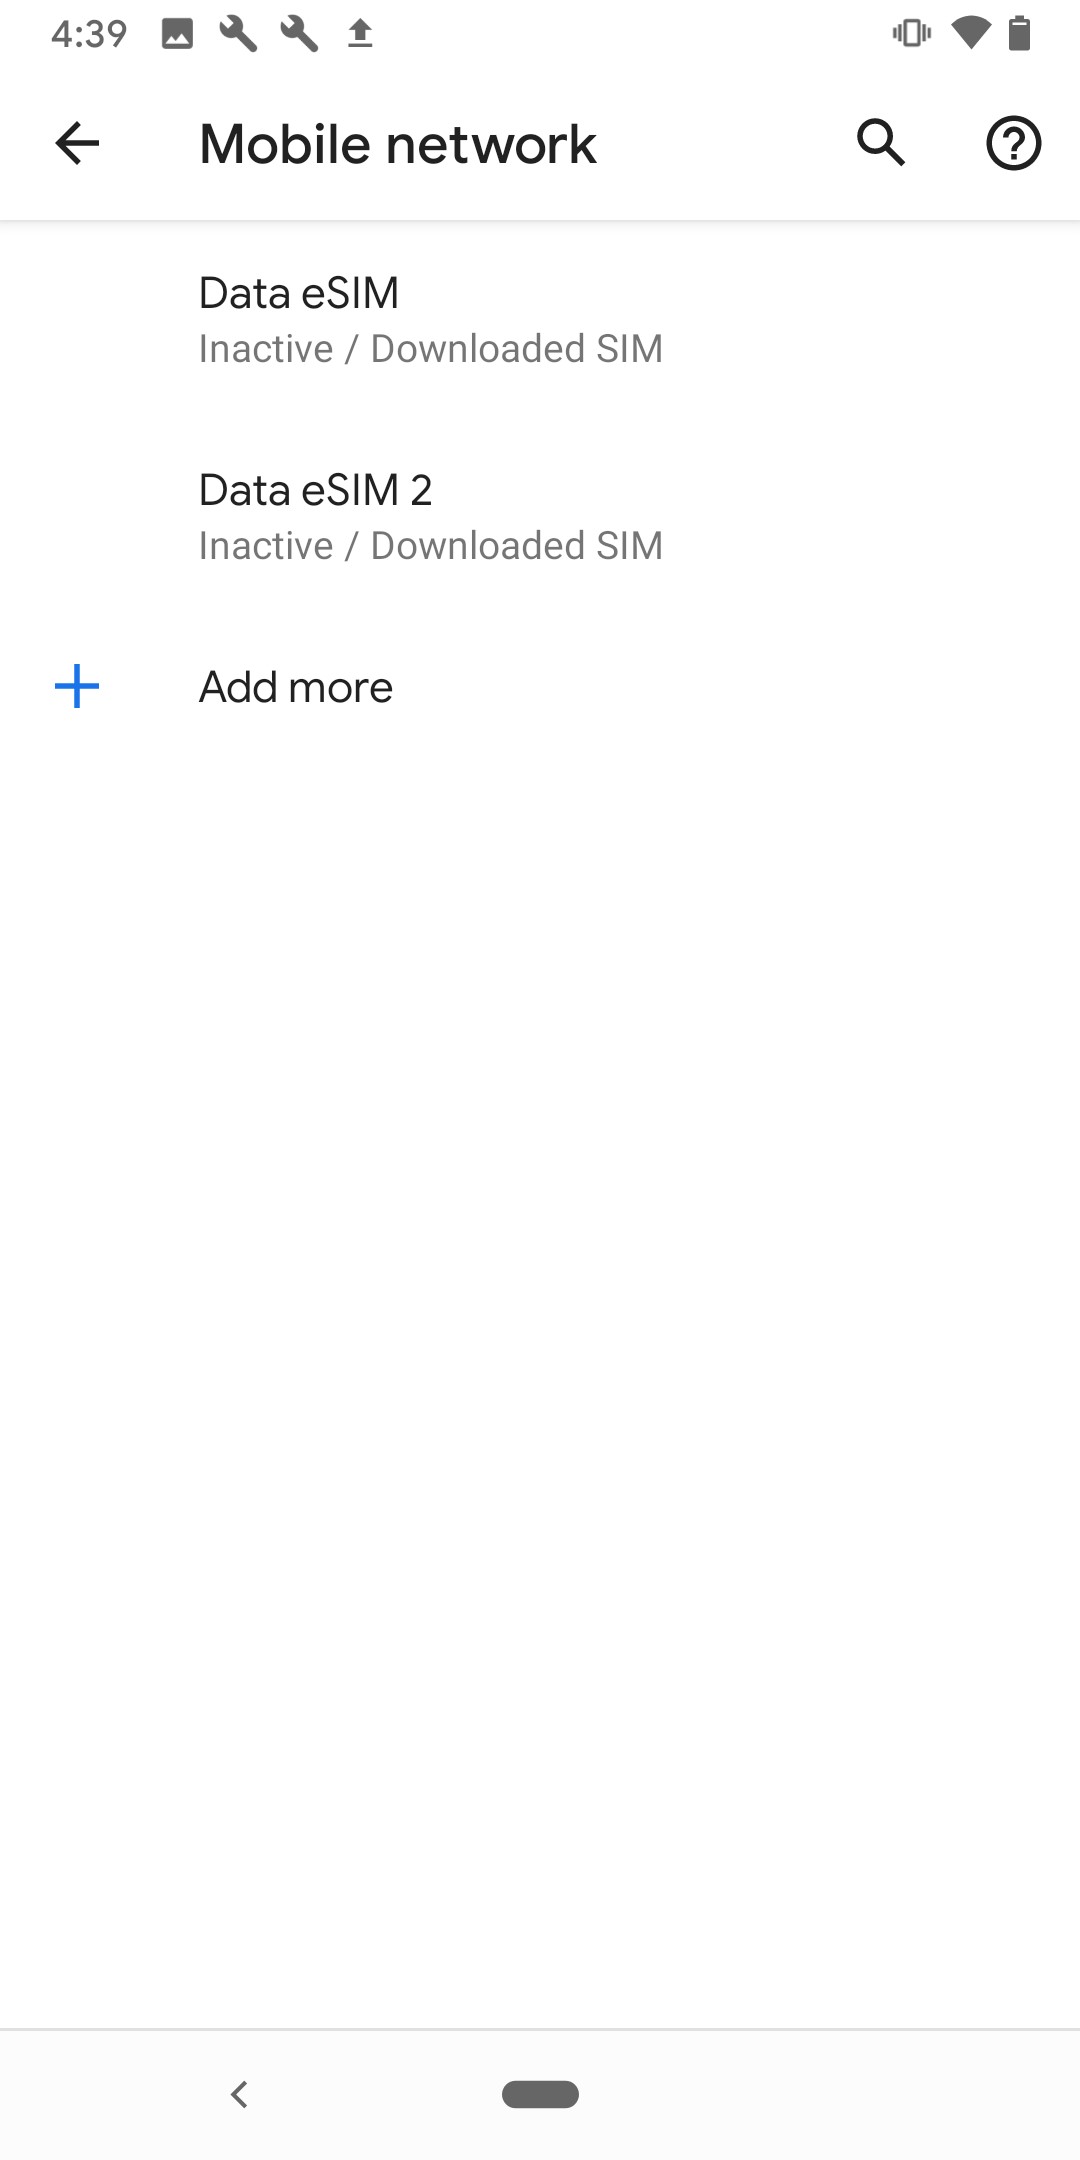
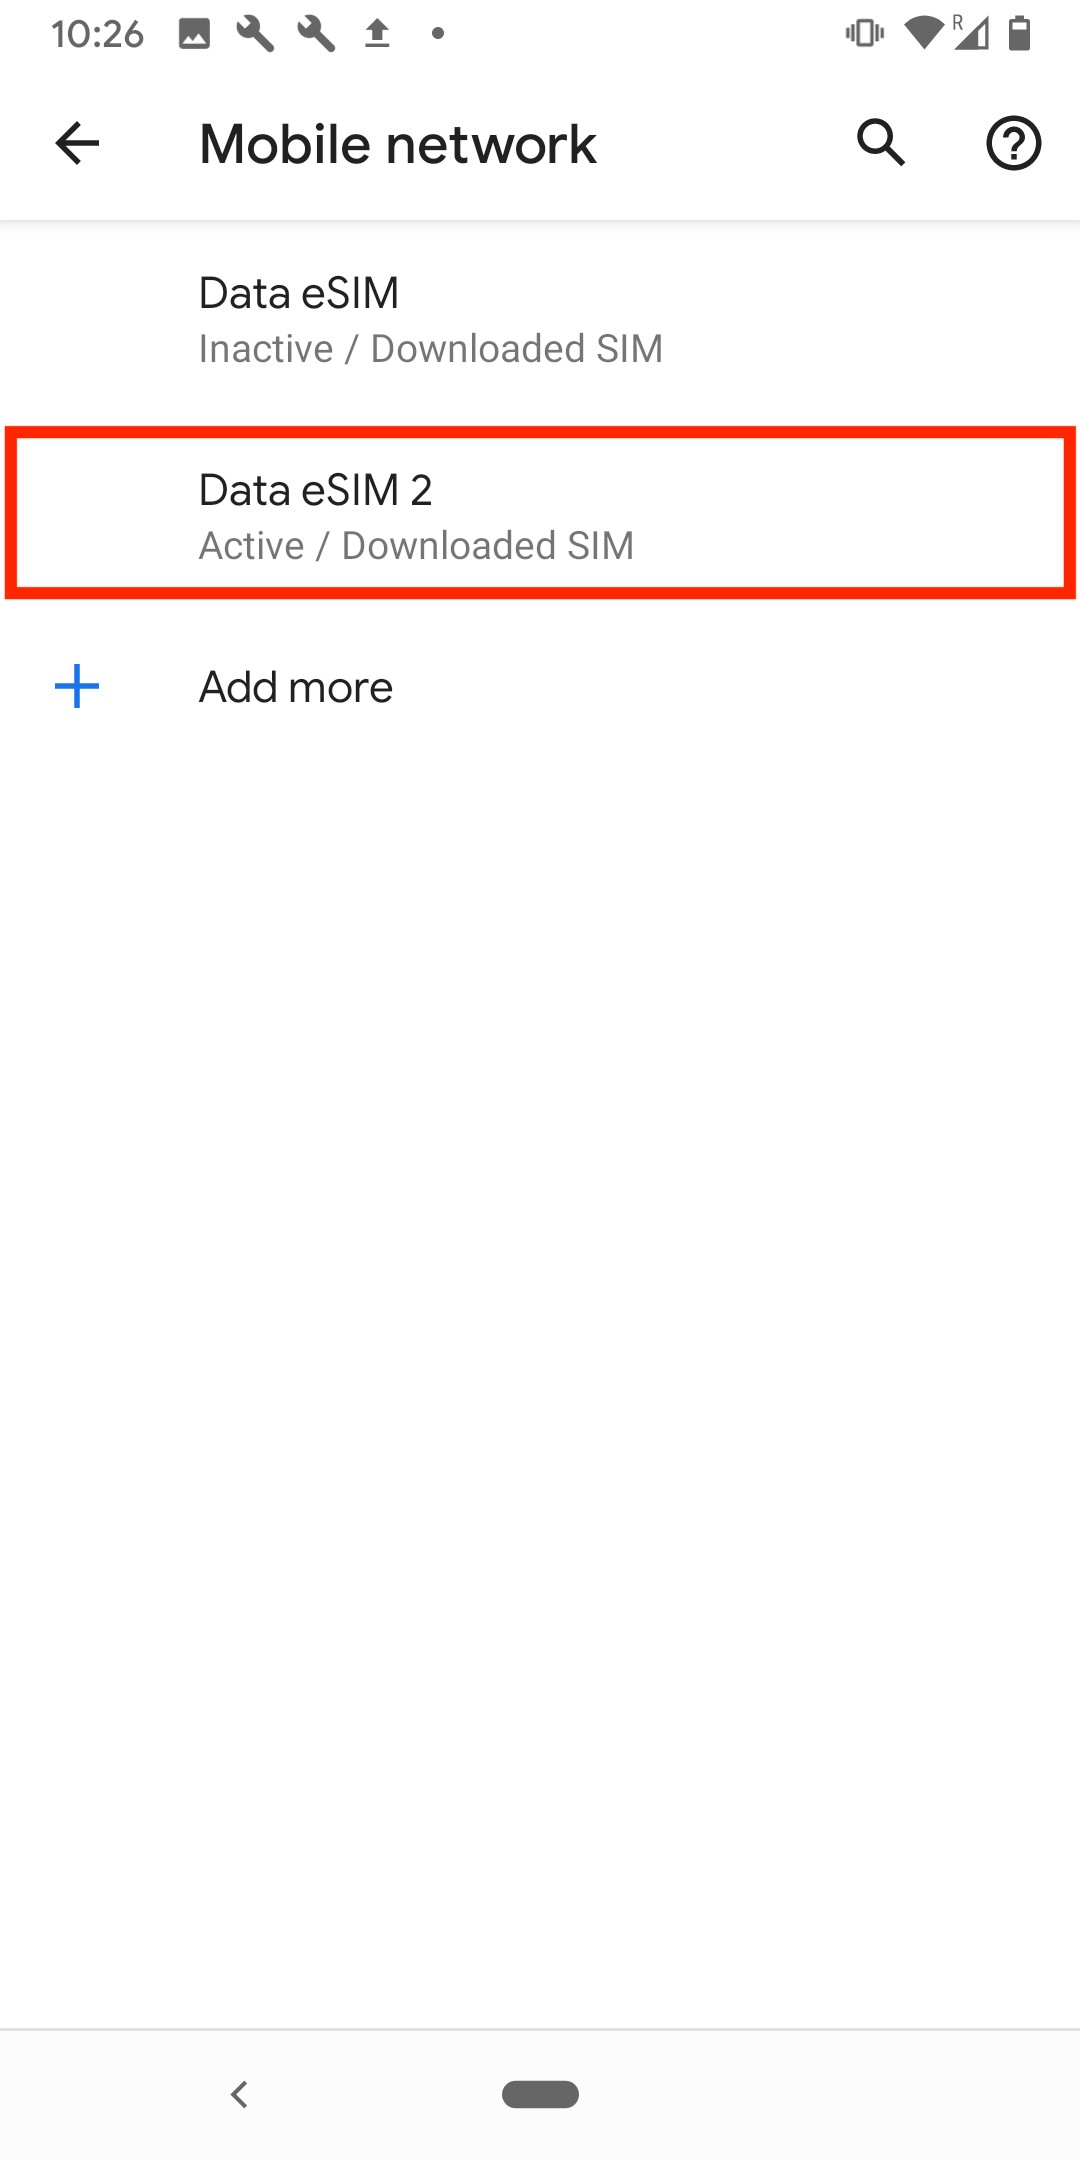
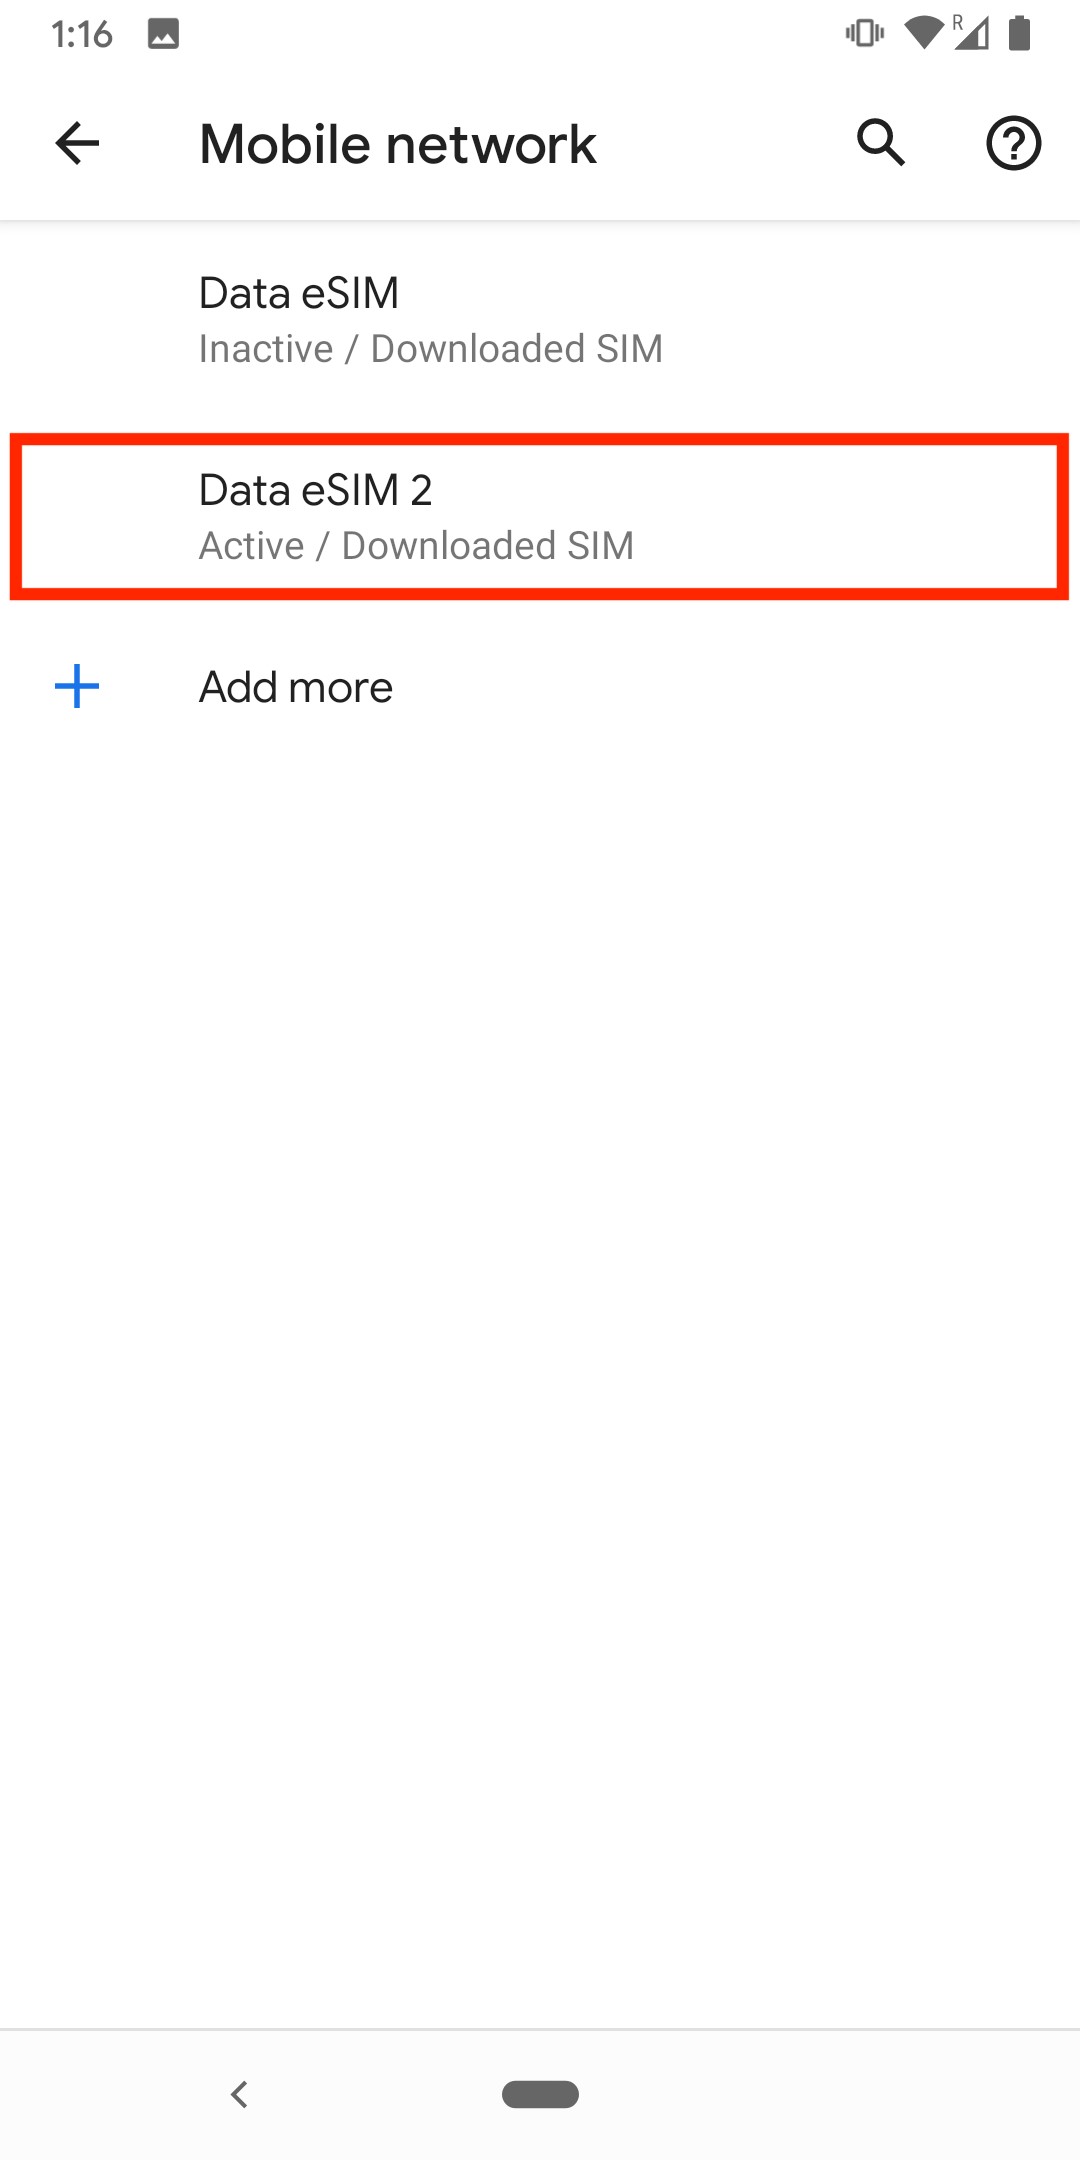
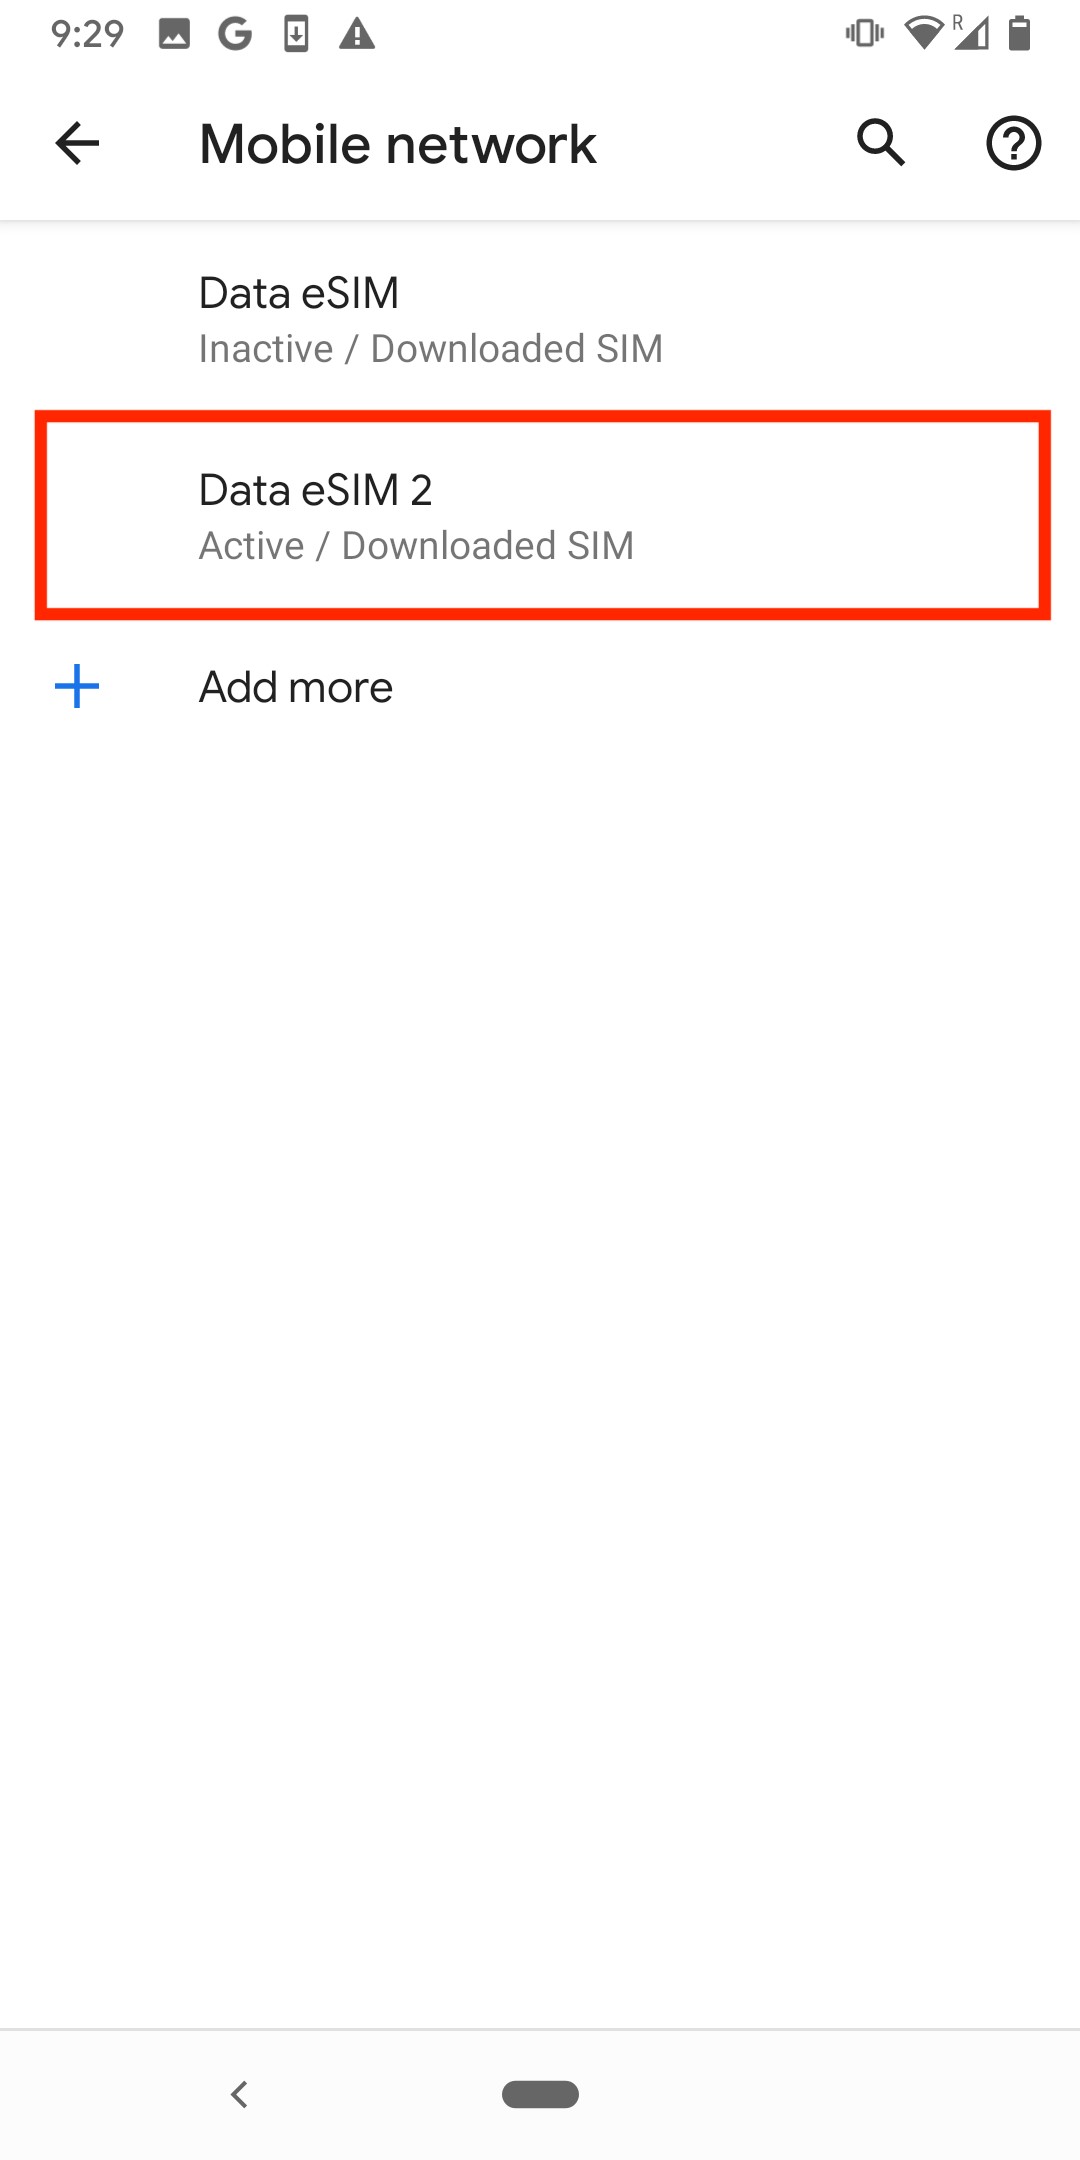
7. Once the eSIM has been successfully activated, you will be bought to a screen where you can choose which sim you would like to use for your number.

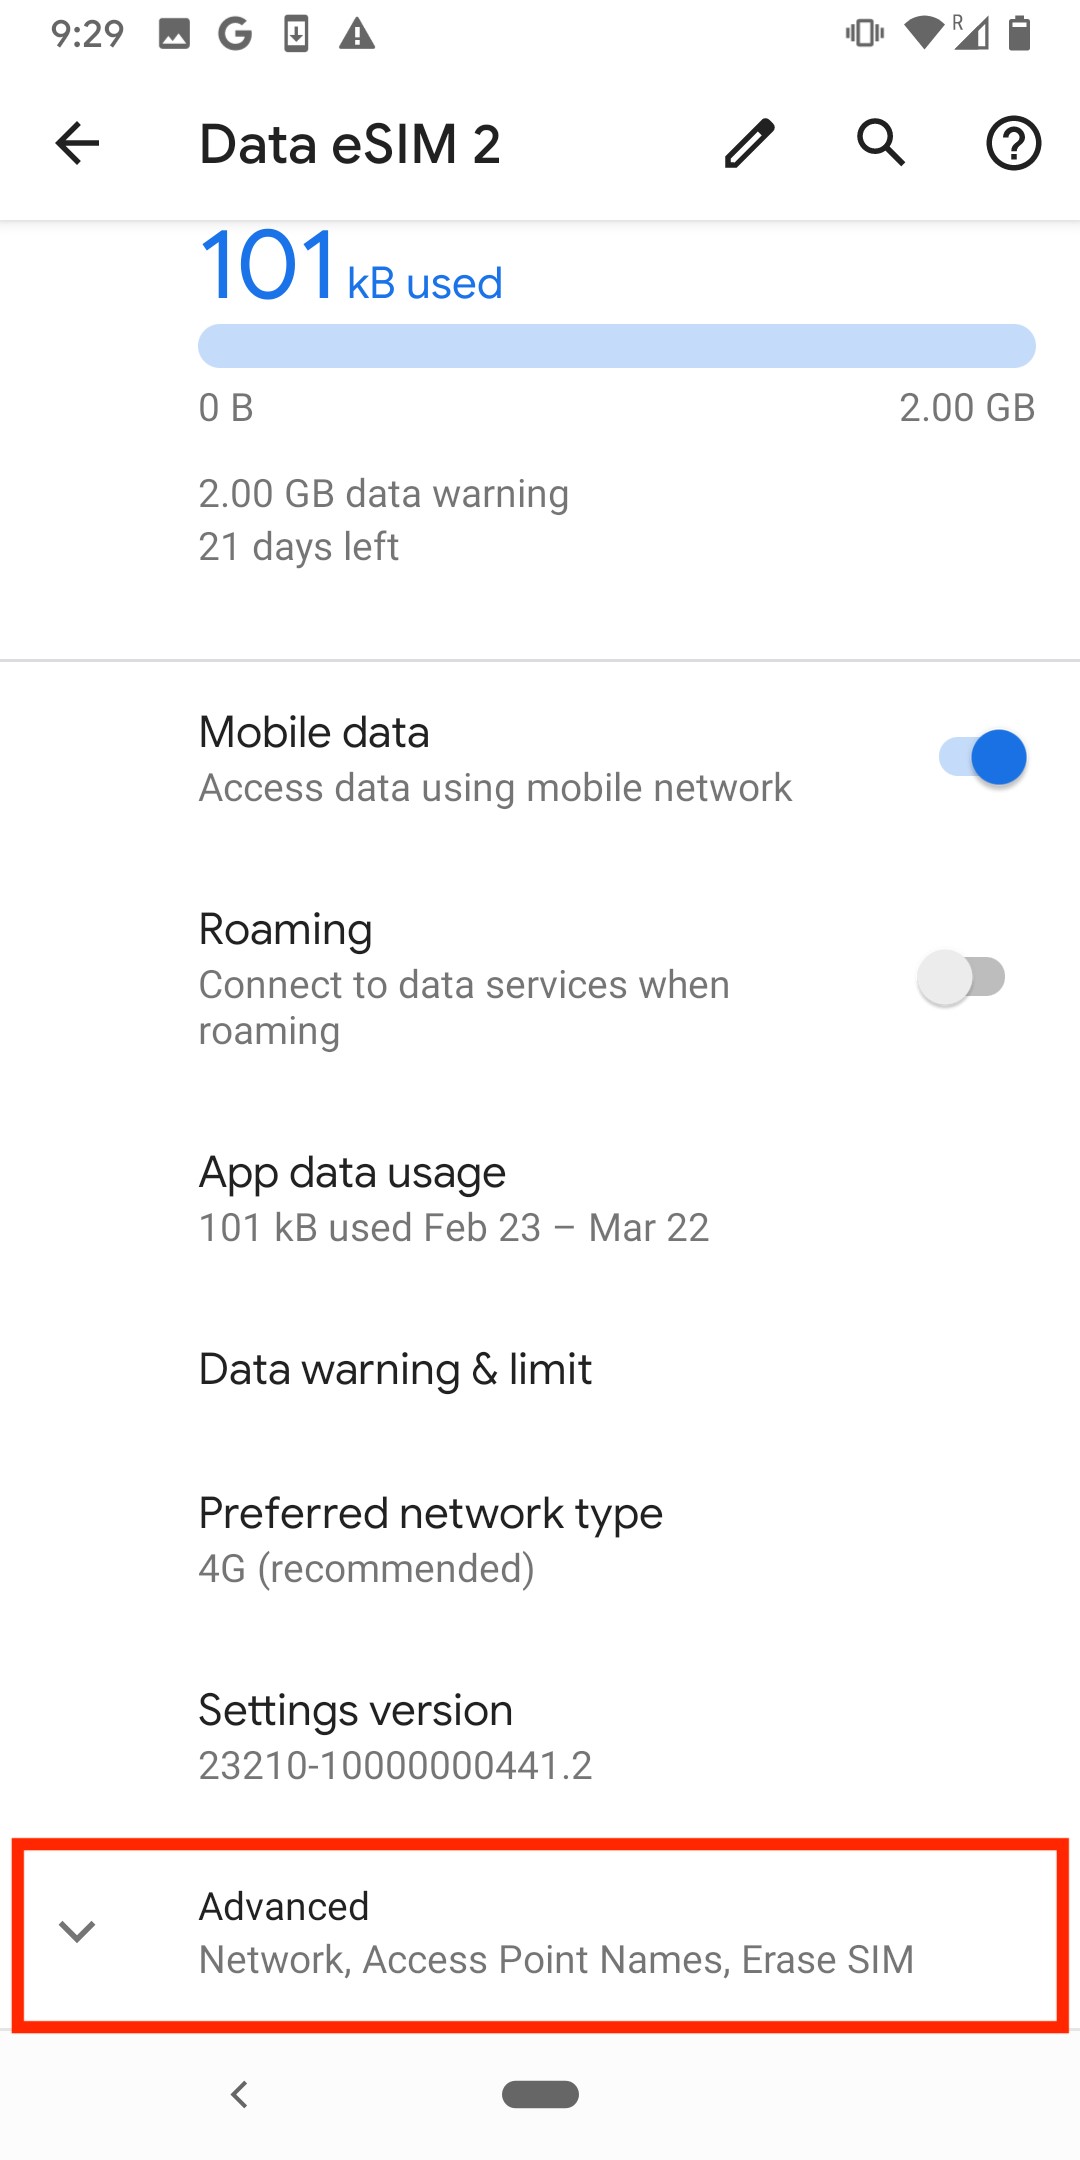
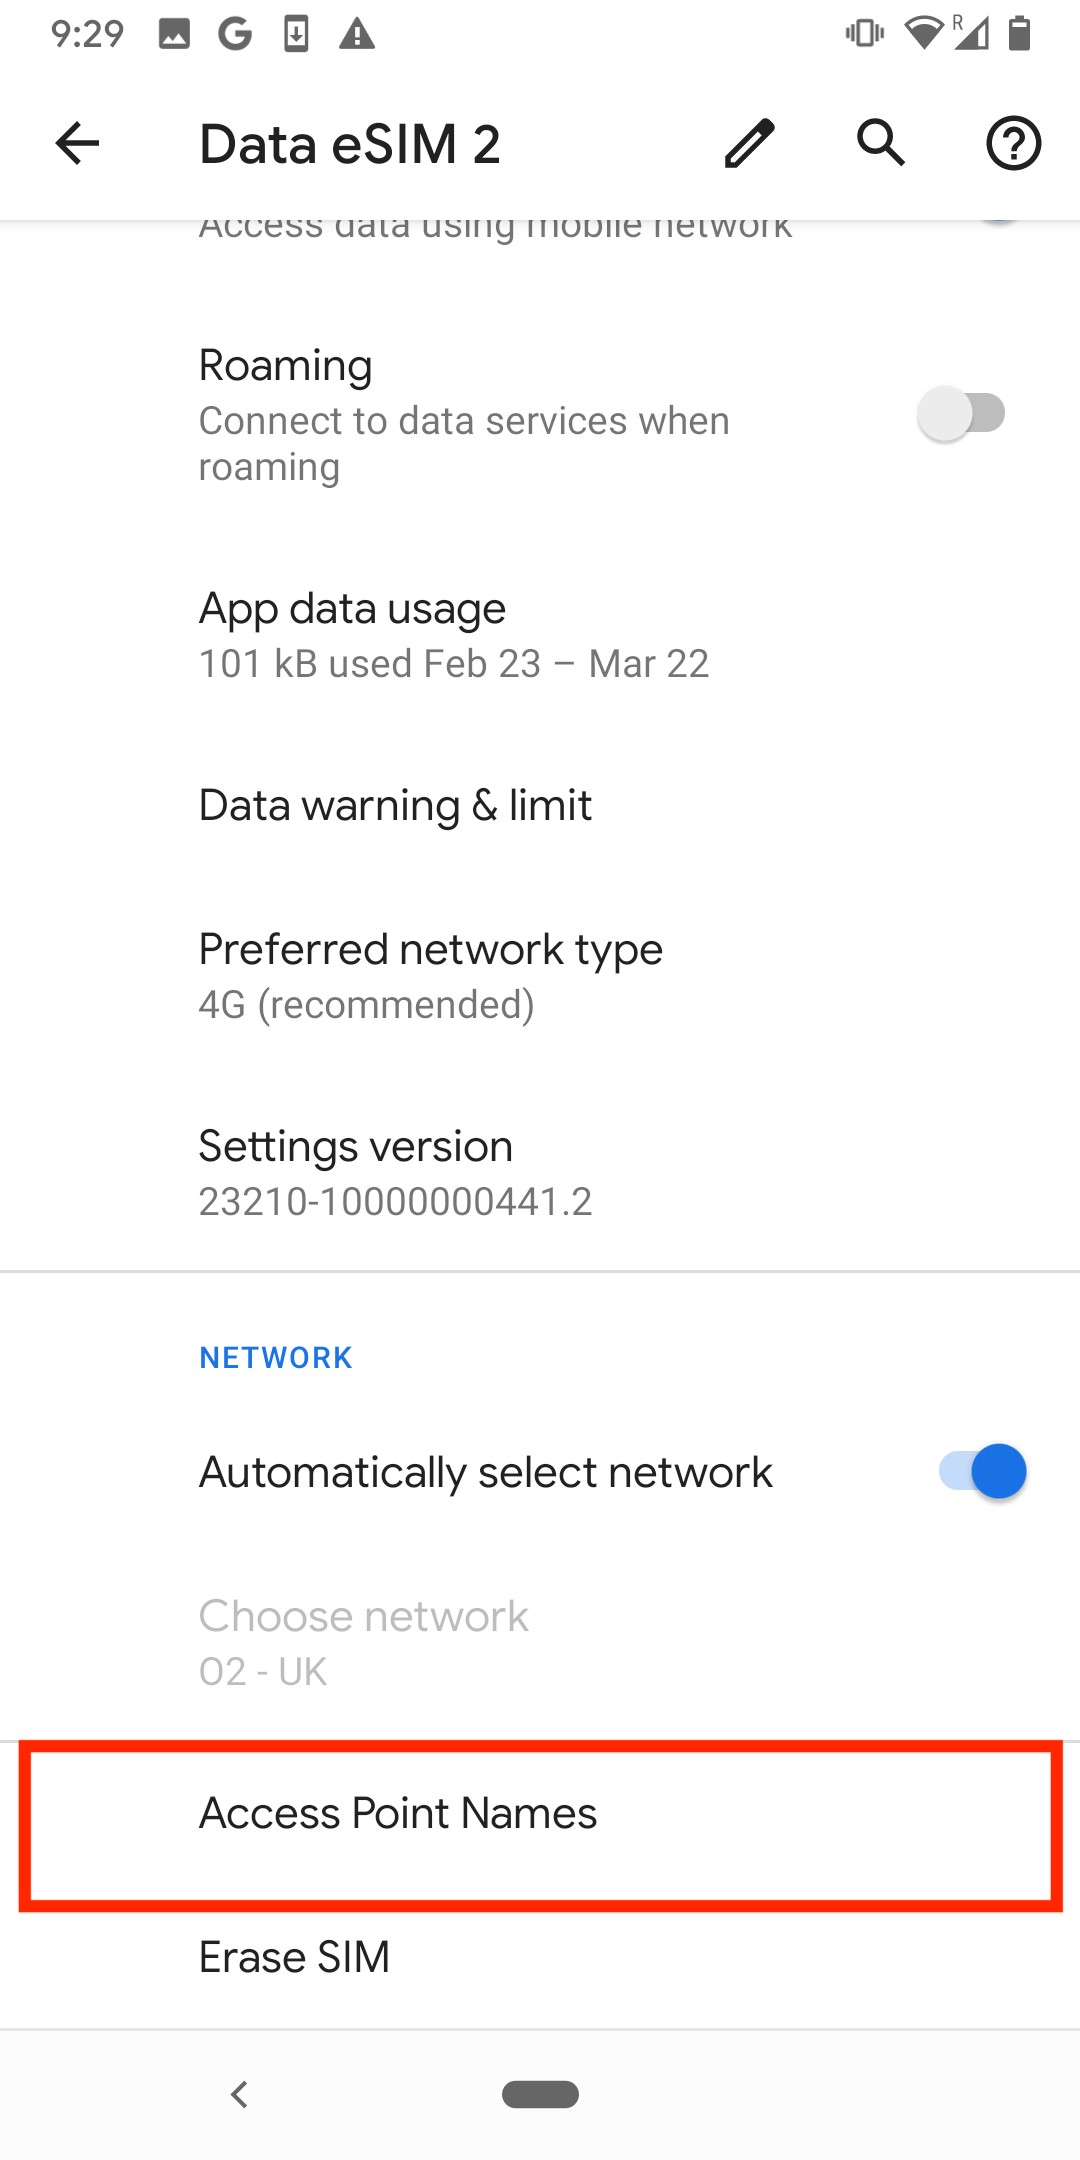
Note: Once you have completed these steps, make sure your Data Roaming is "ON" as seen in the photos below, otherwise you will not be able to use the eSIM.