In this guide, you have a step-by-step walkthrough you can take when installing an eSIM on your IOS device.
Installing an eSIM using a QR Code.
Before attempting to install the eSIM, there are three main things you will need:
- A strong internet connection - Ideally, you will need to be connected to Wi-fi or have a good 4G signal.
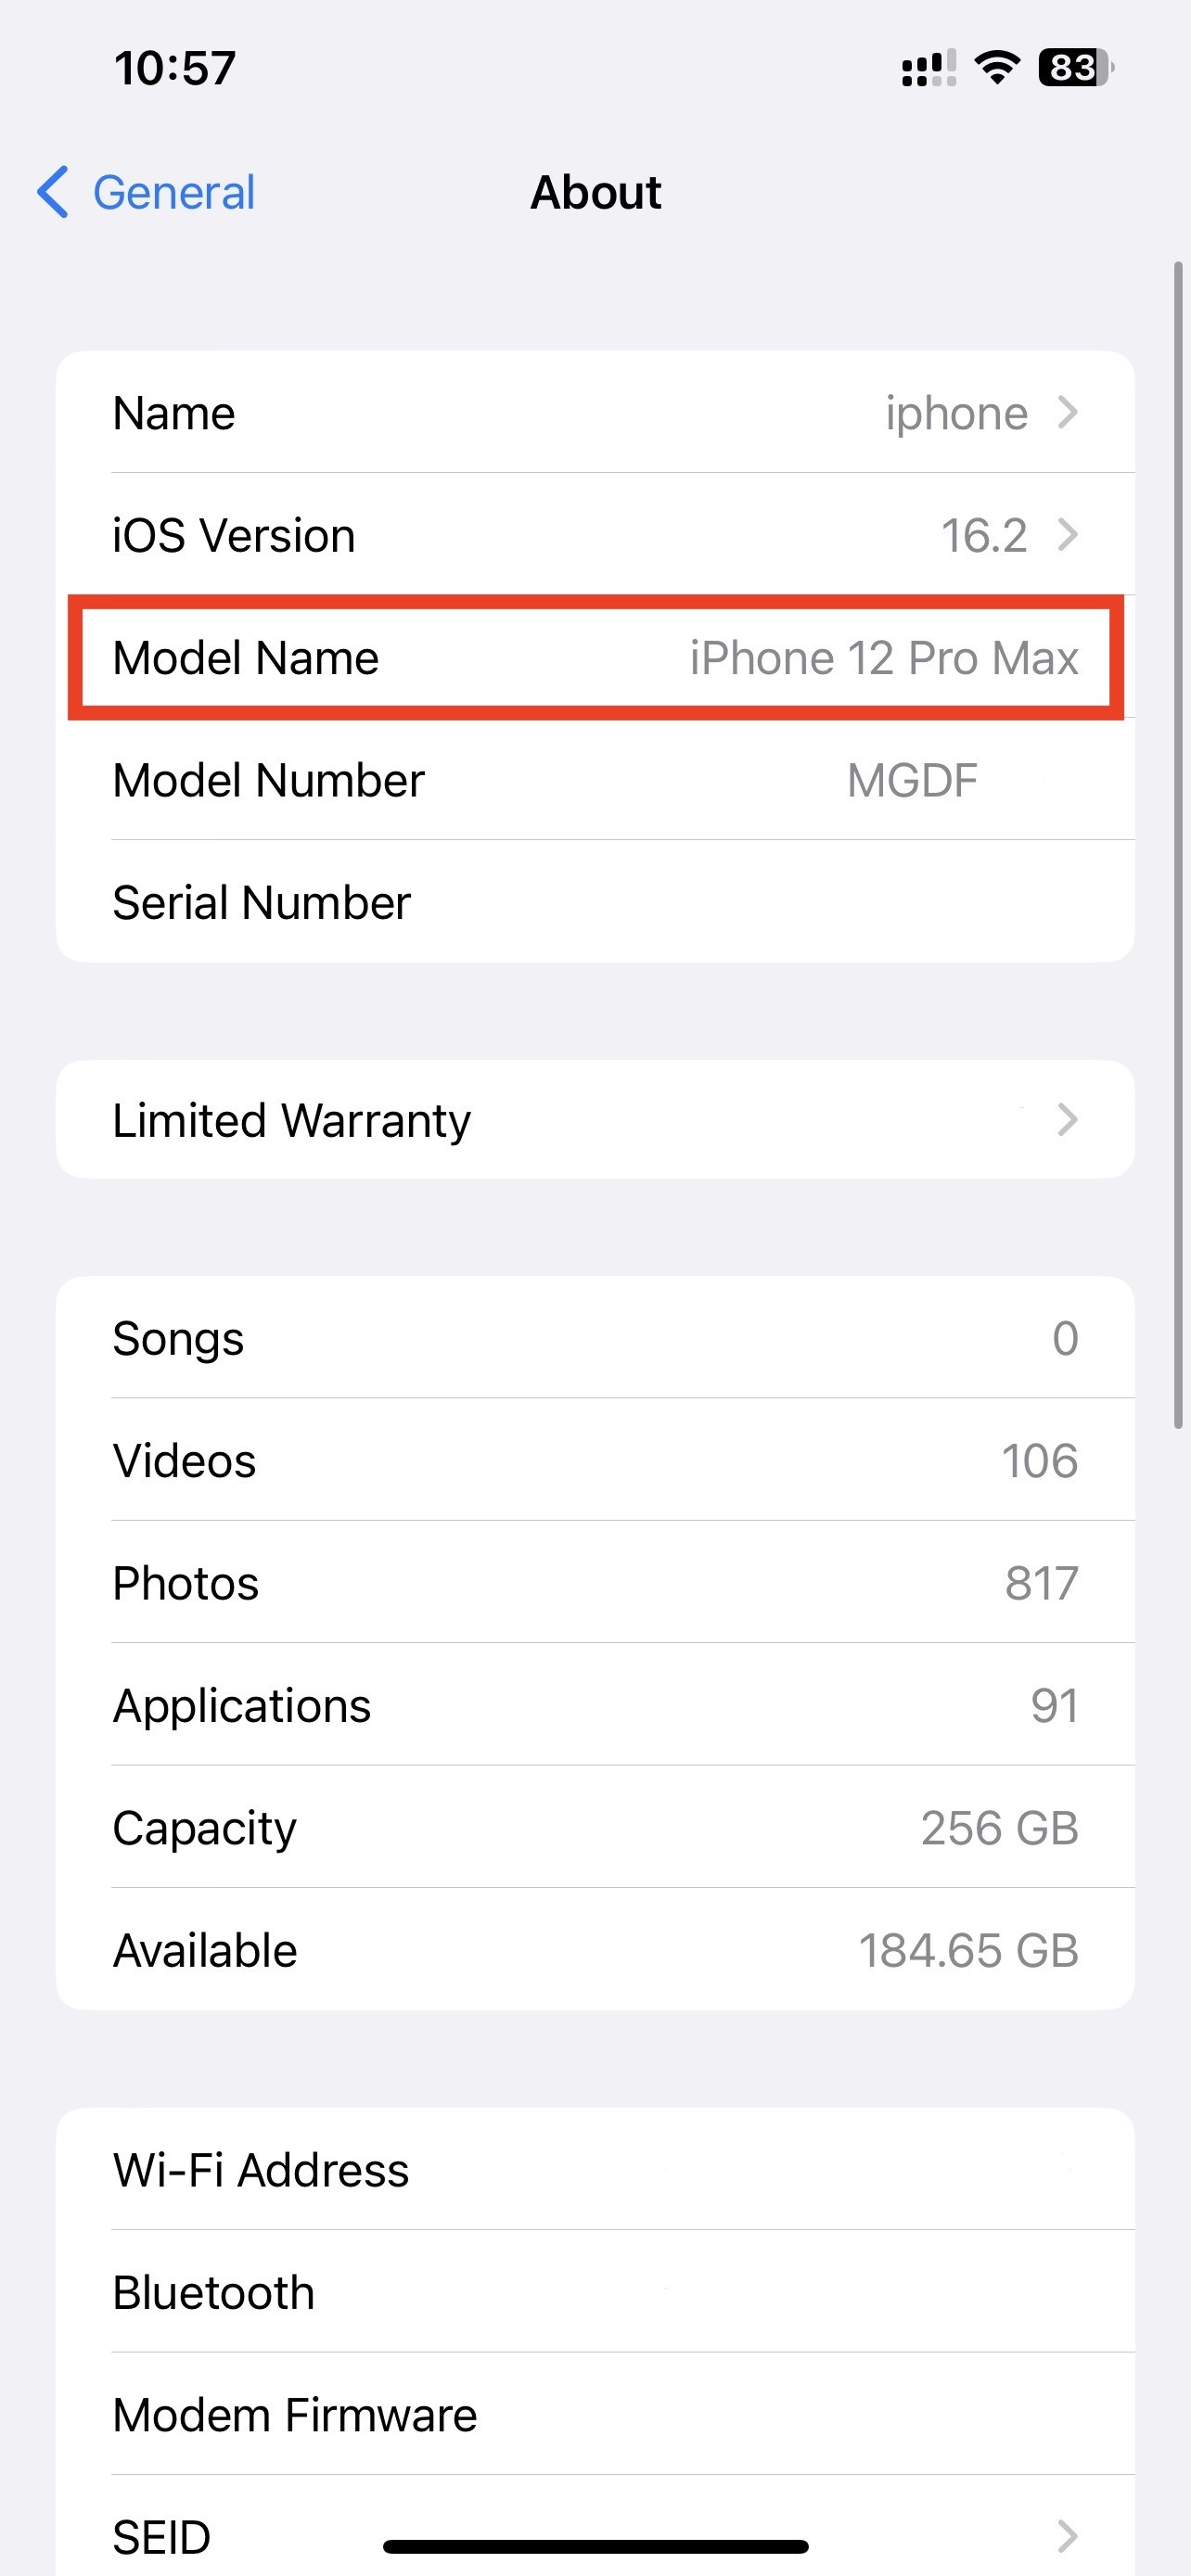
- An eSIM compatible device - If you are unsure, here's a list of compatible devices: List of compatible devices
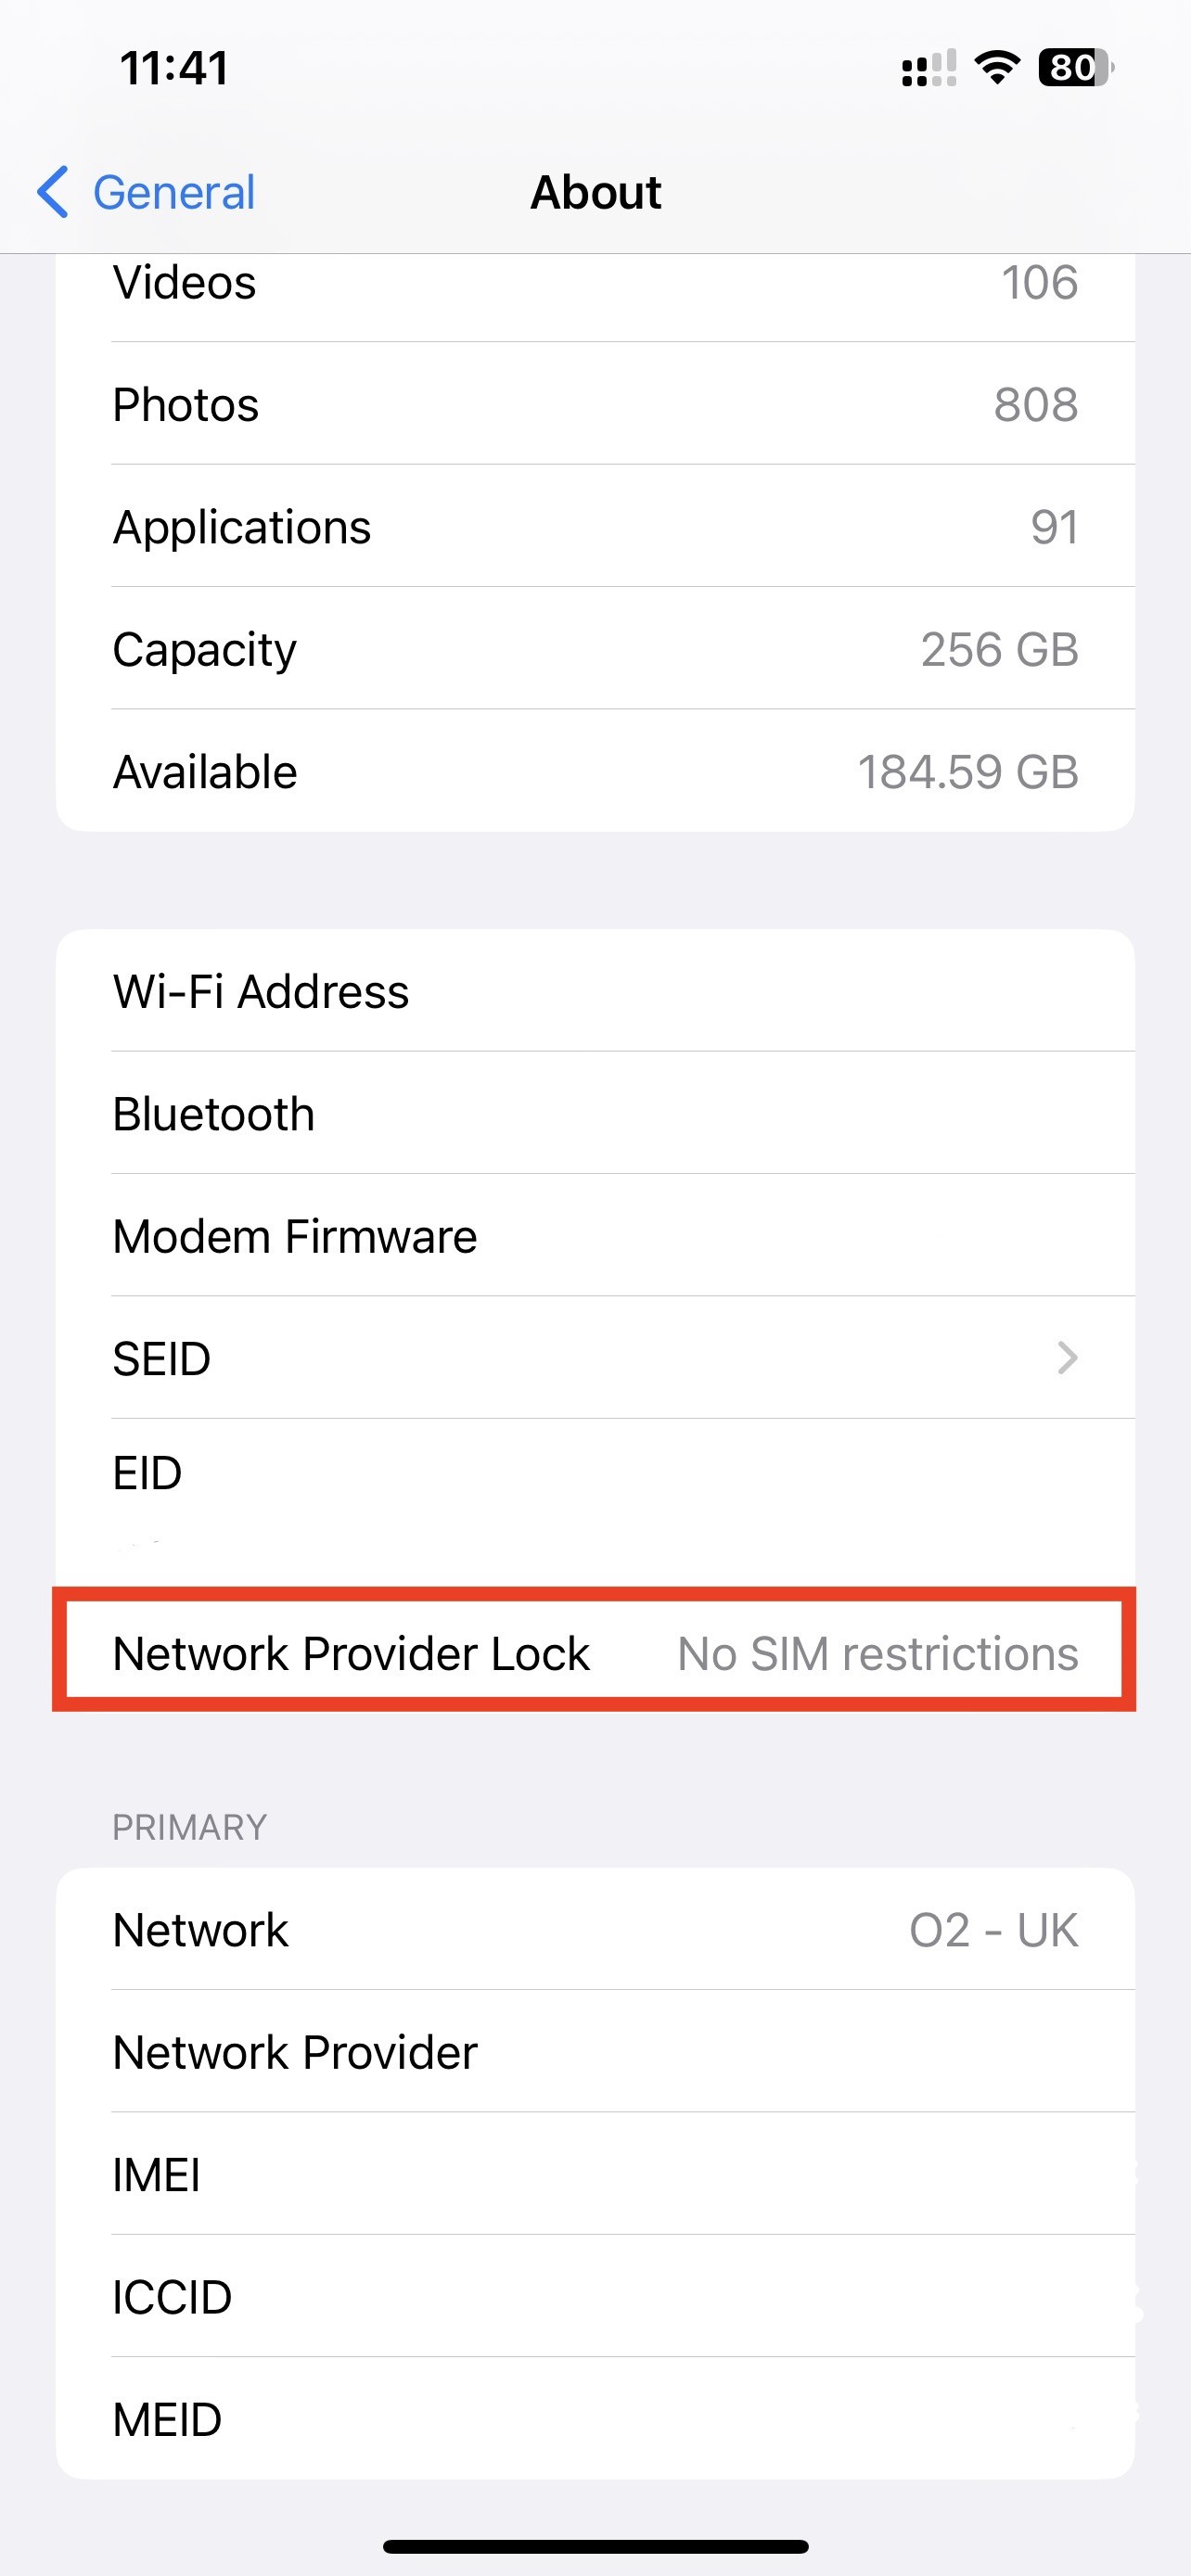
- The device isn't locked to one Mobile Network - If you are unsure whether or not your device is locked to a certain network, have a look at our article on how to check if your device is "locked/unlocked" Locked/unlocked devices
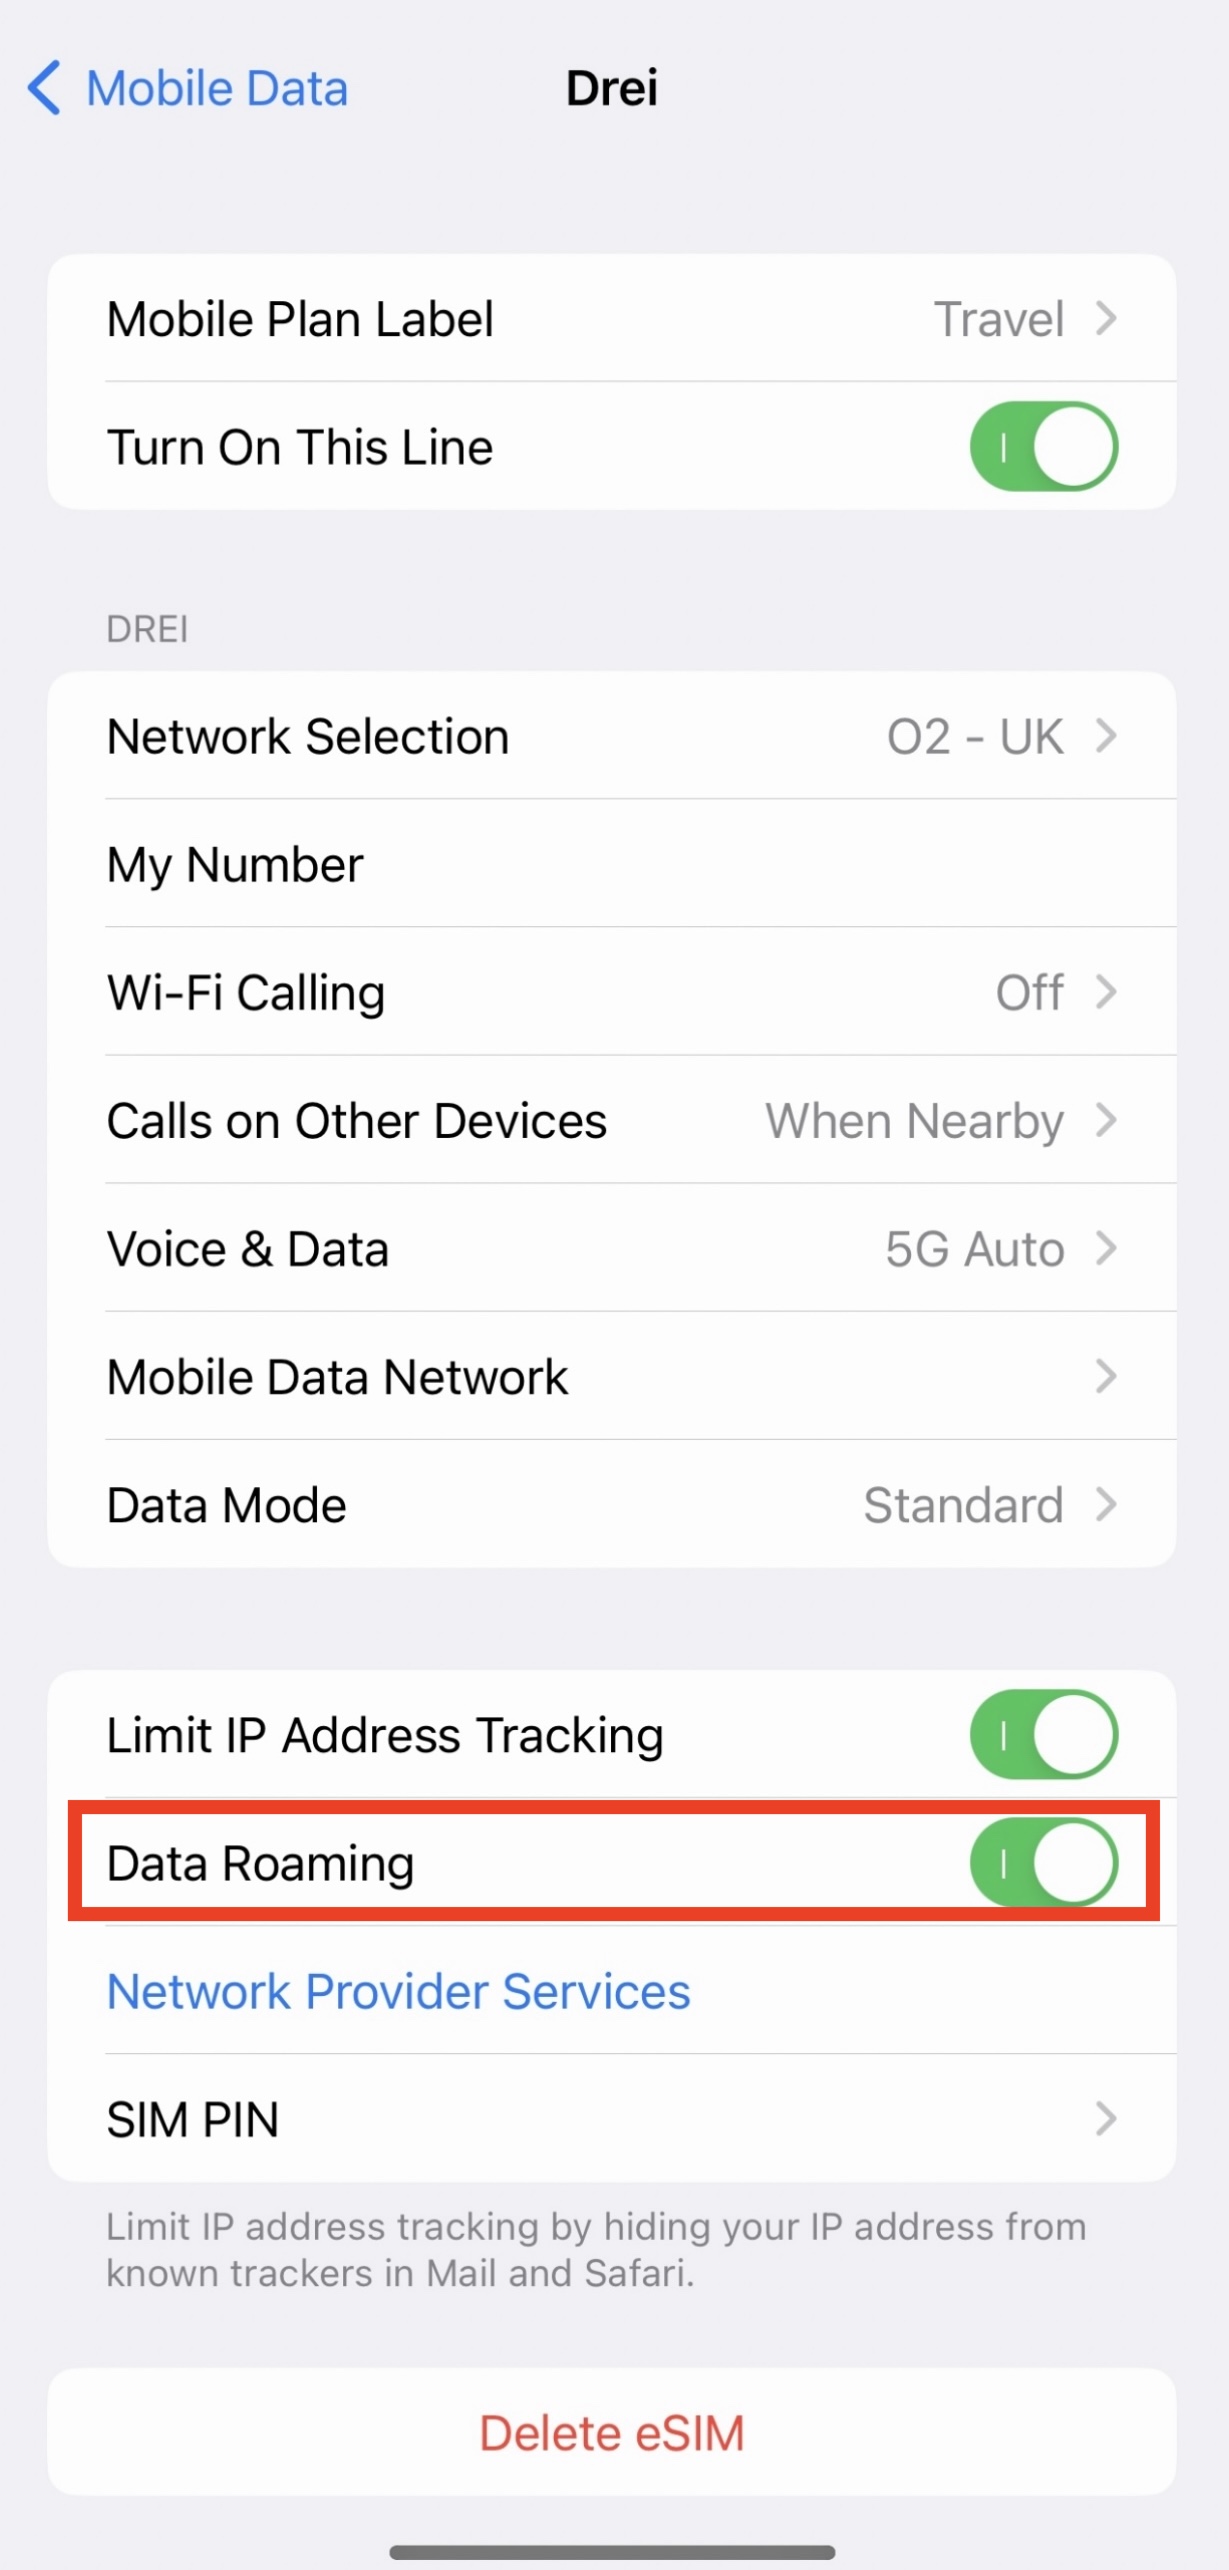
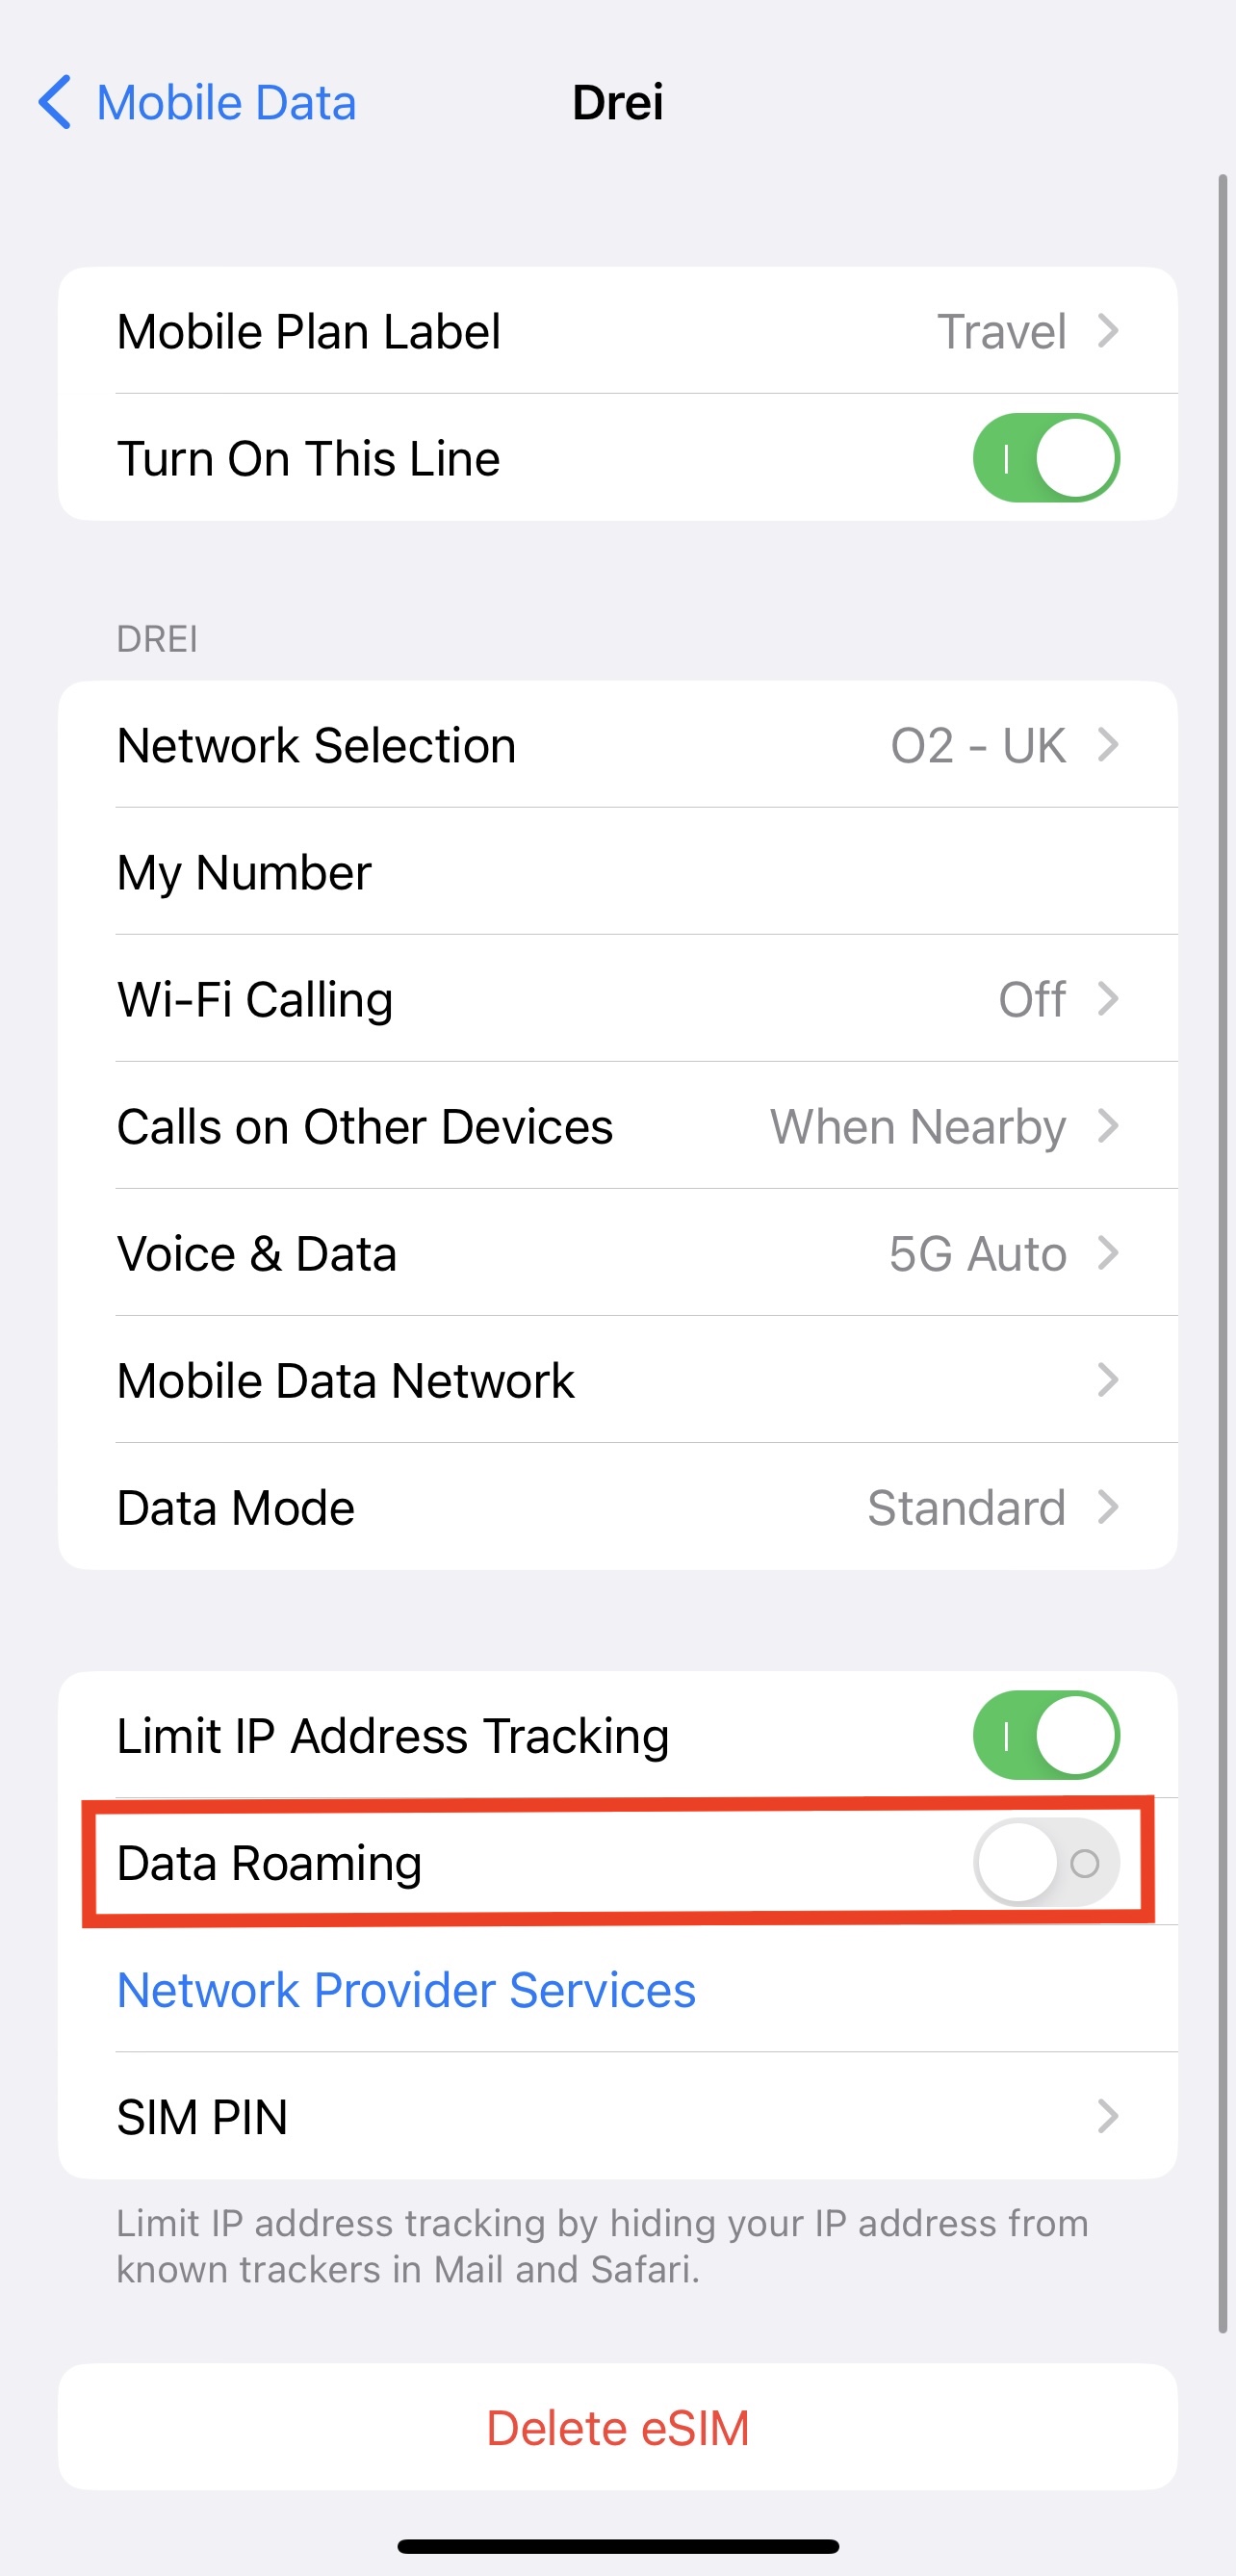
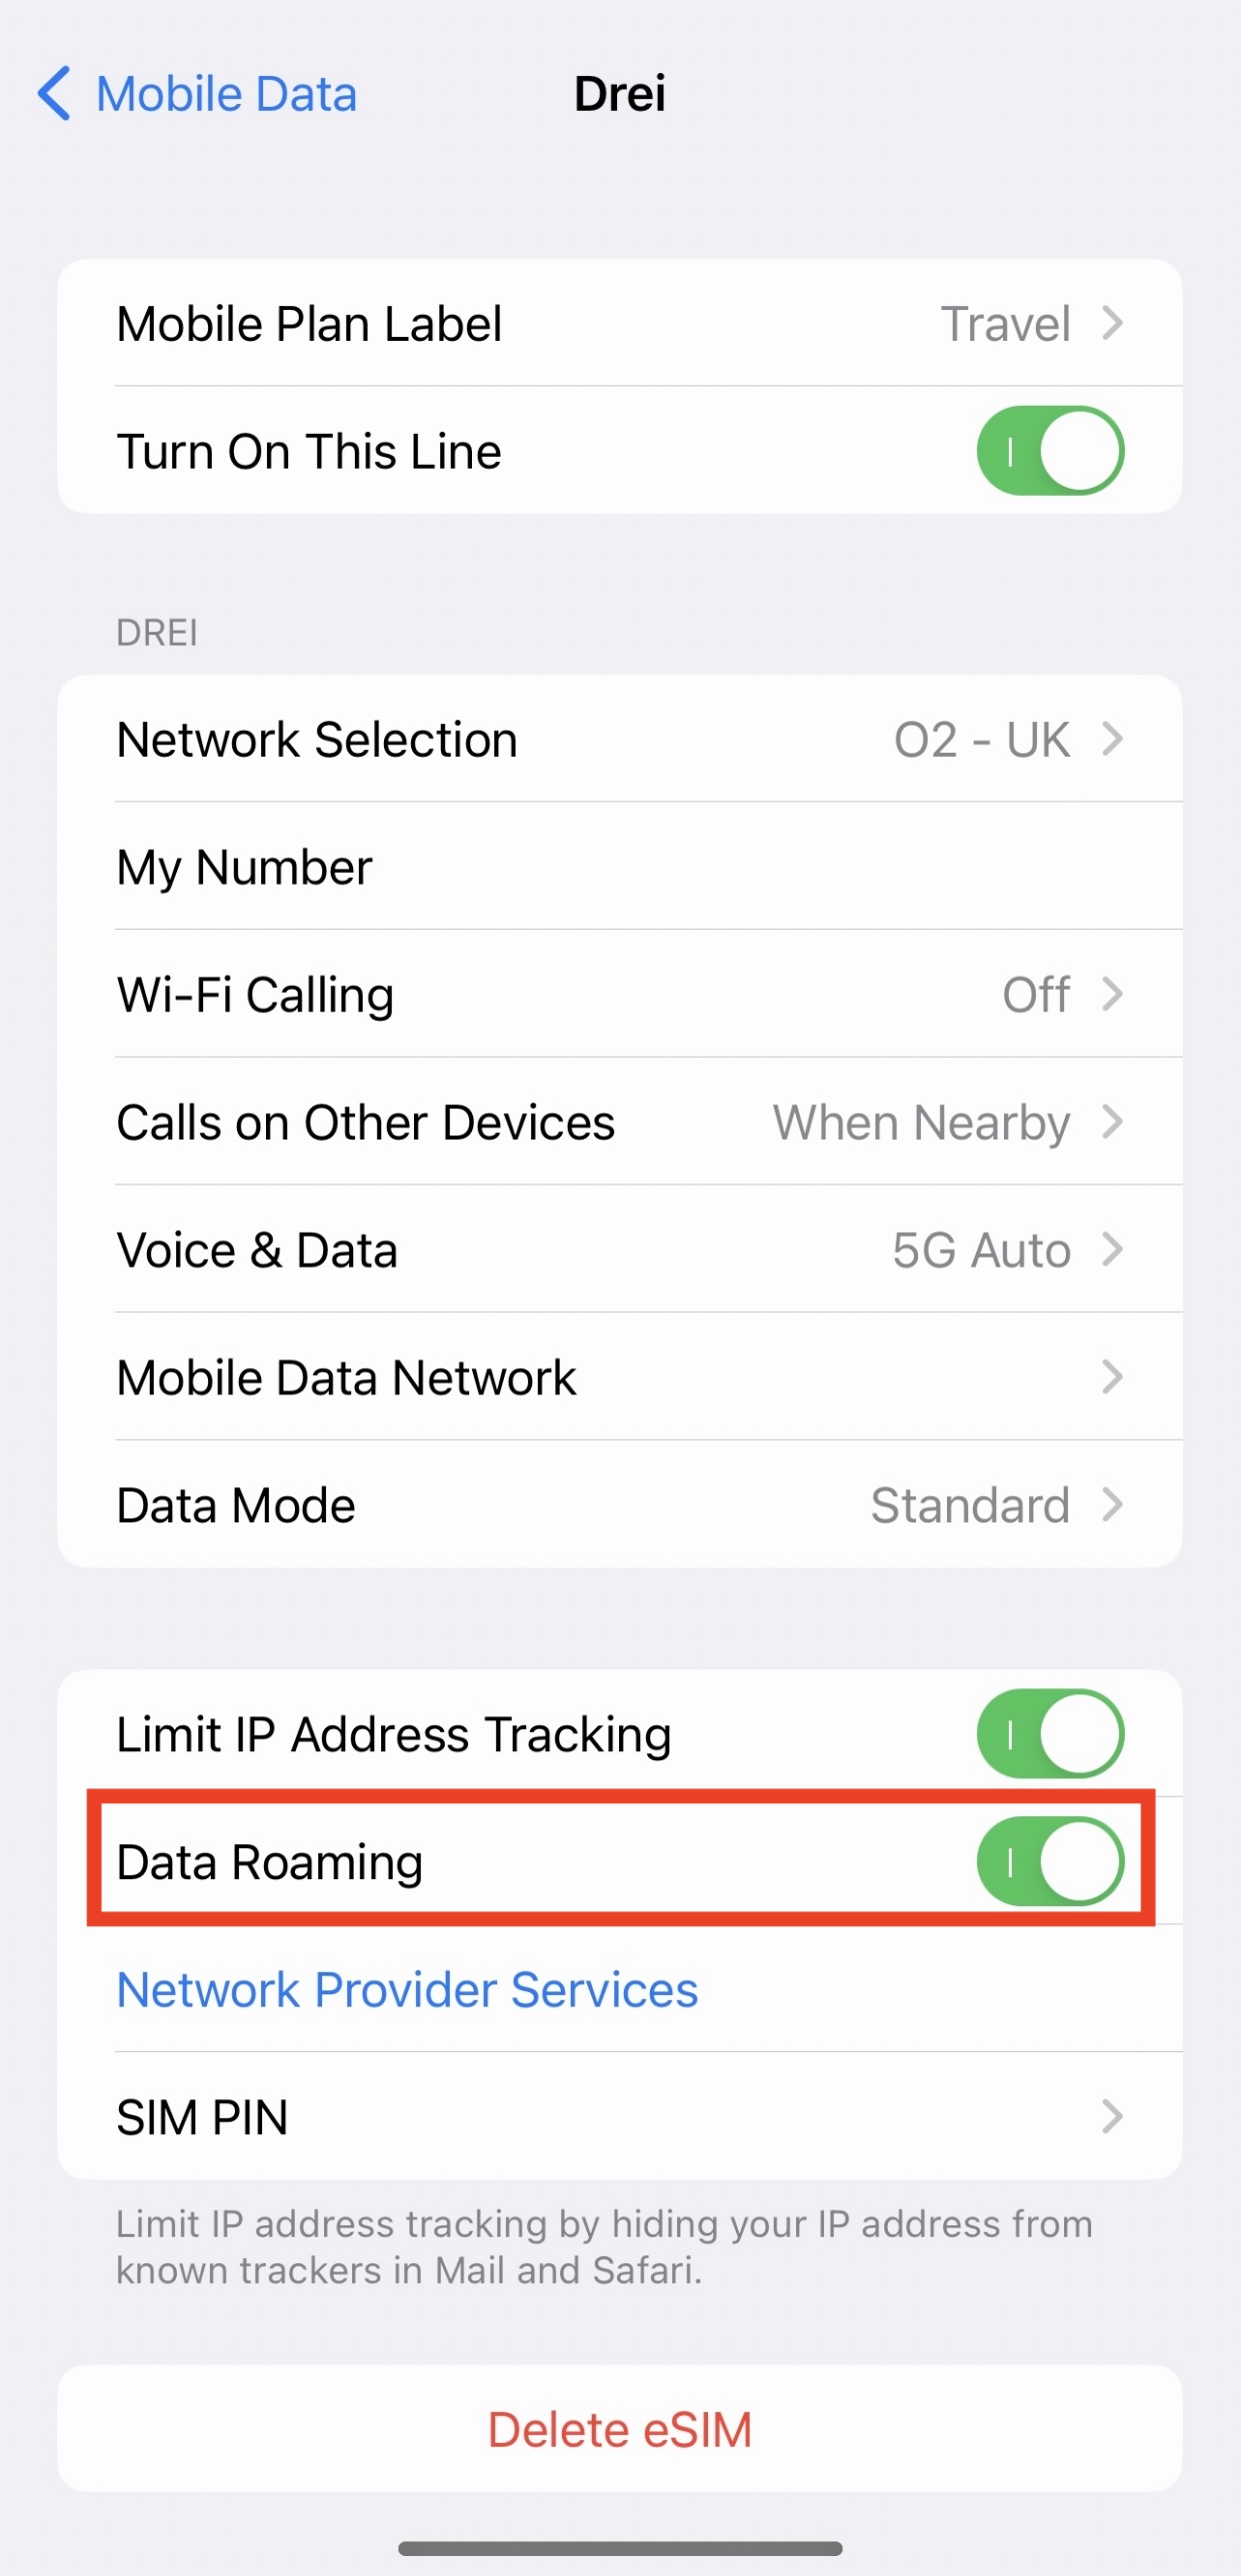
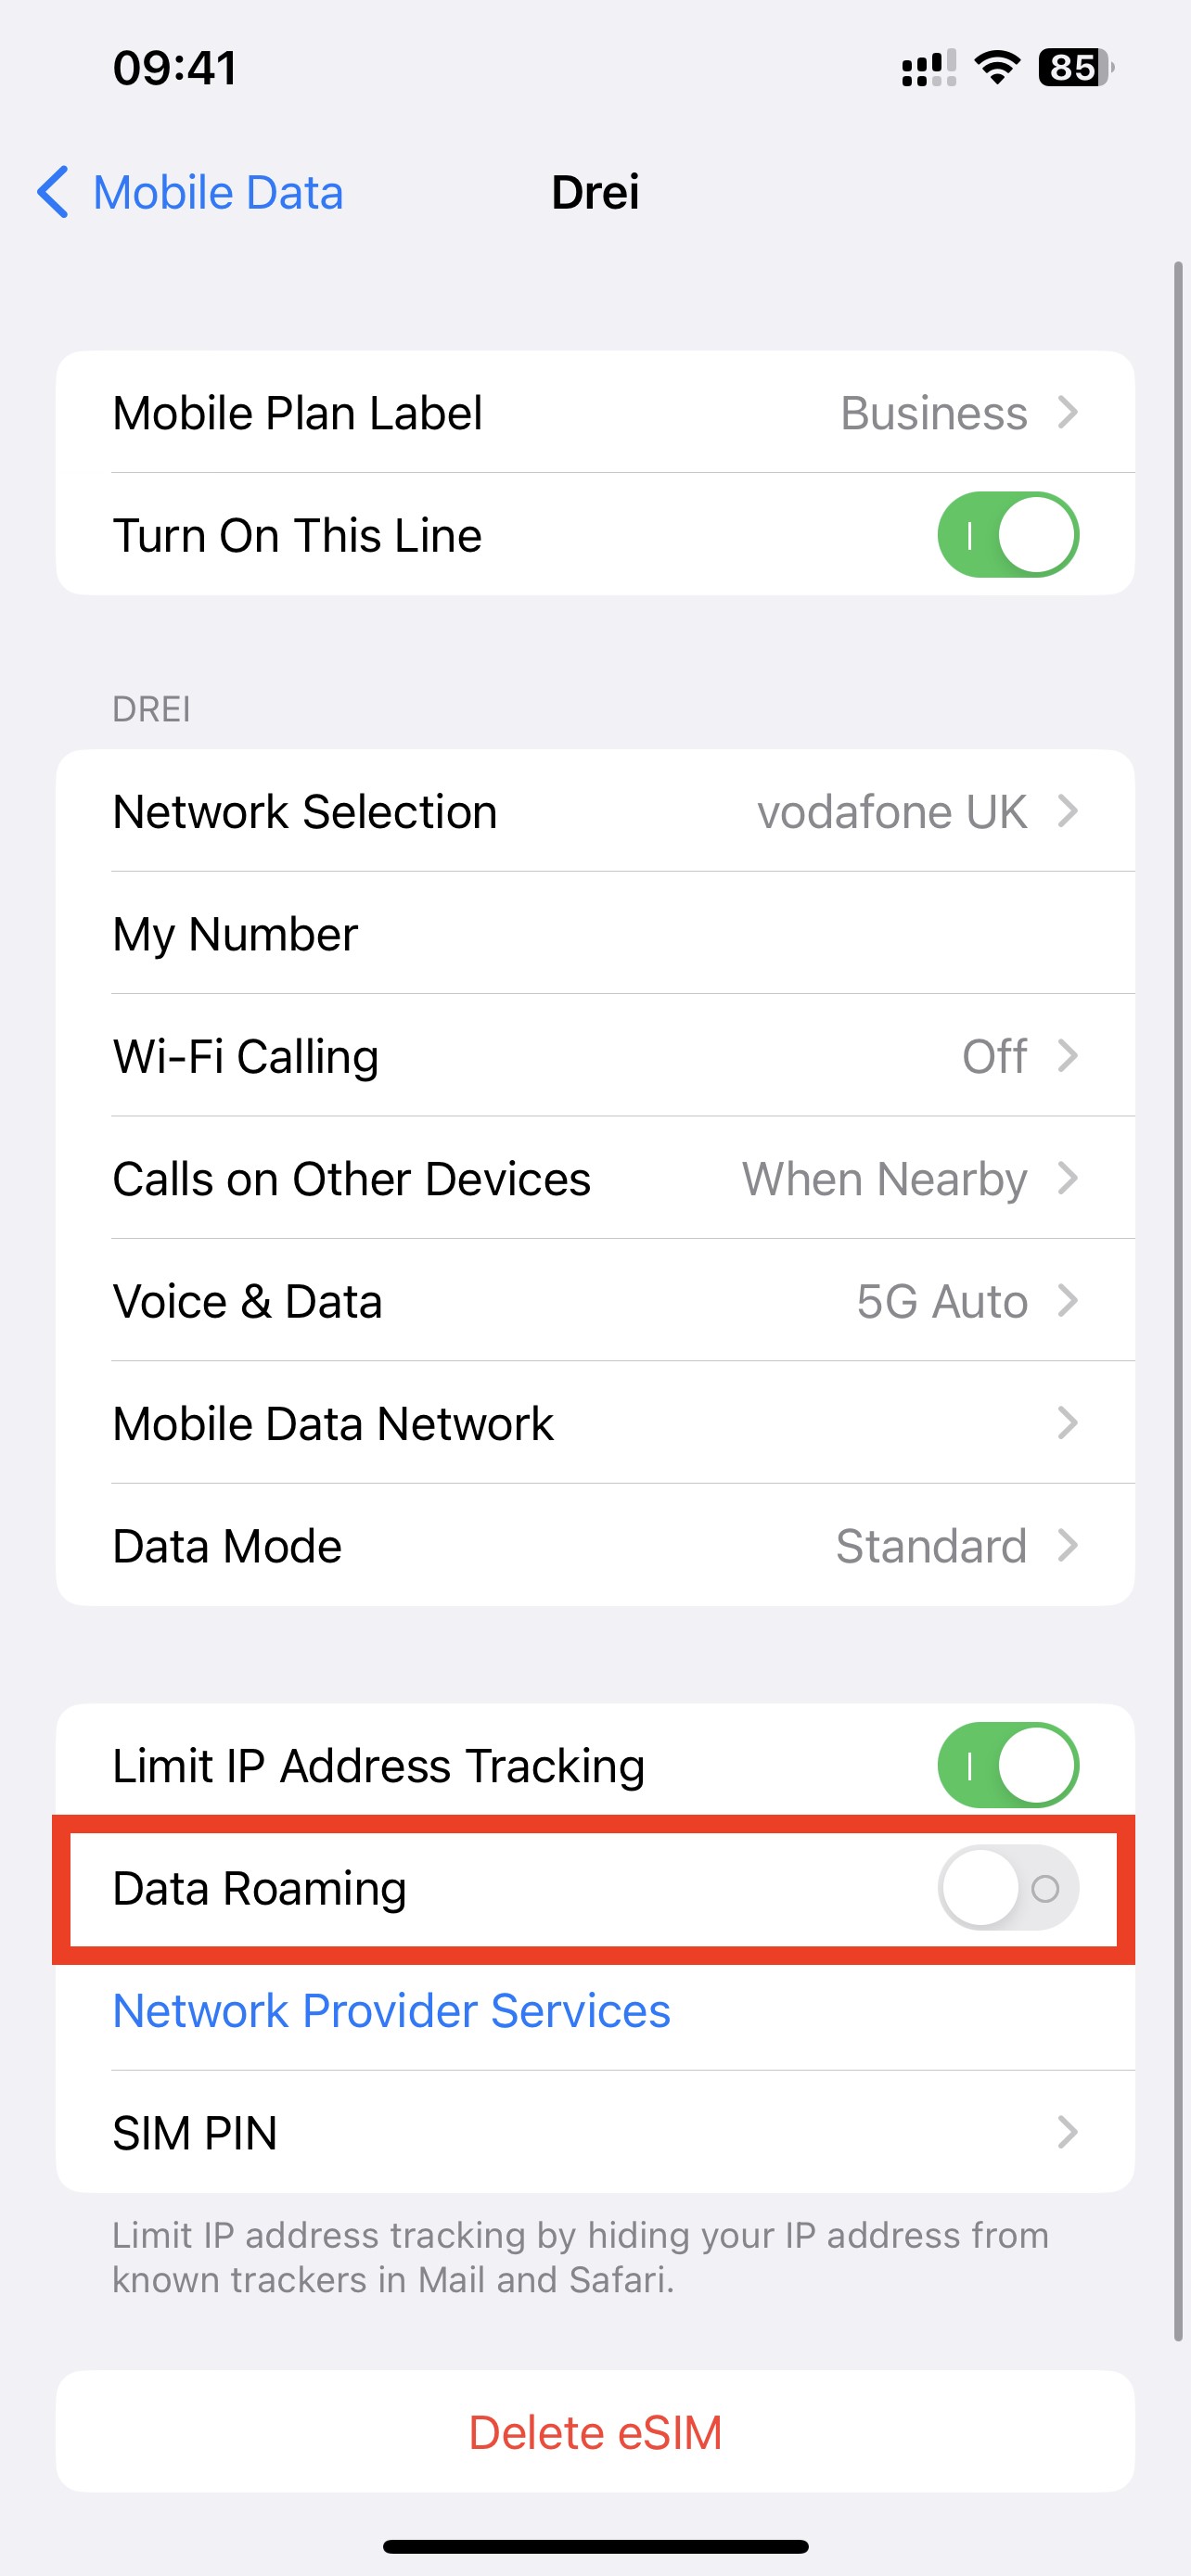
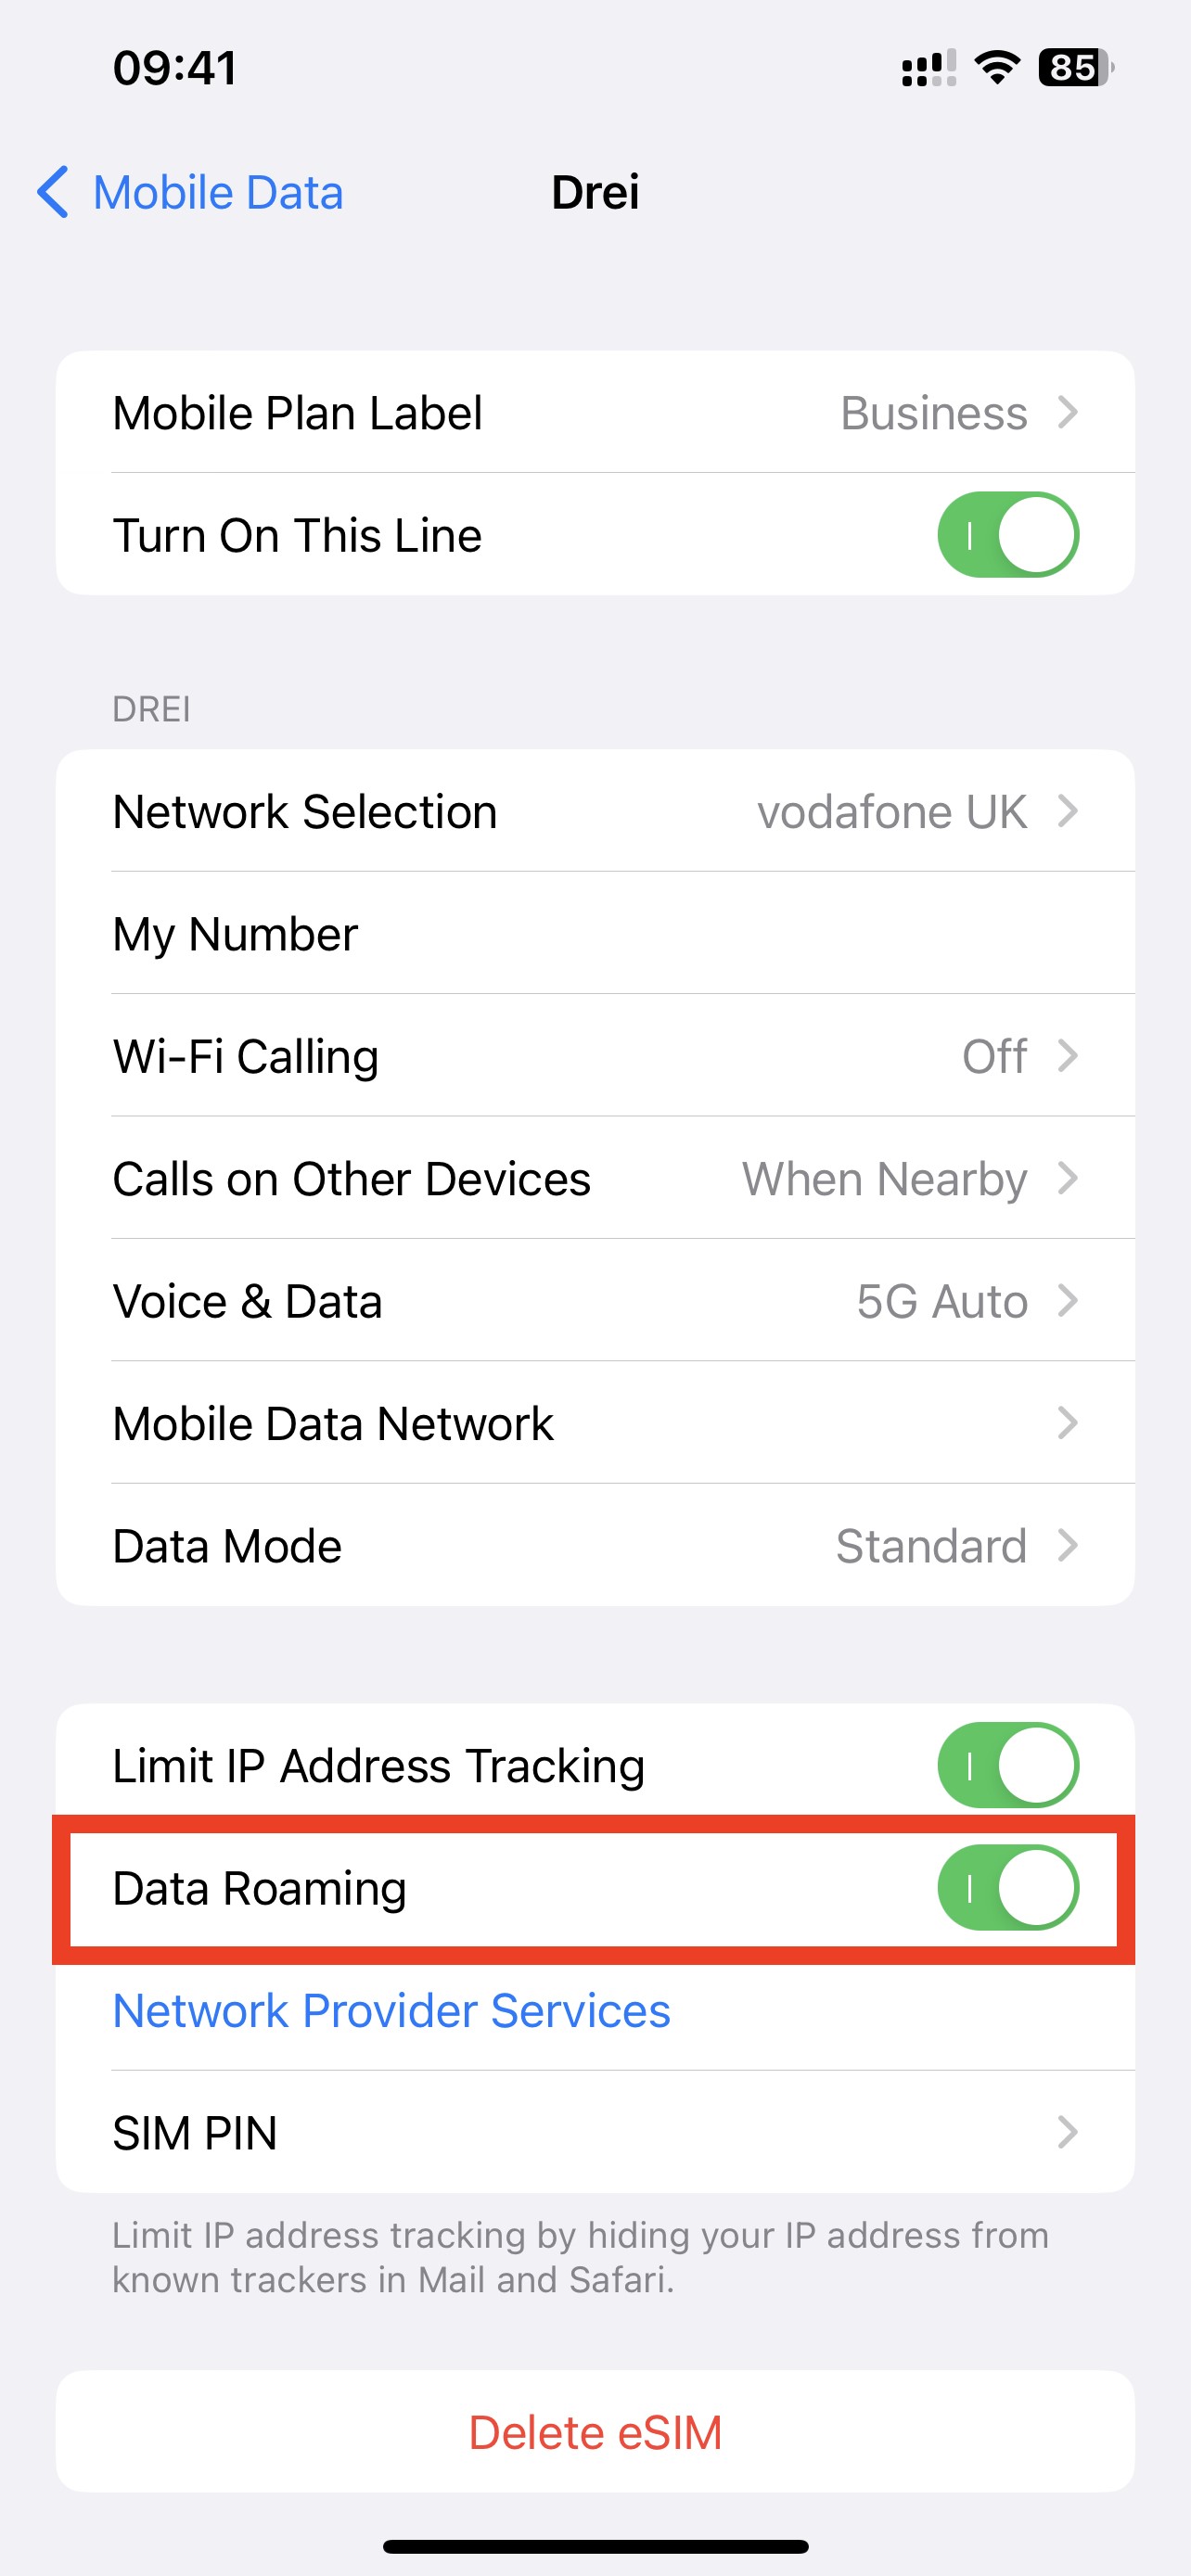
Do not forget to turn on "Data Roaming" once the installation is complete.
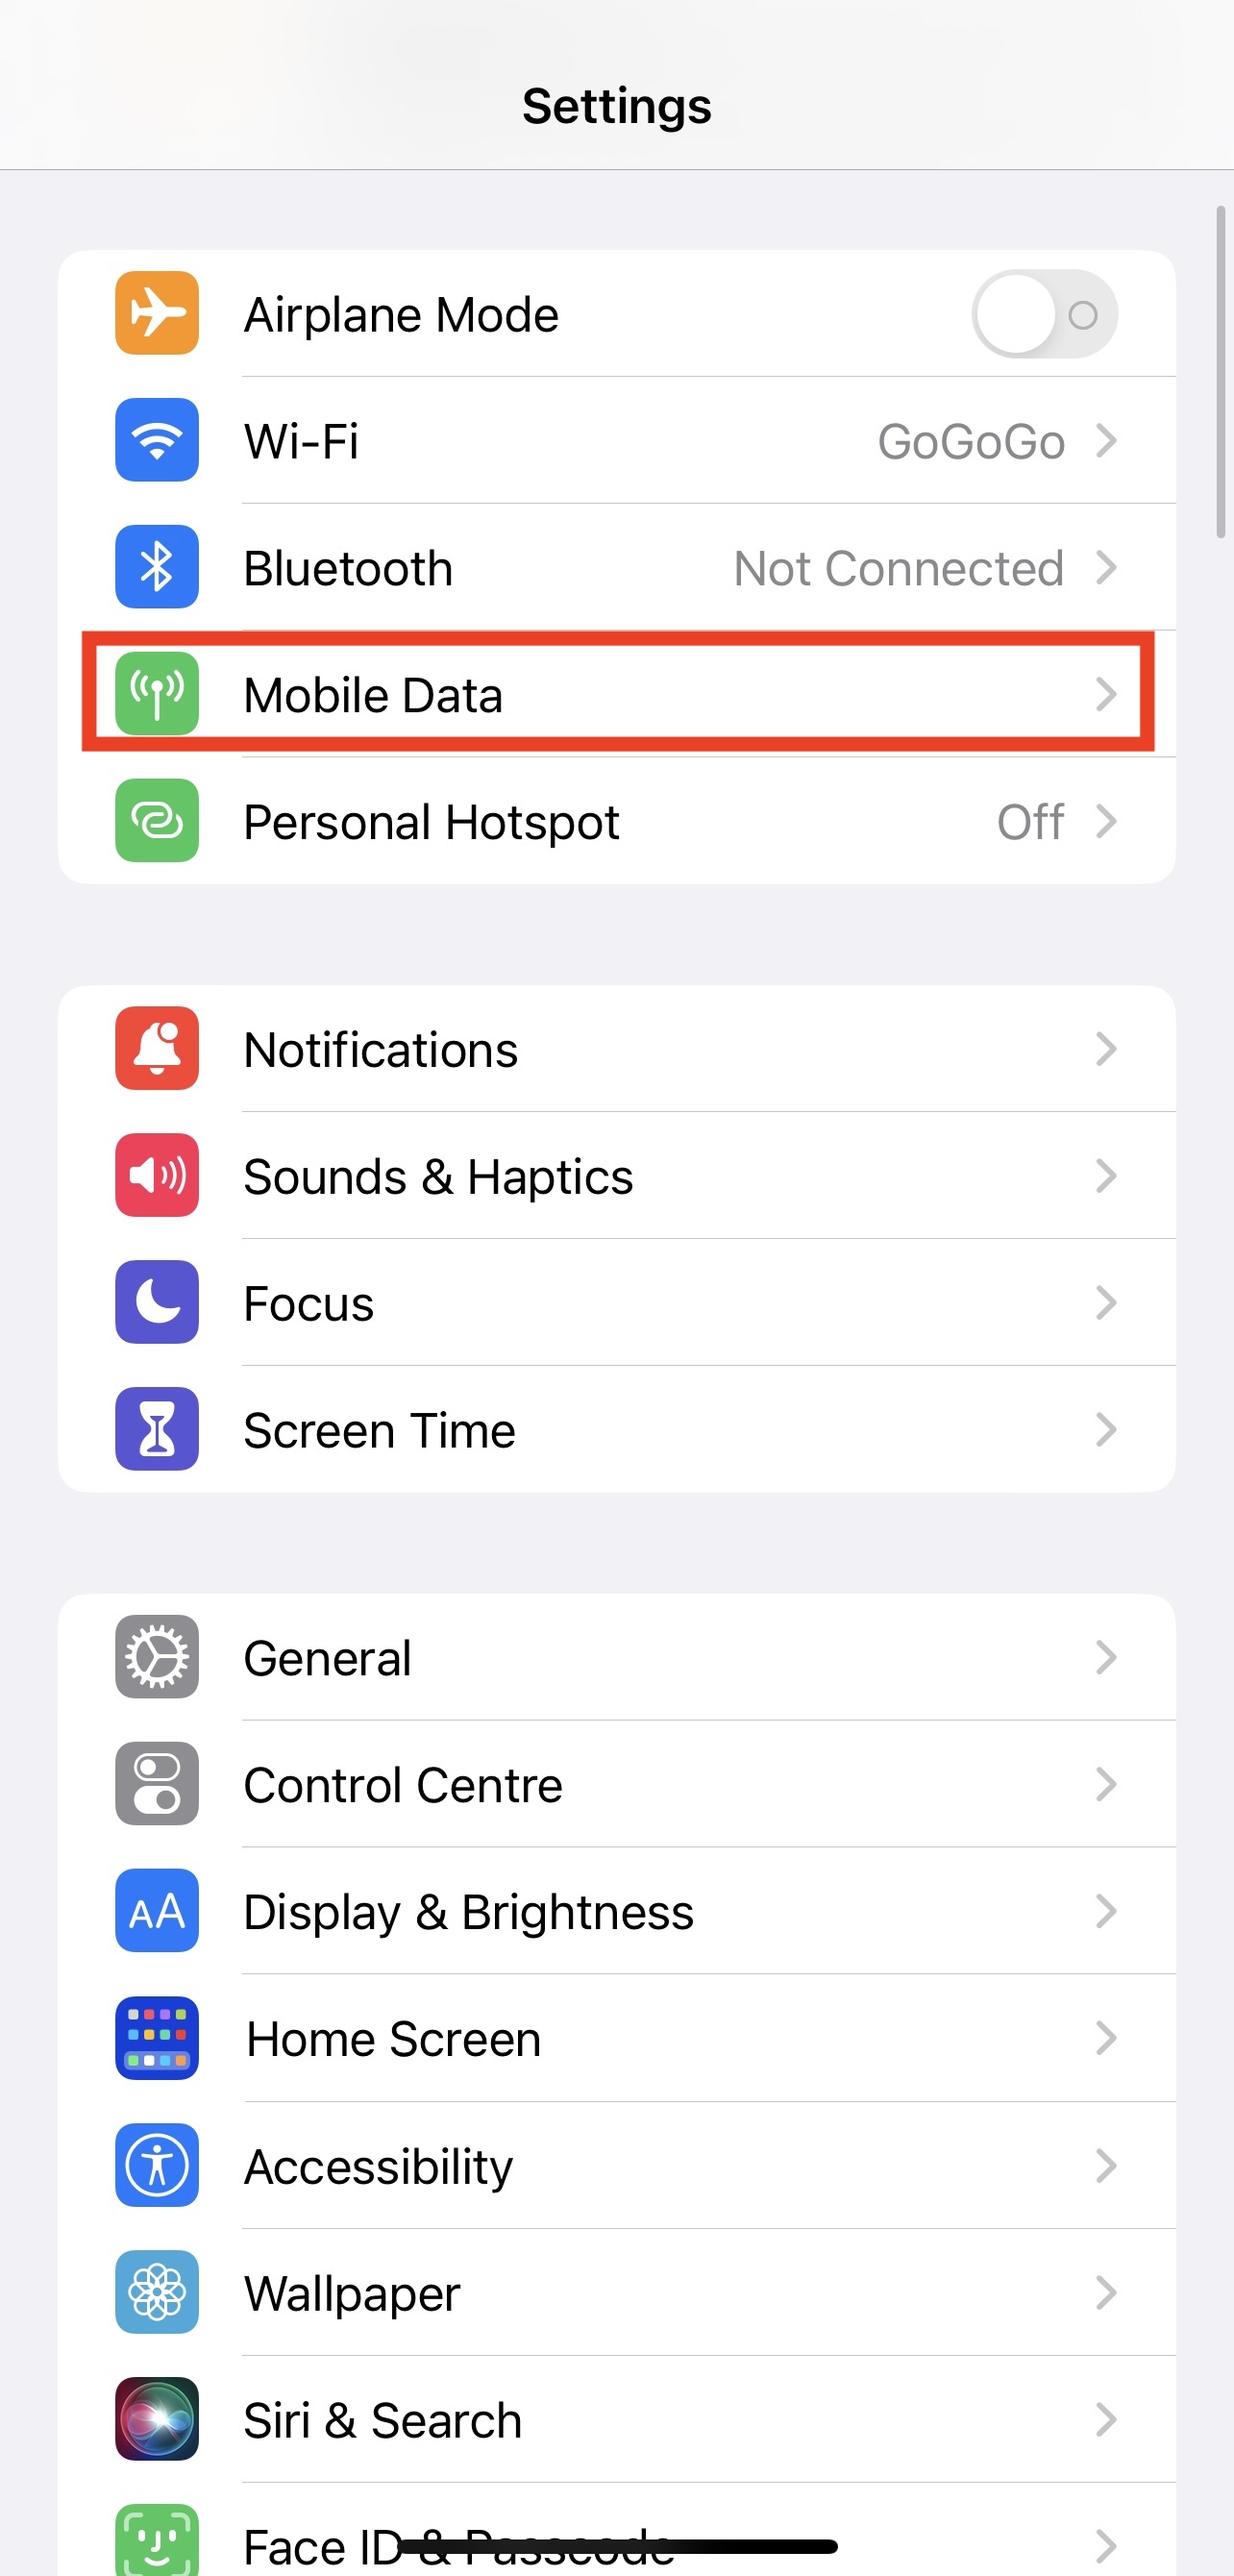
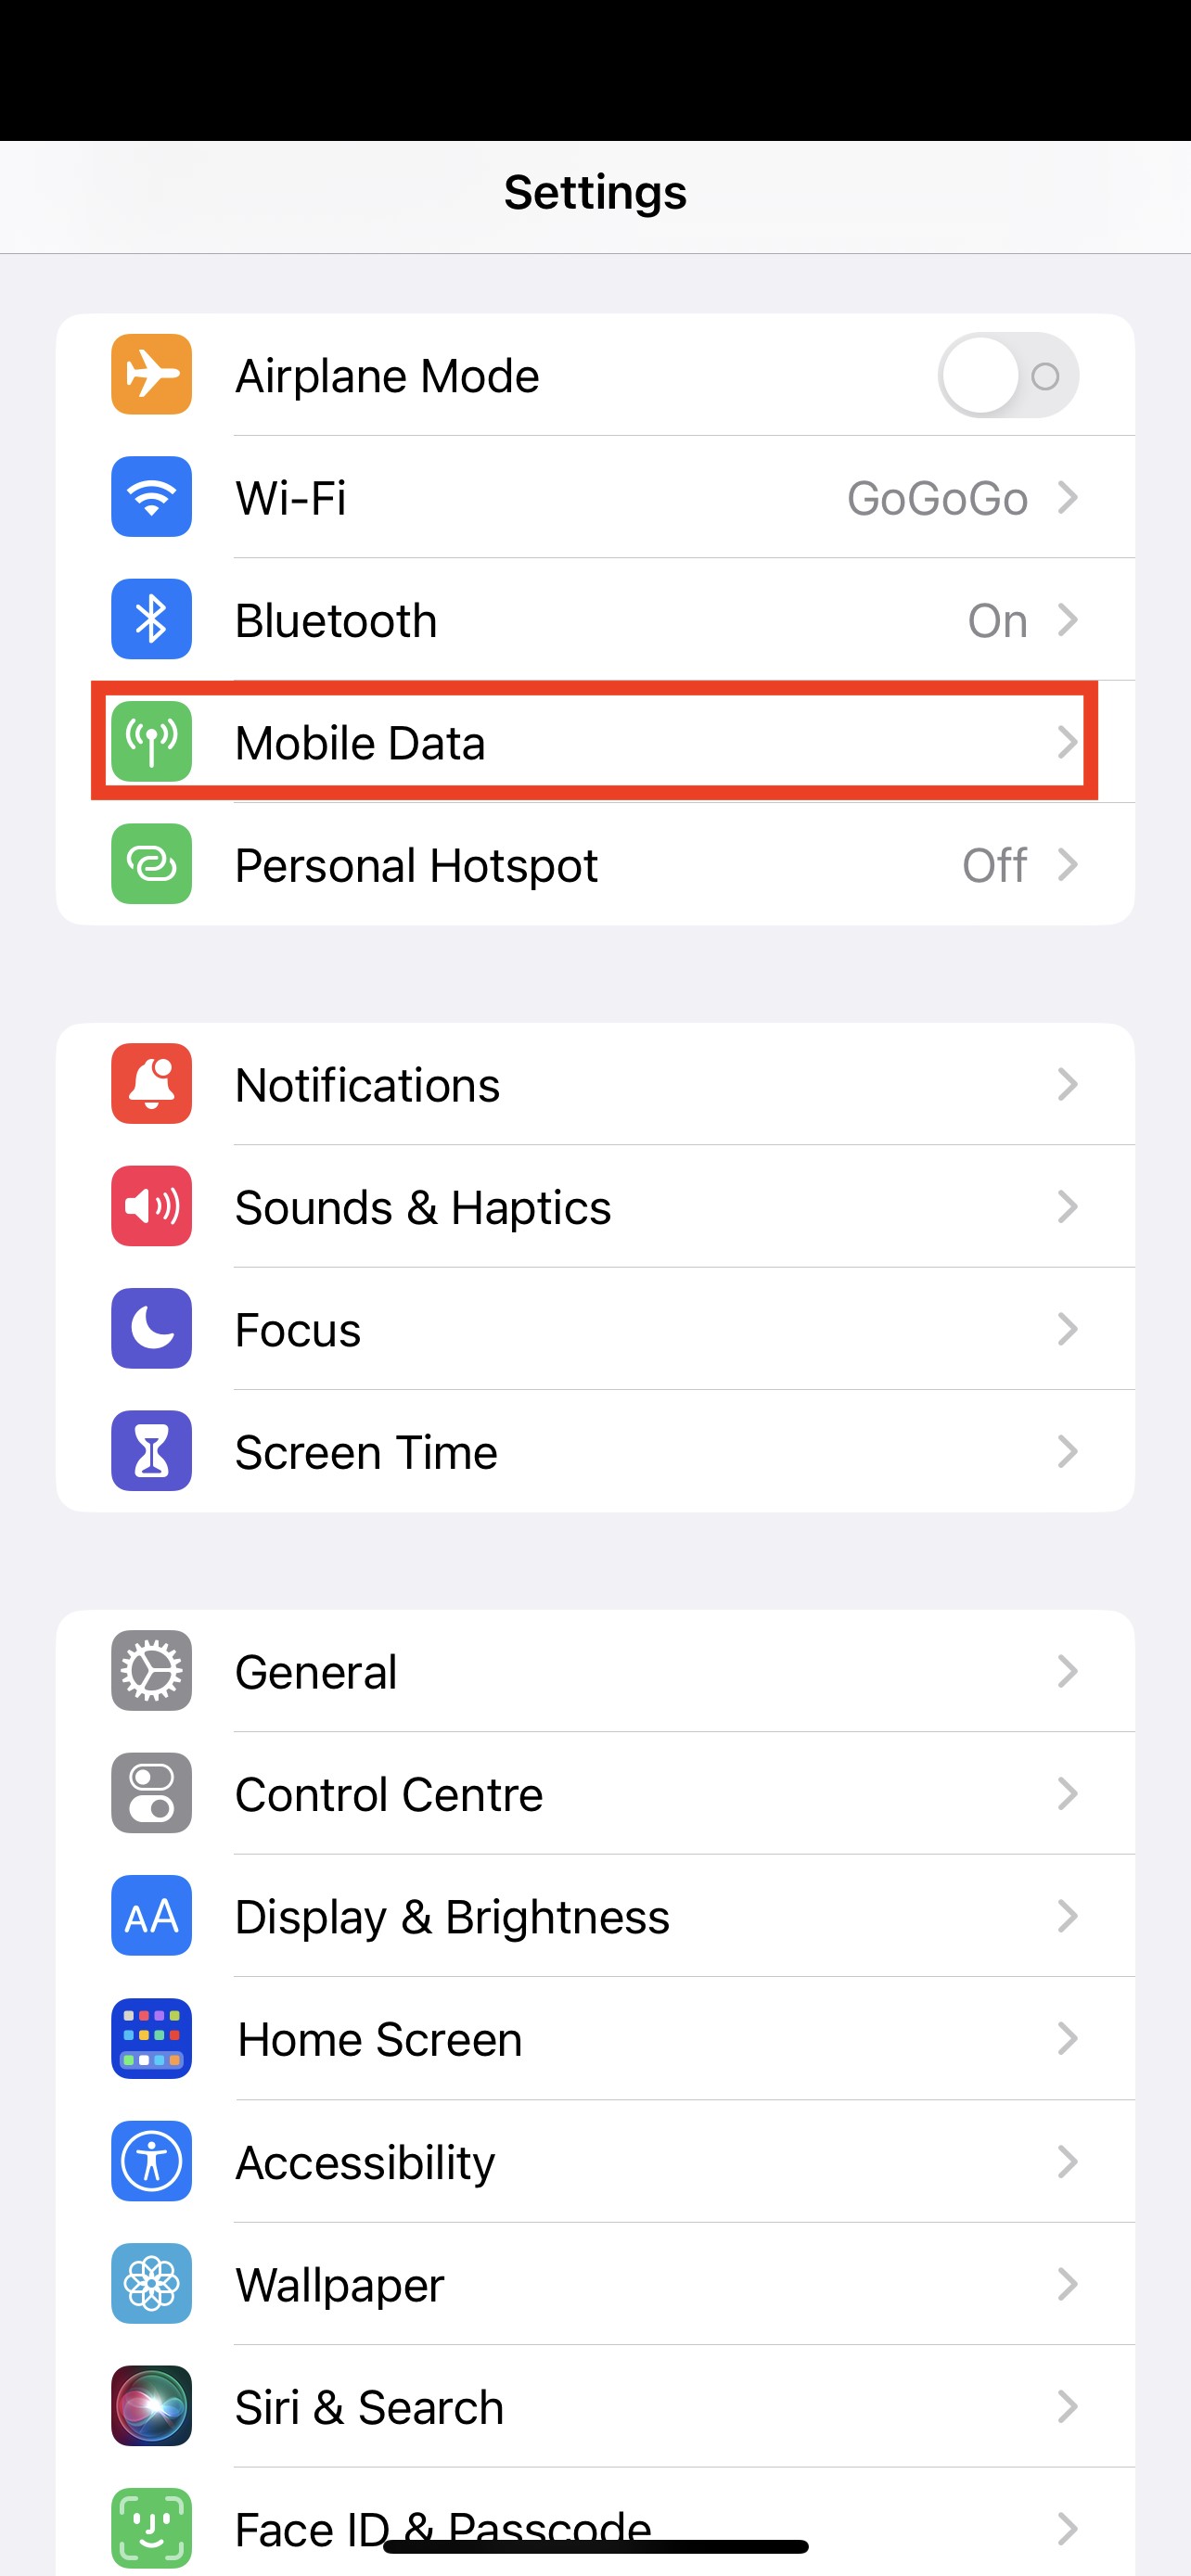
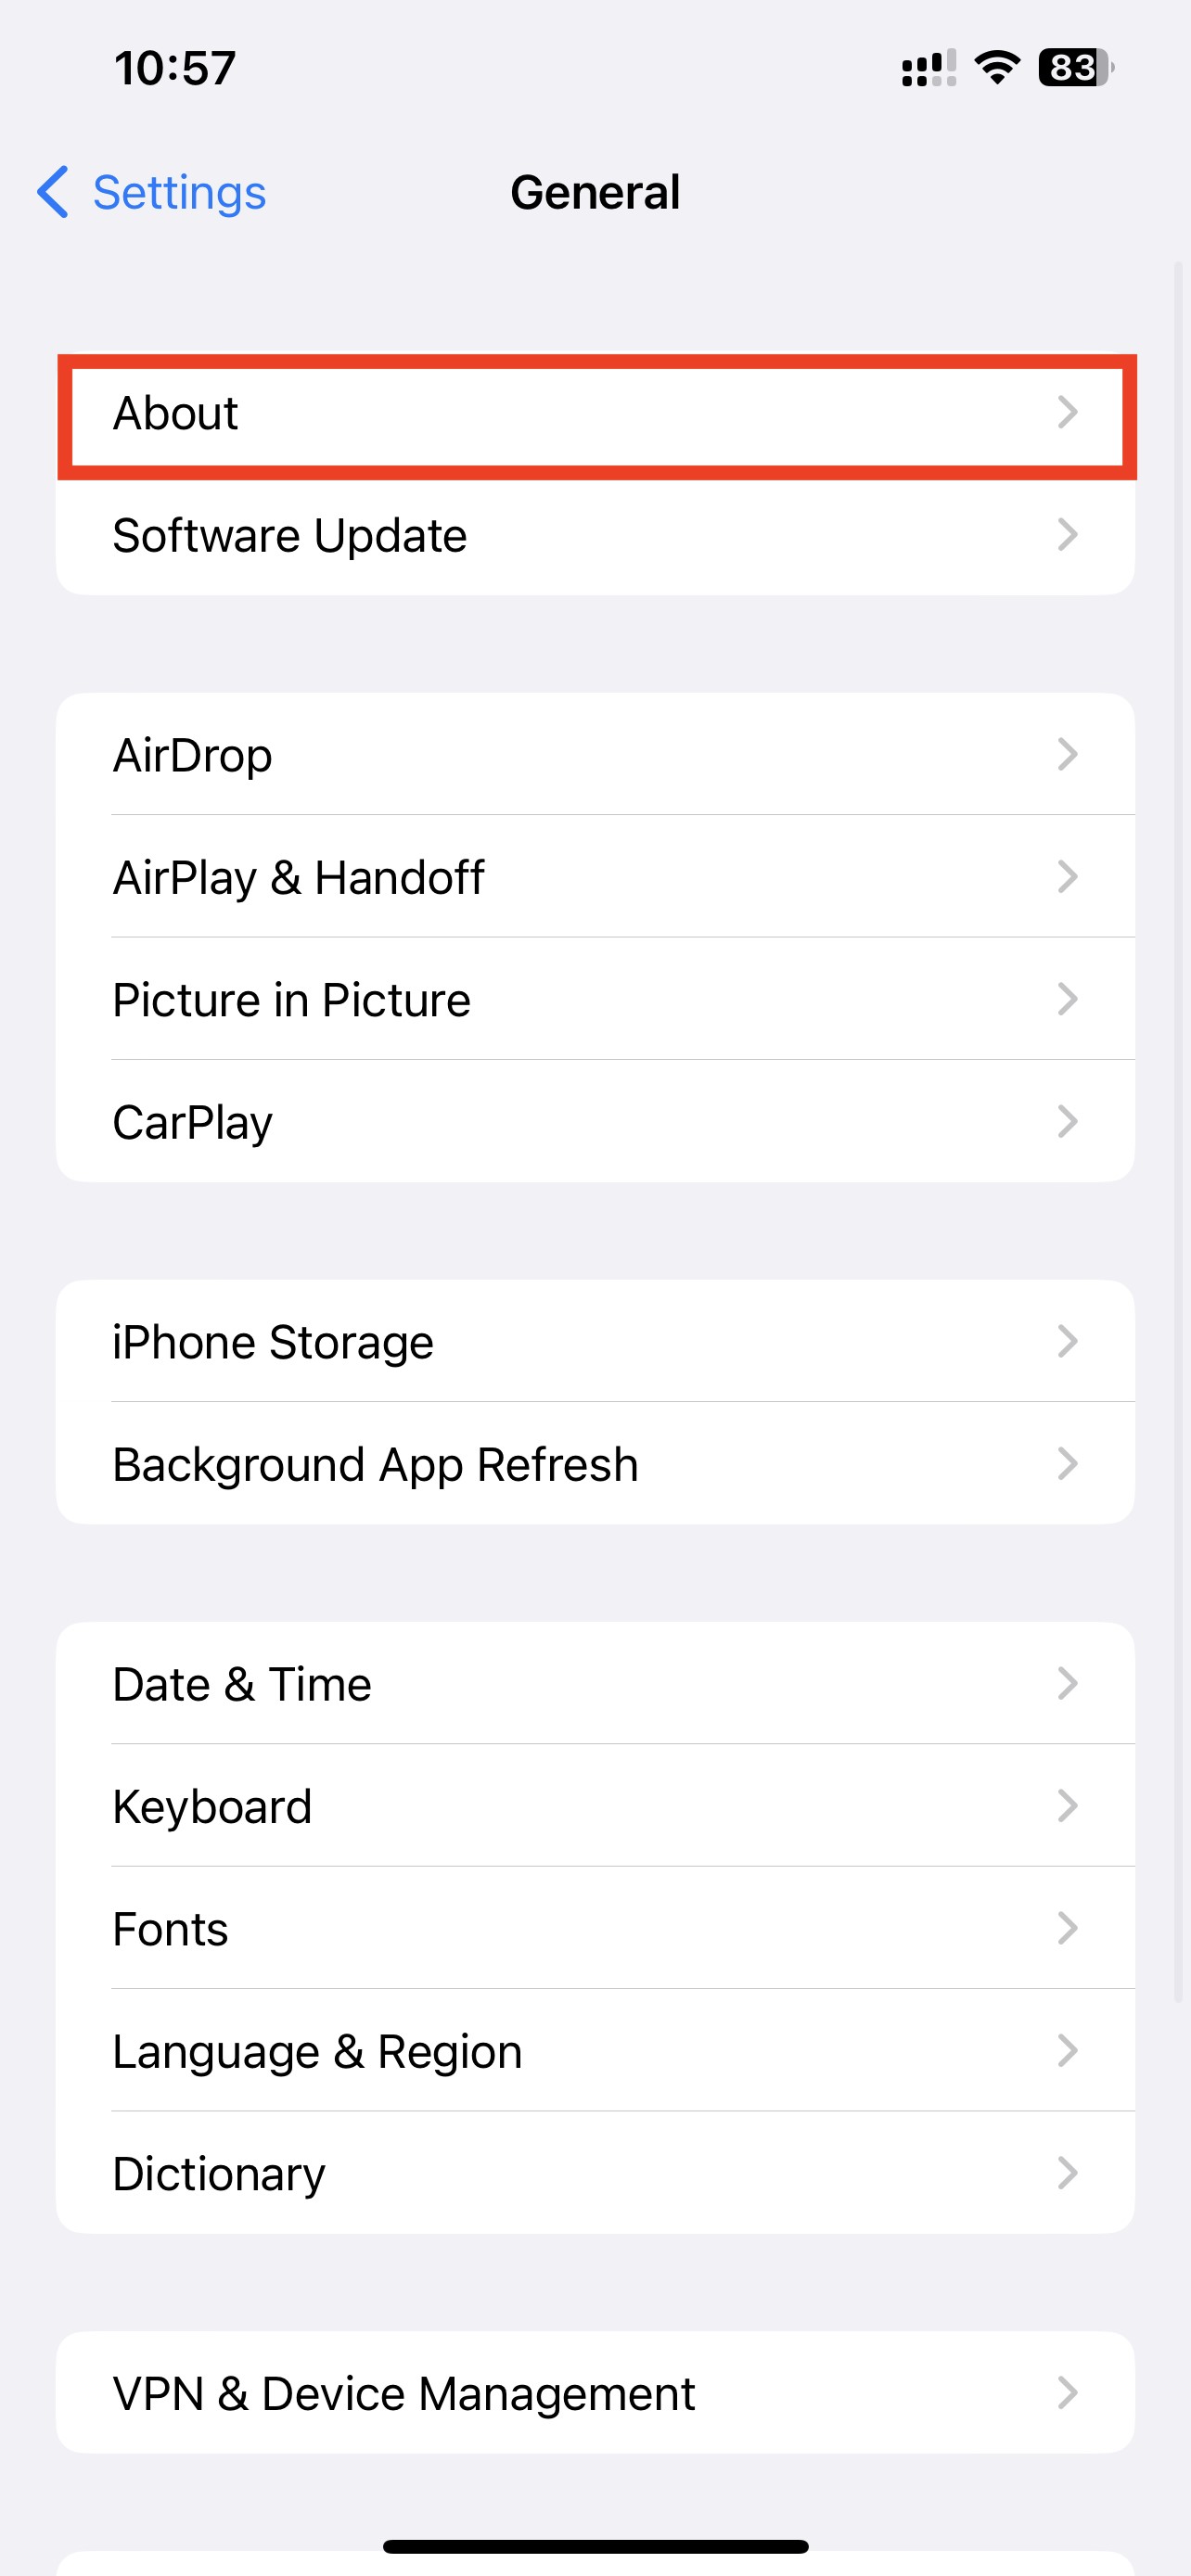
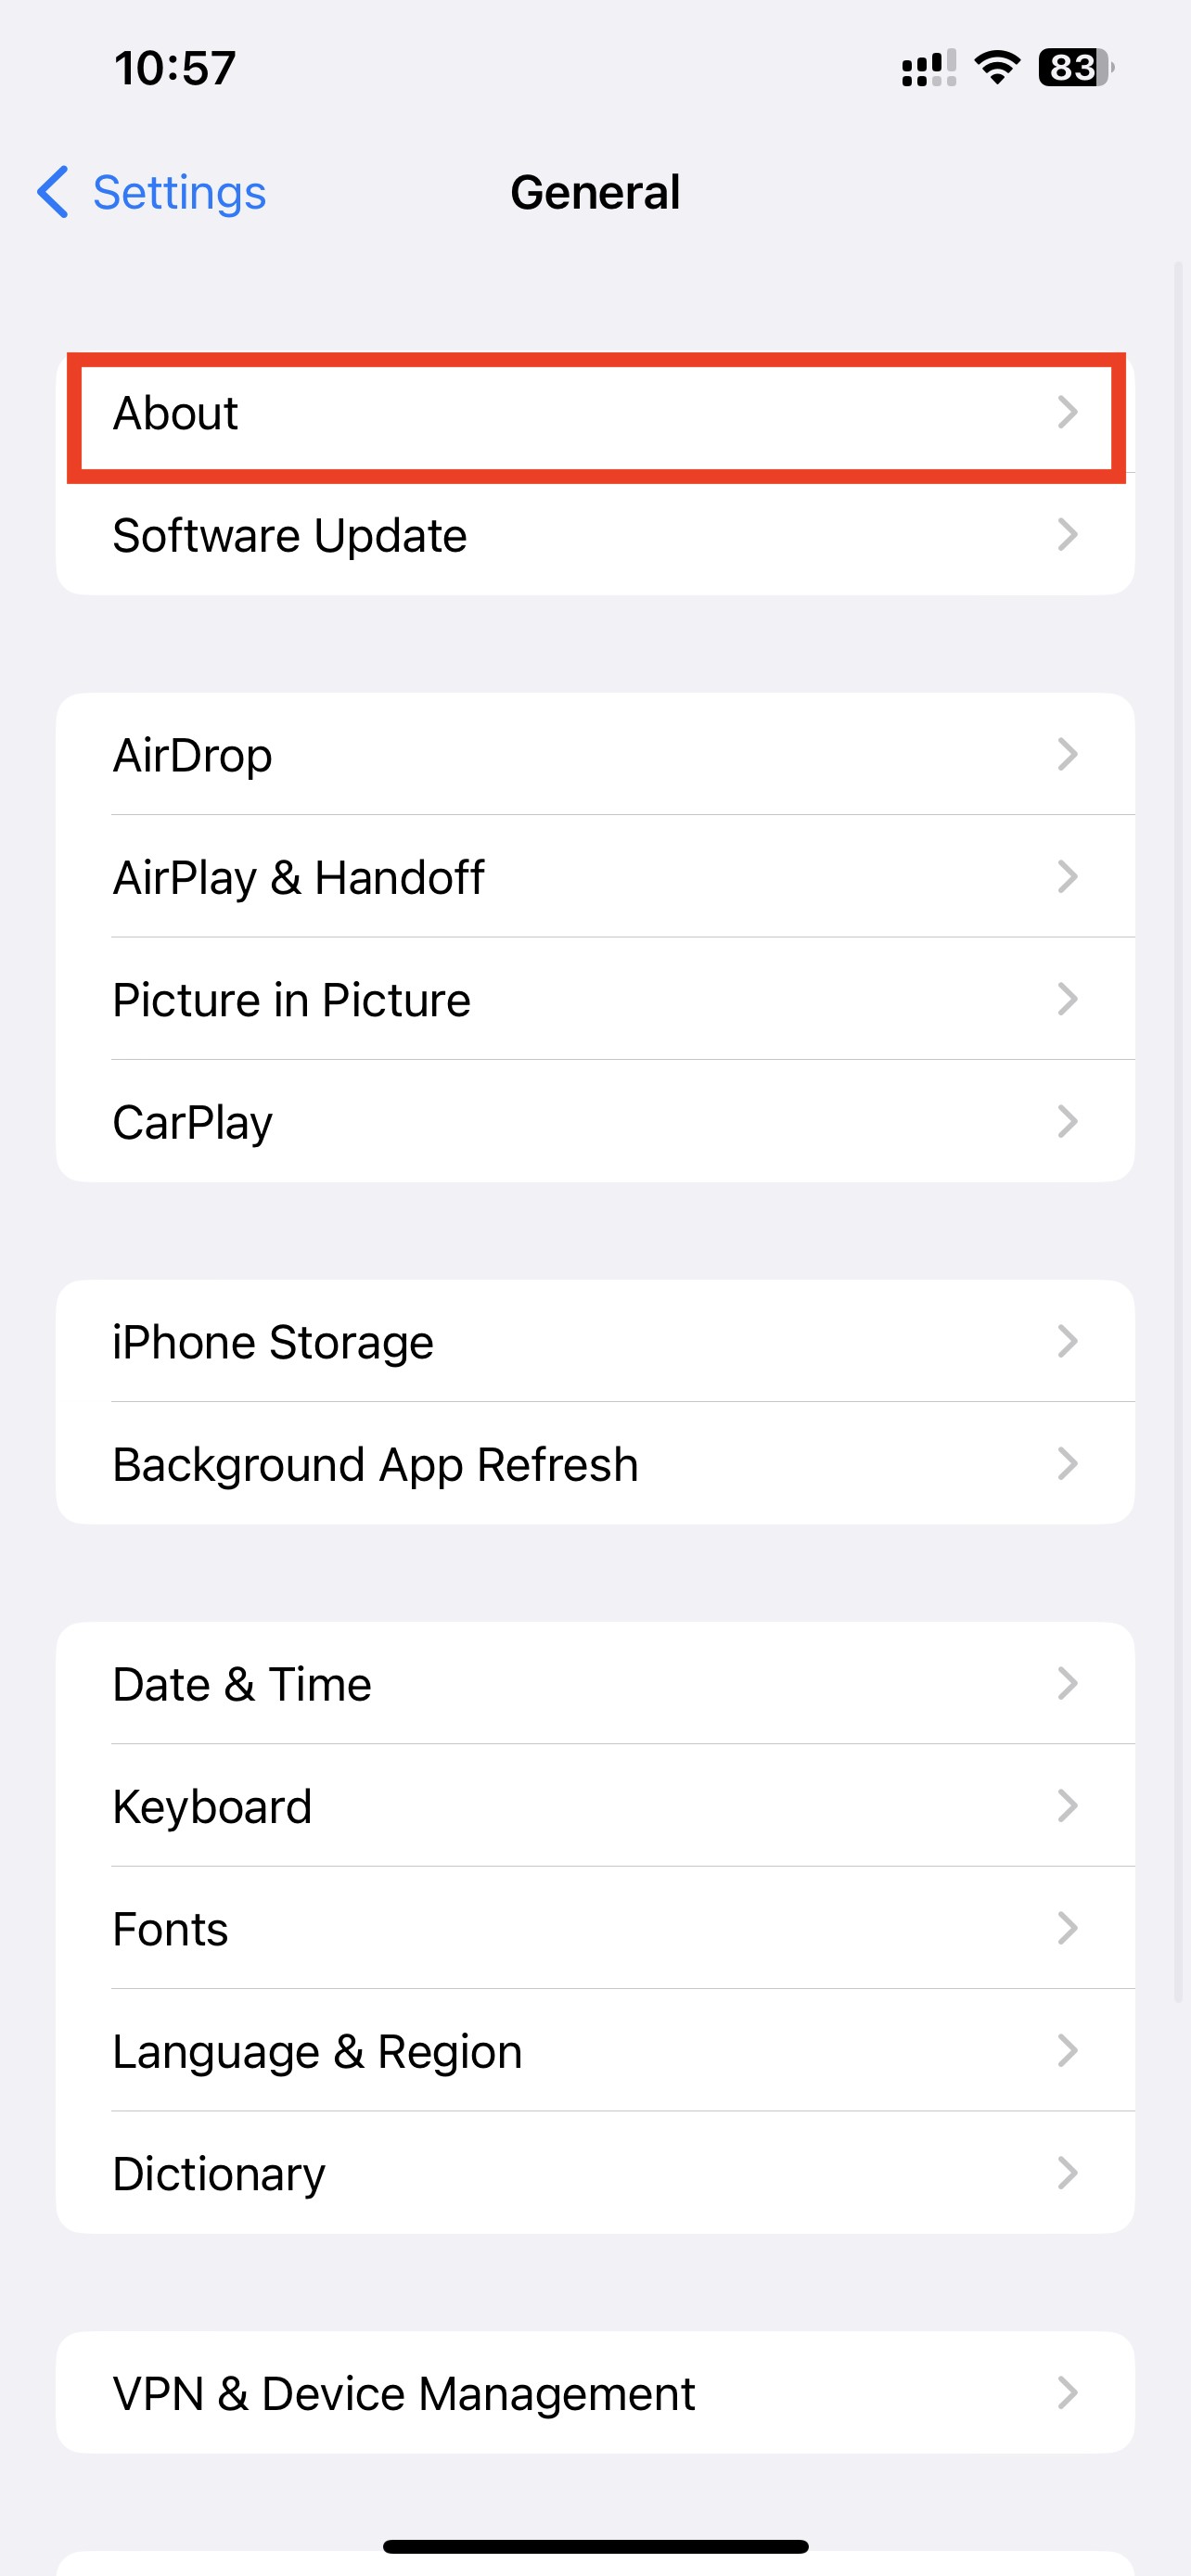
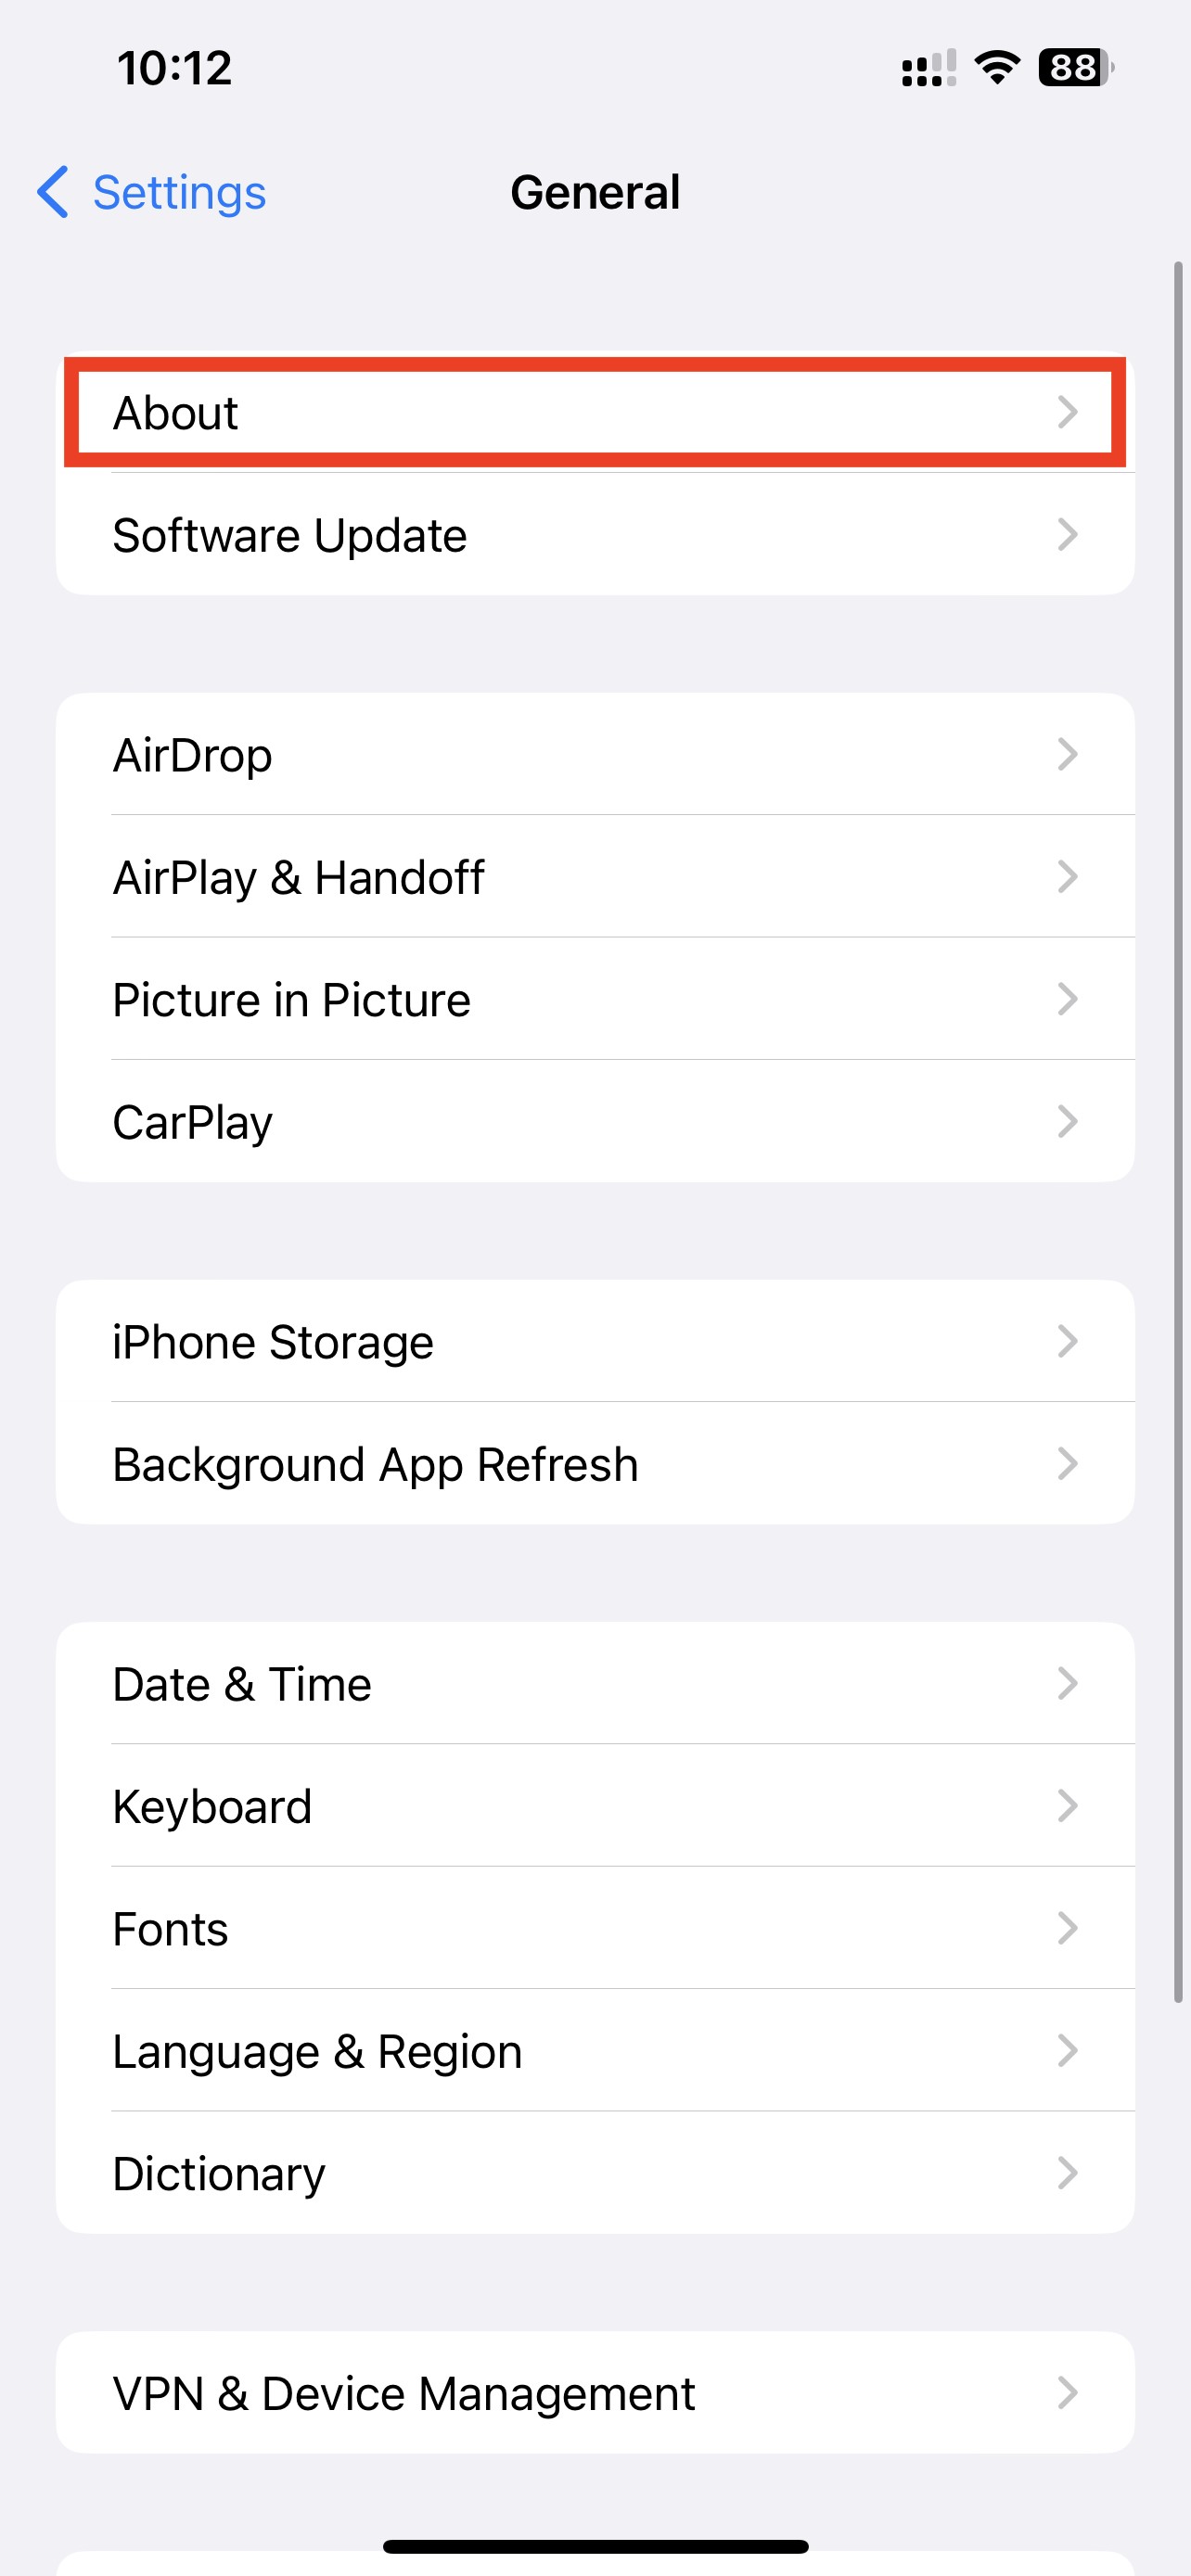
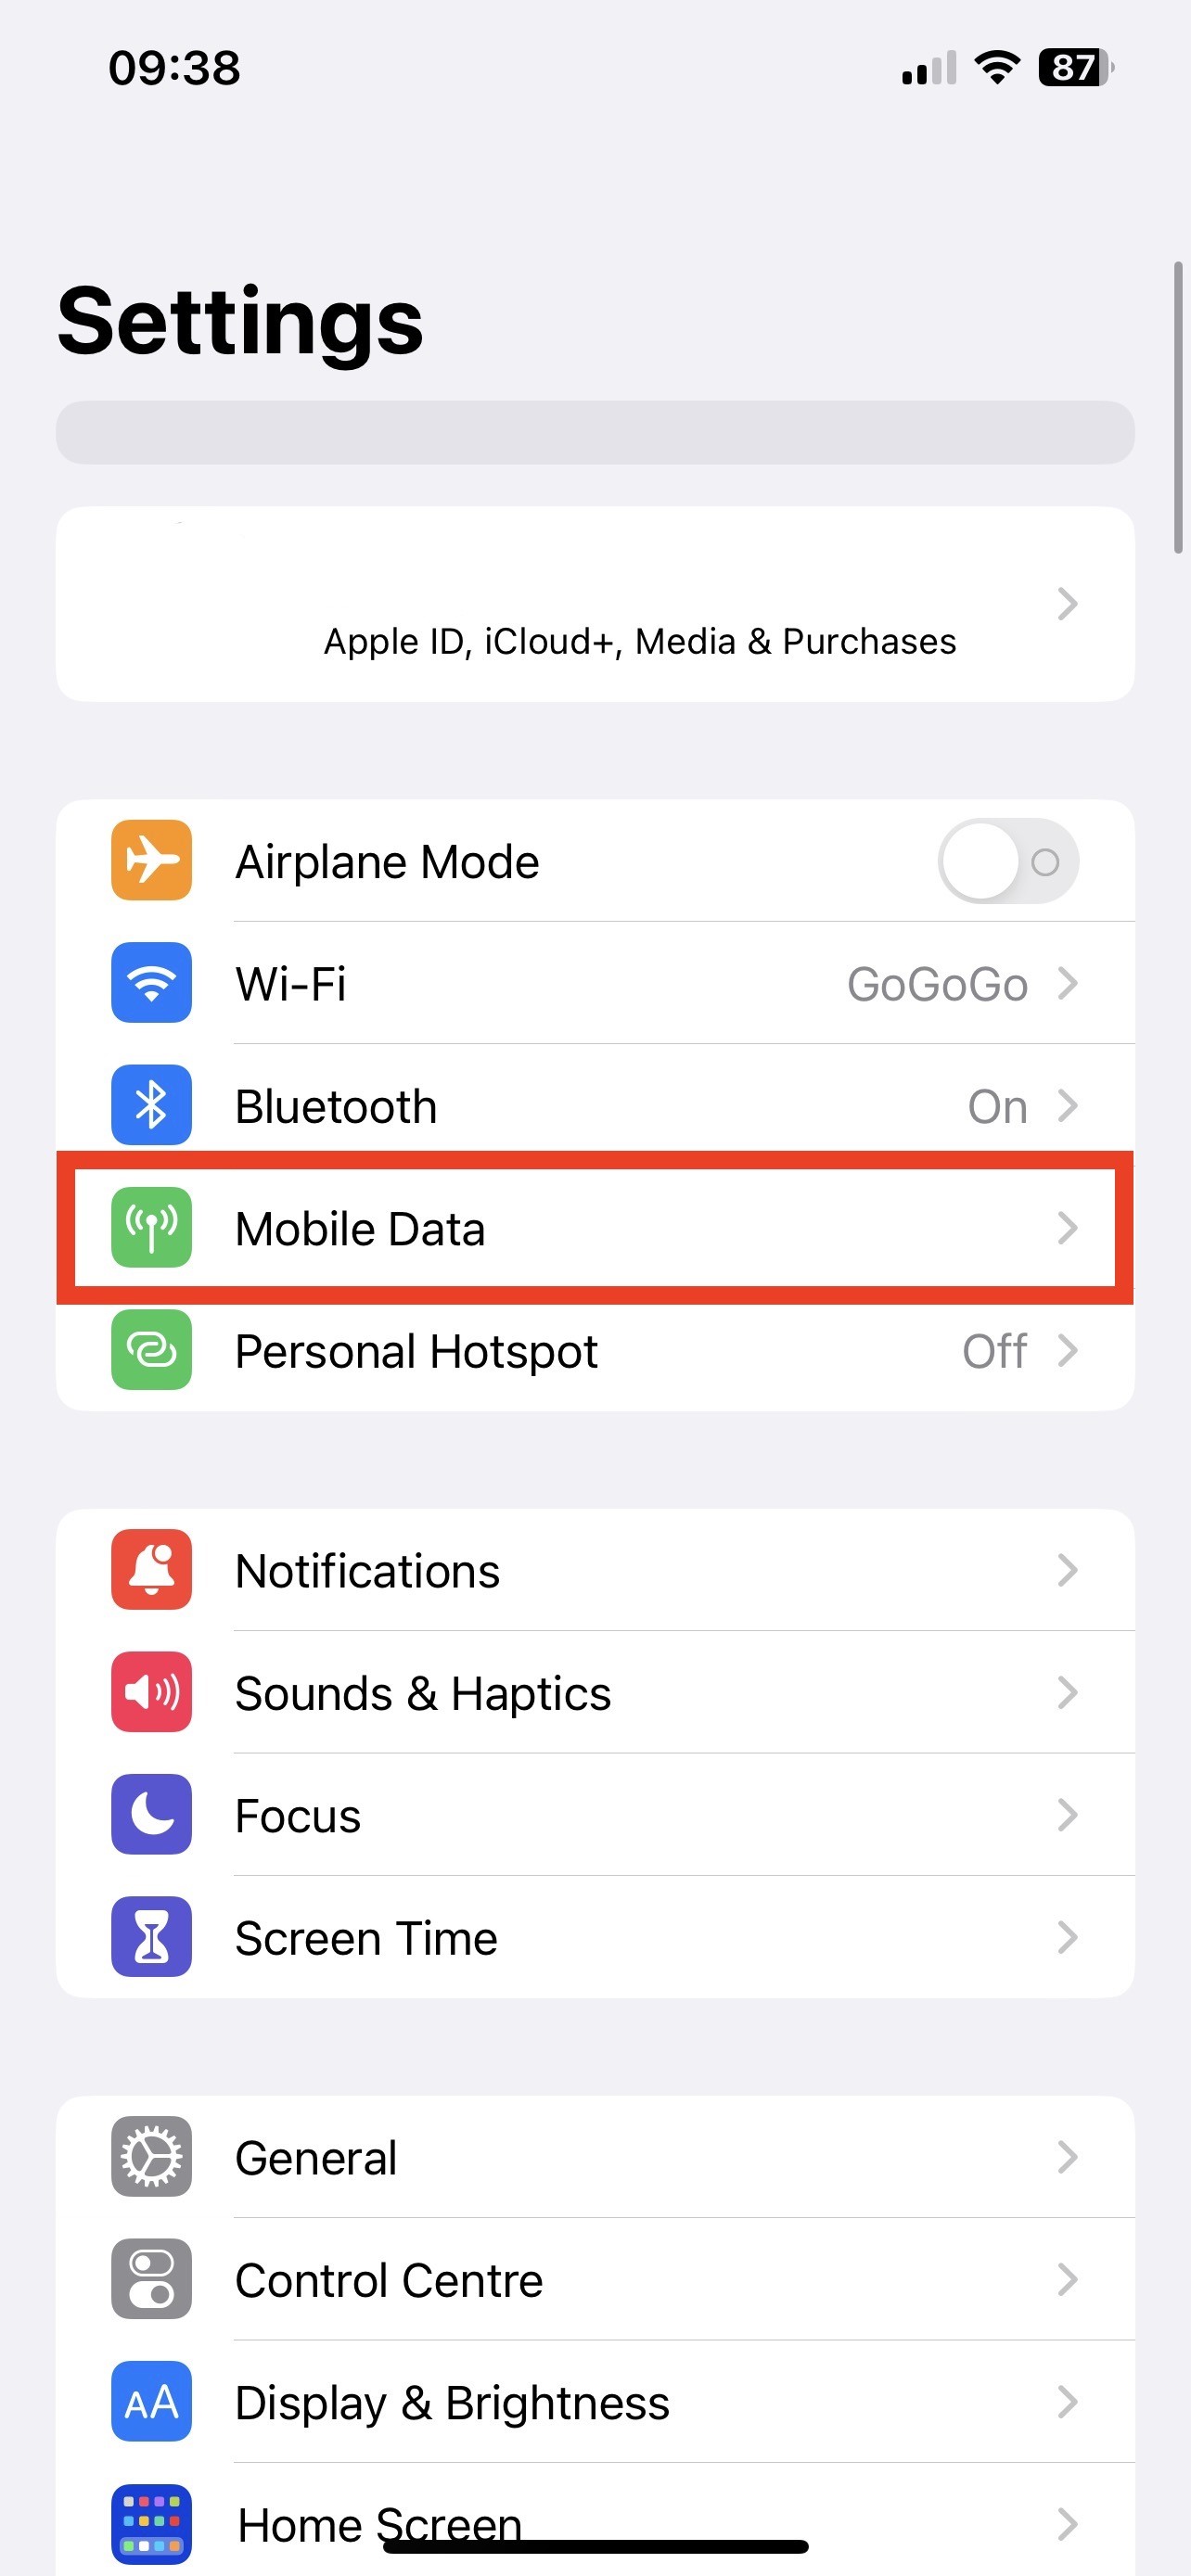
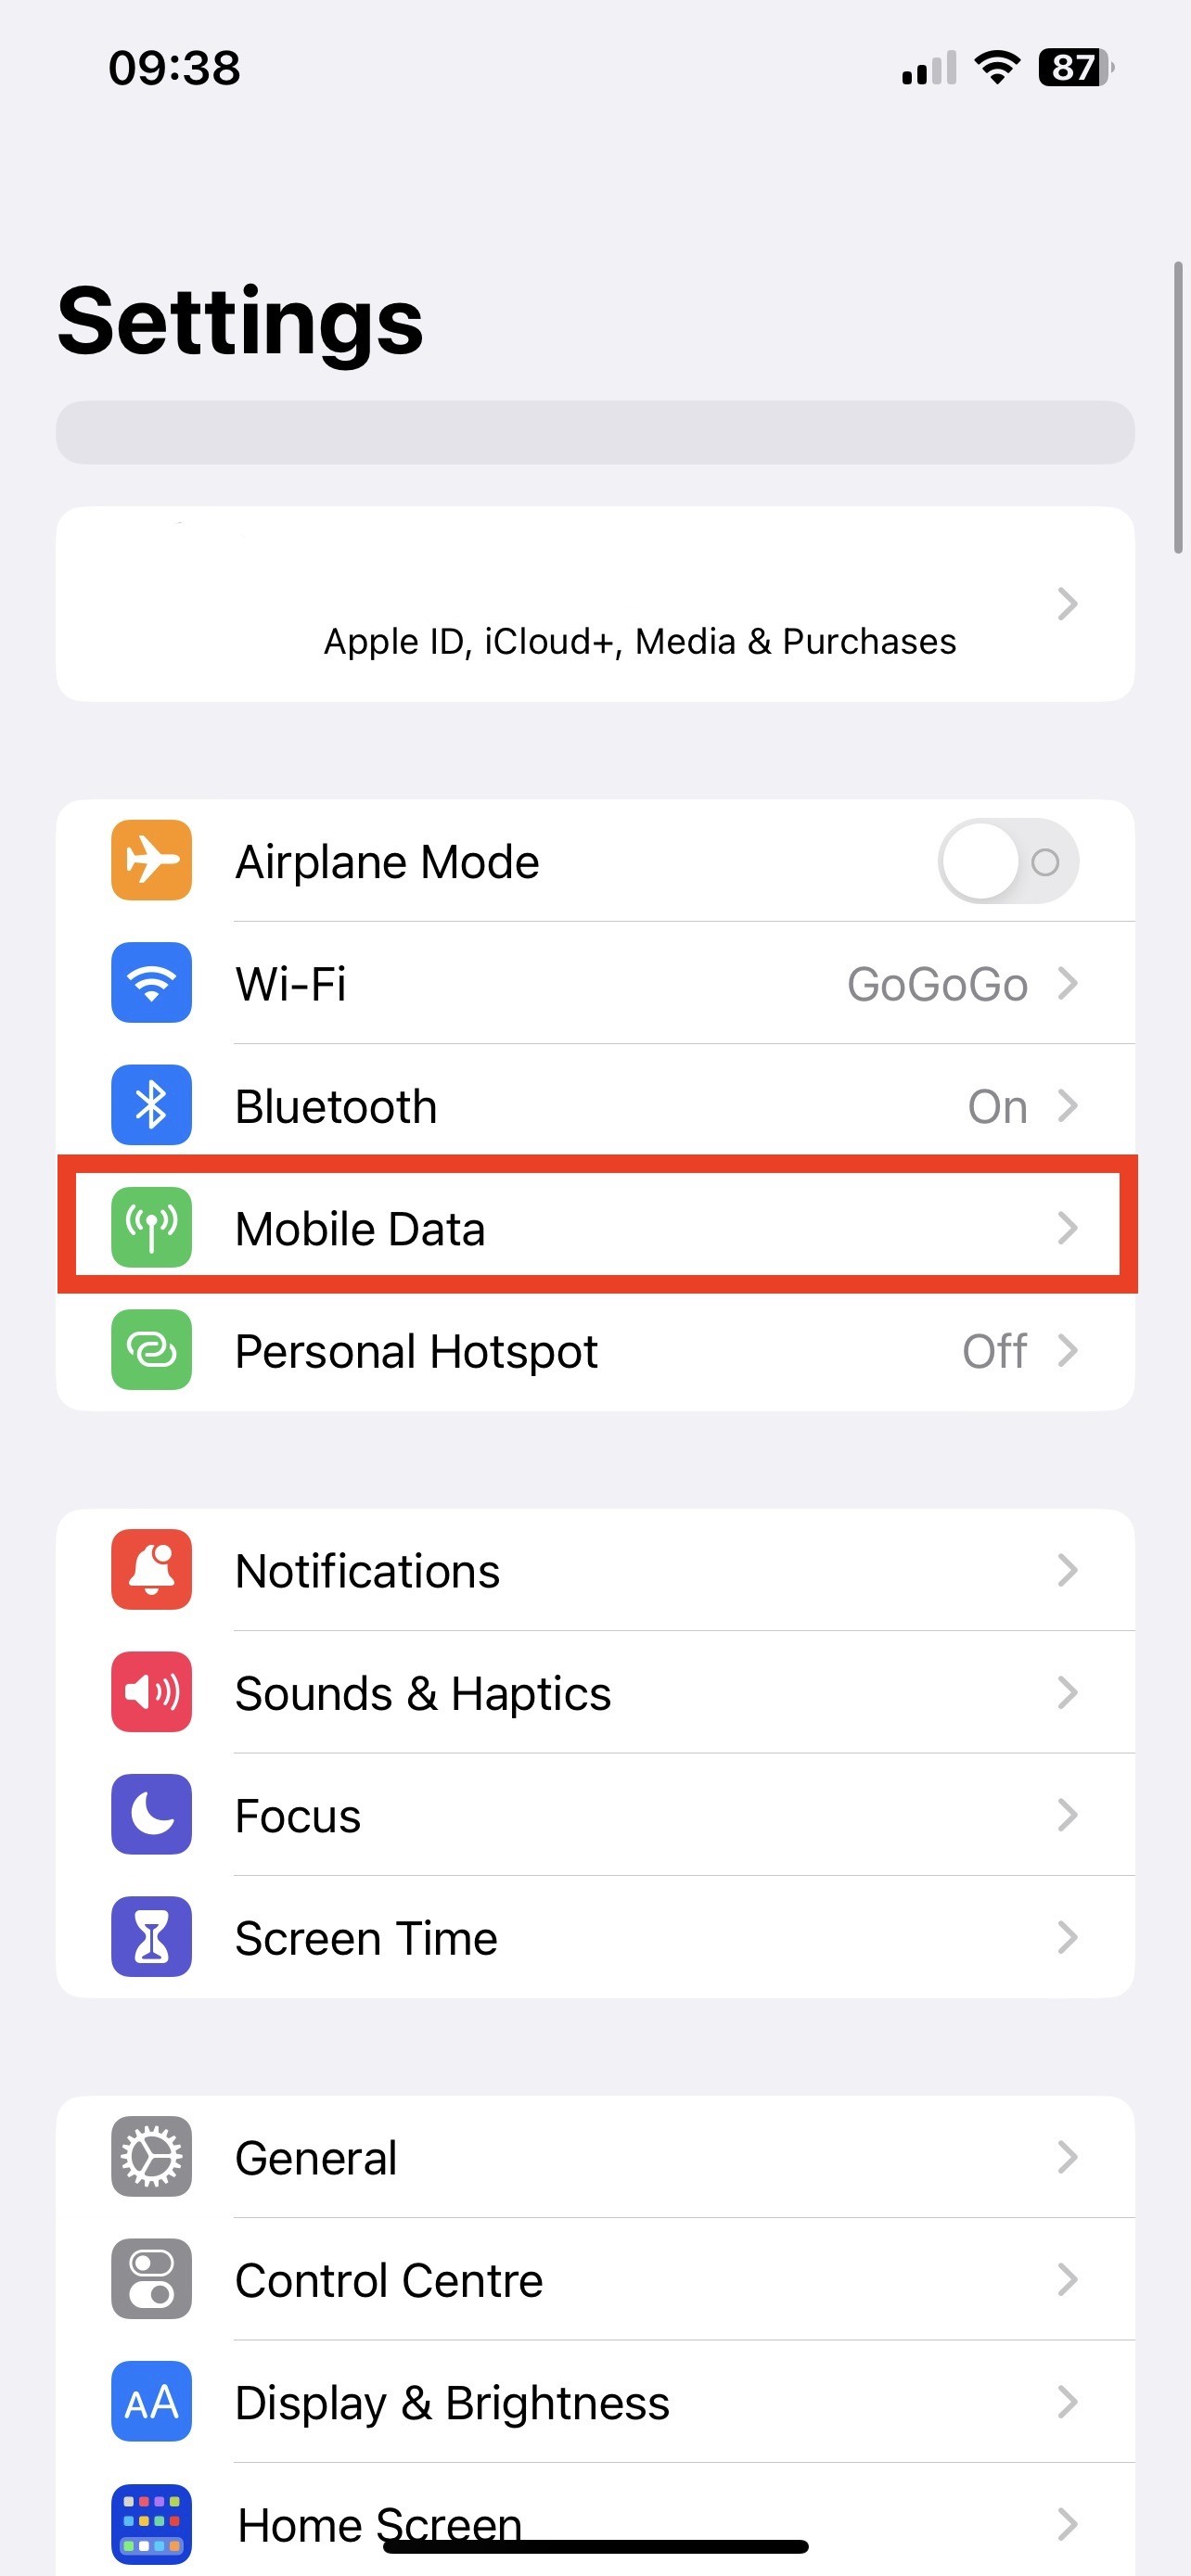
1. Go into your "Settings" and click on "Mobile Data / Cellular".
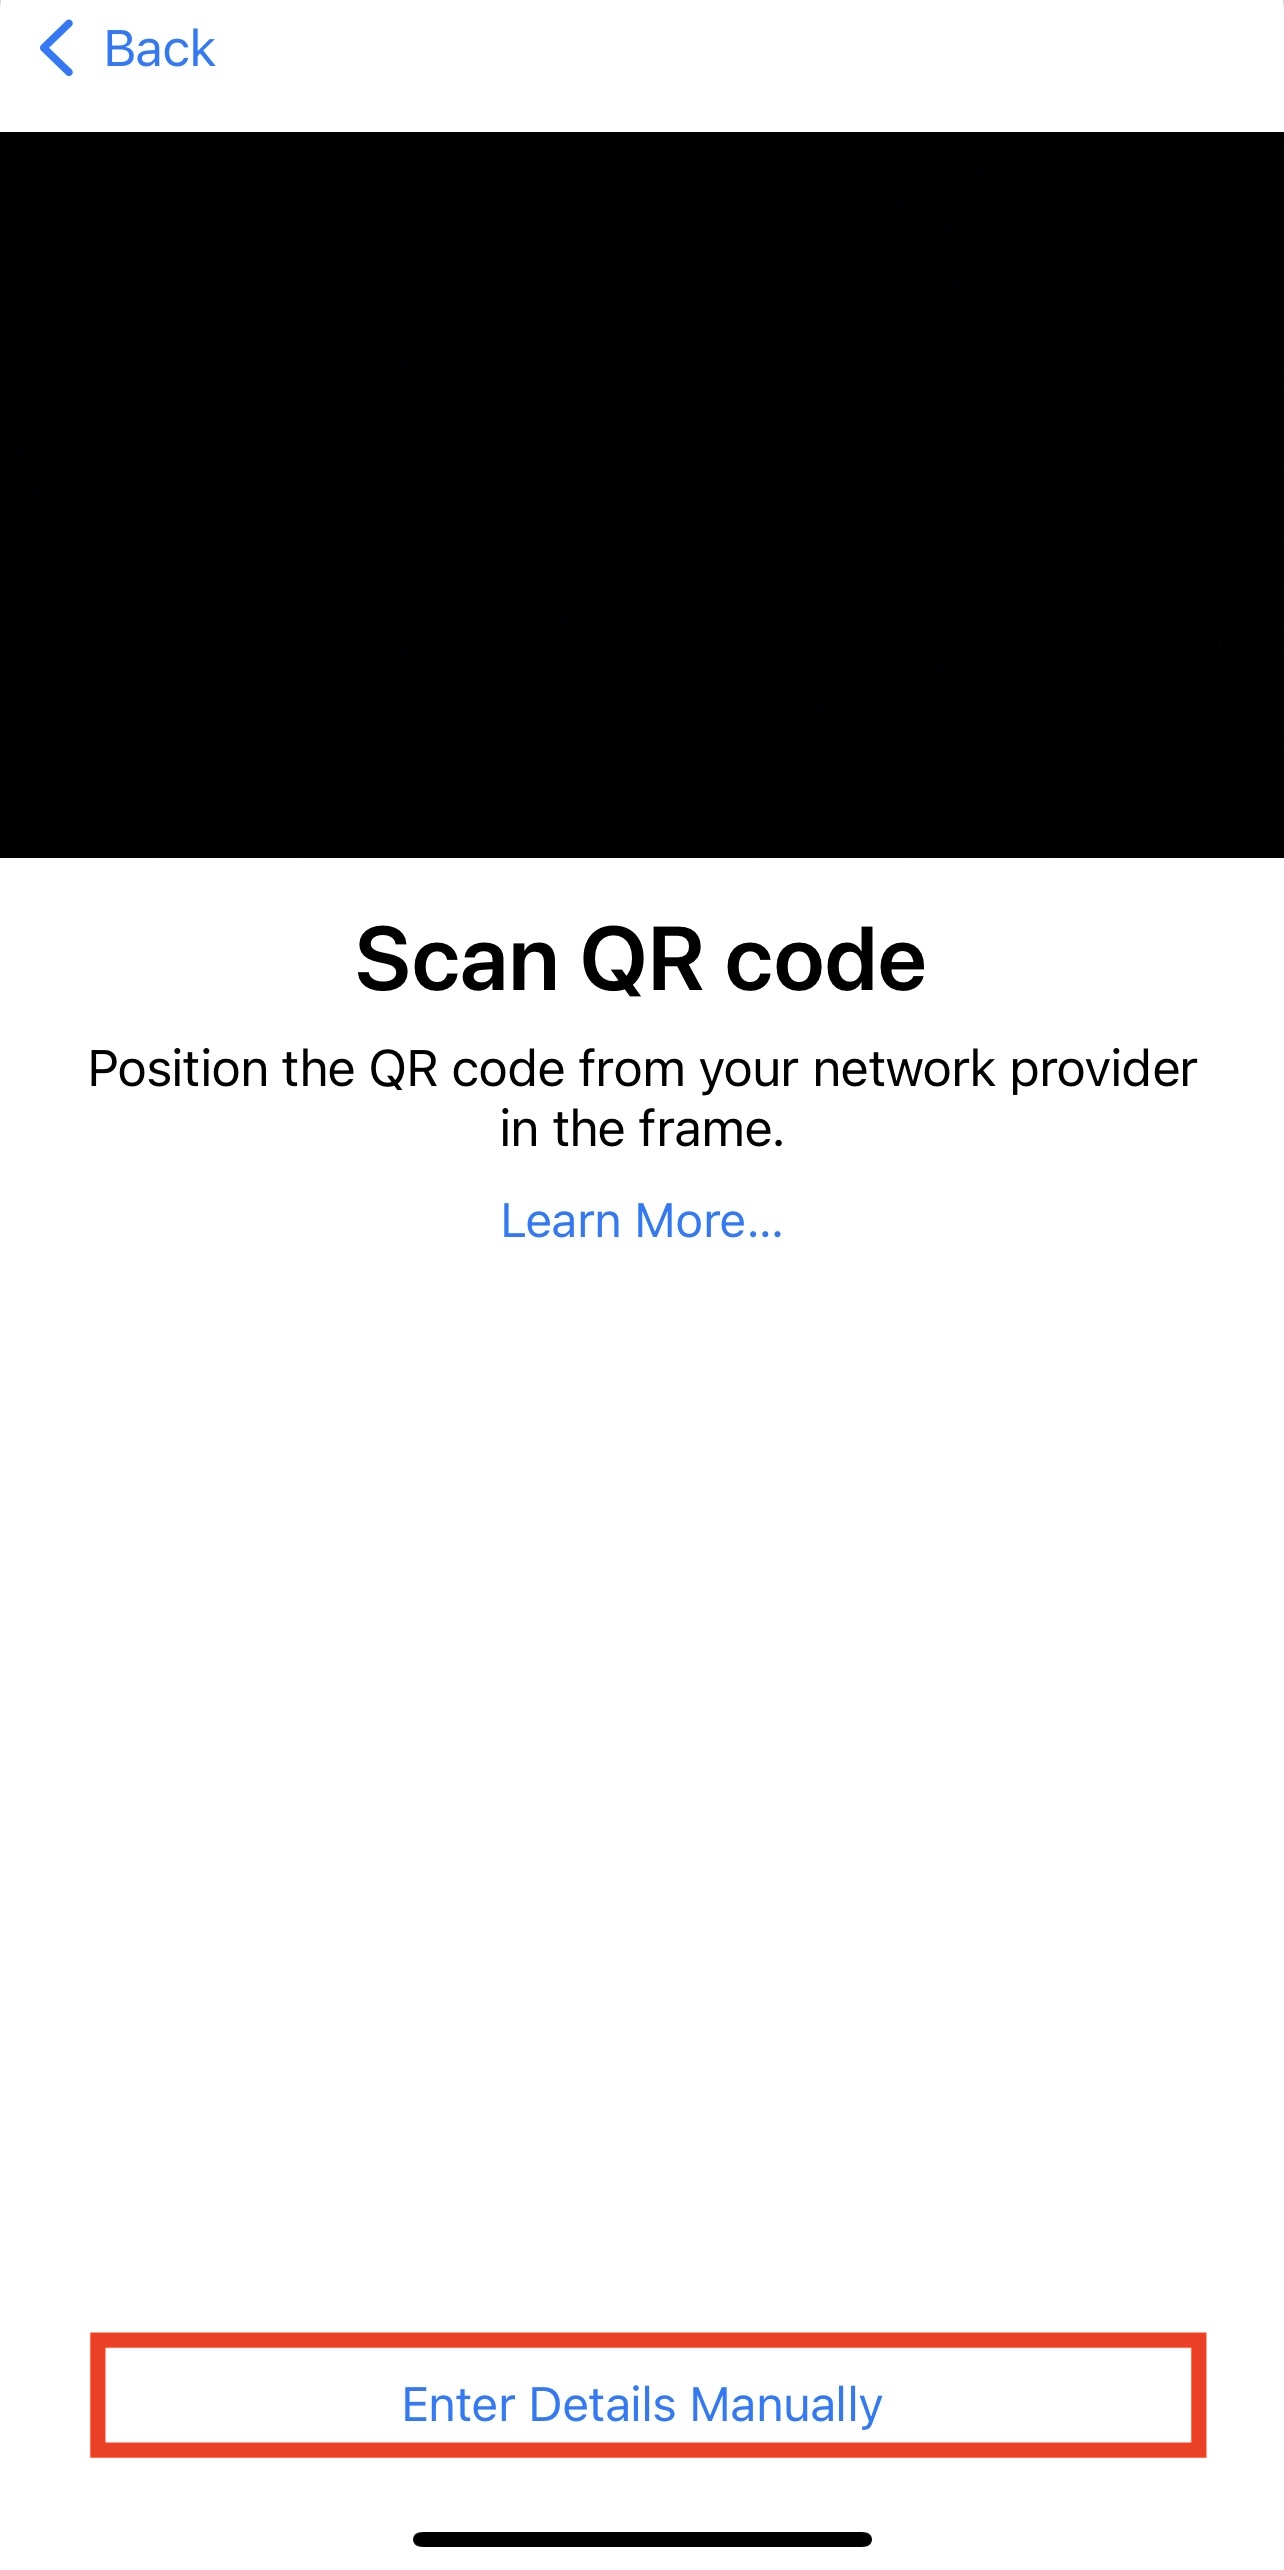
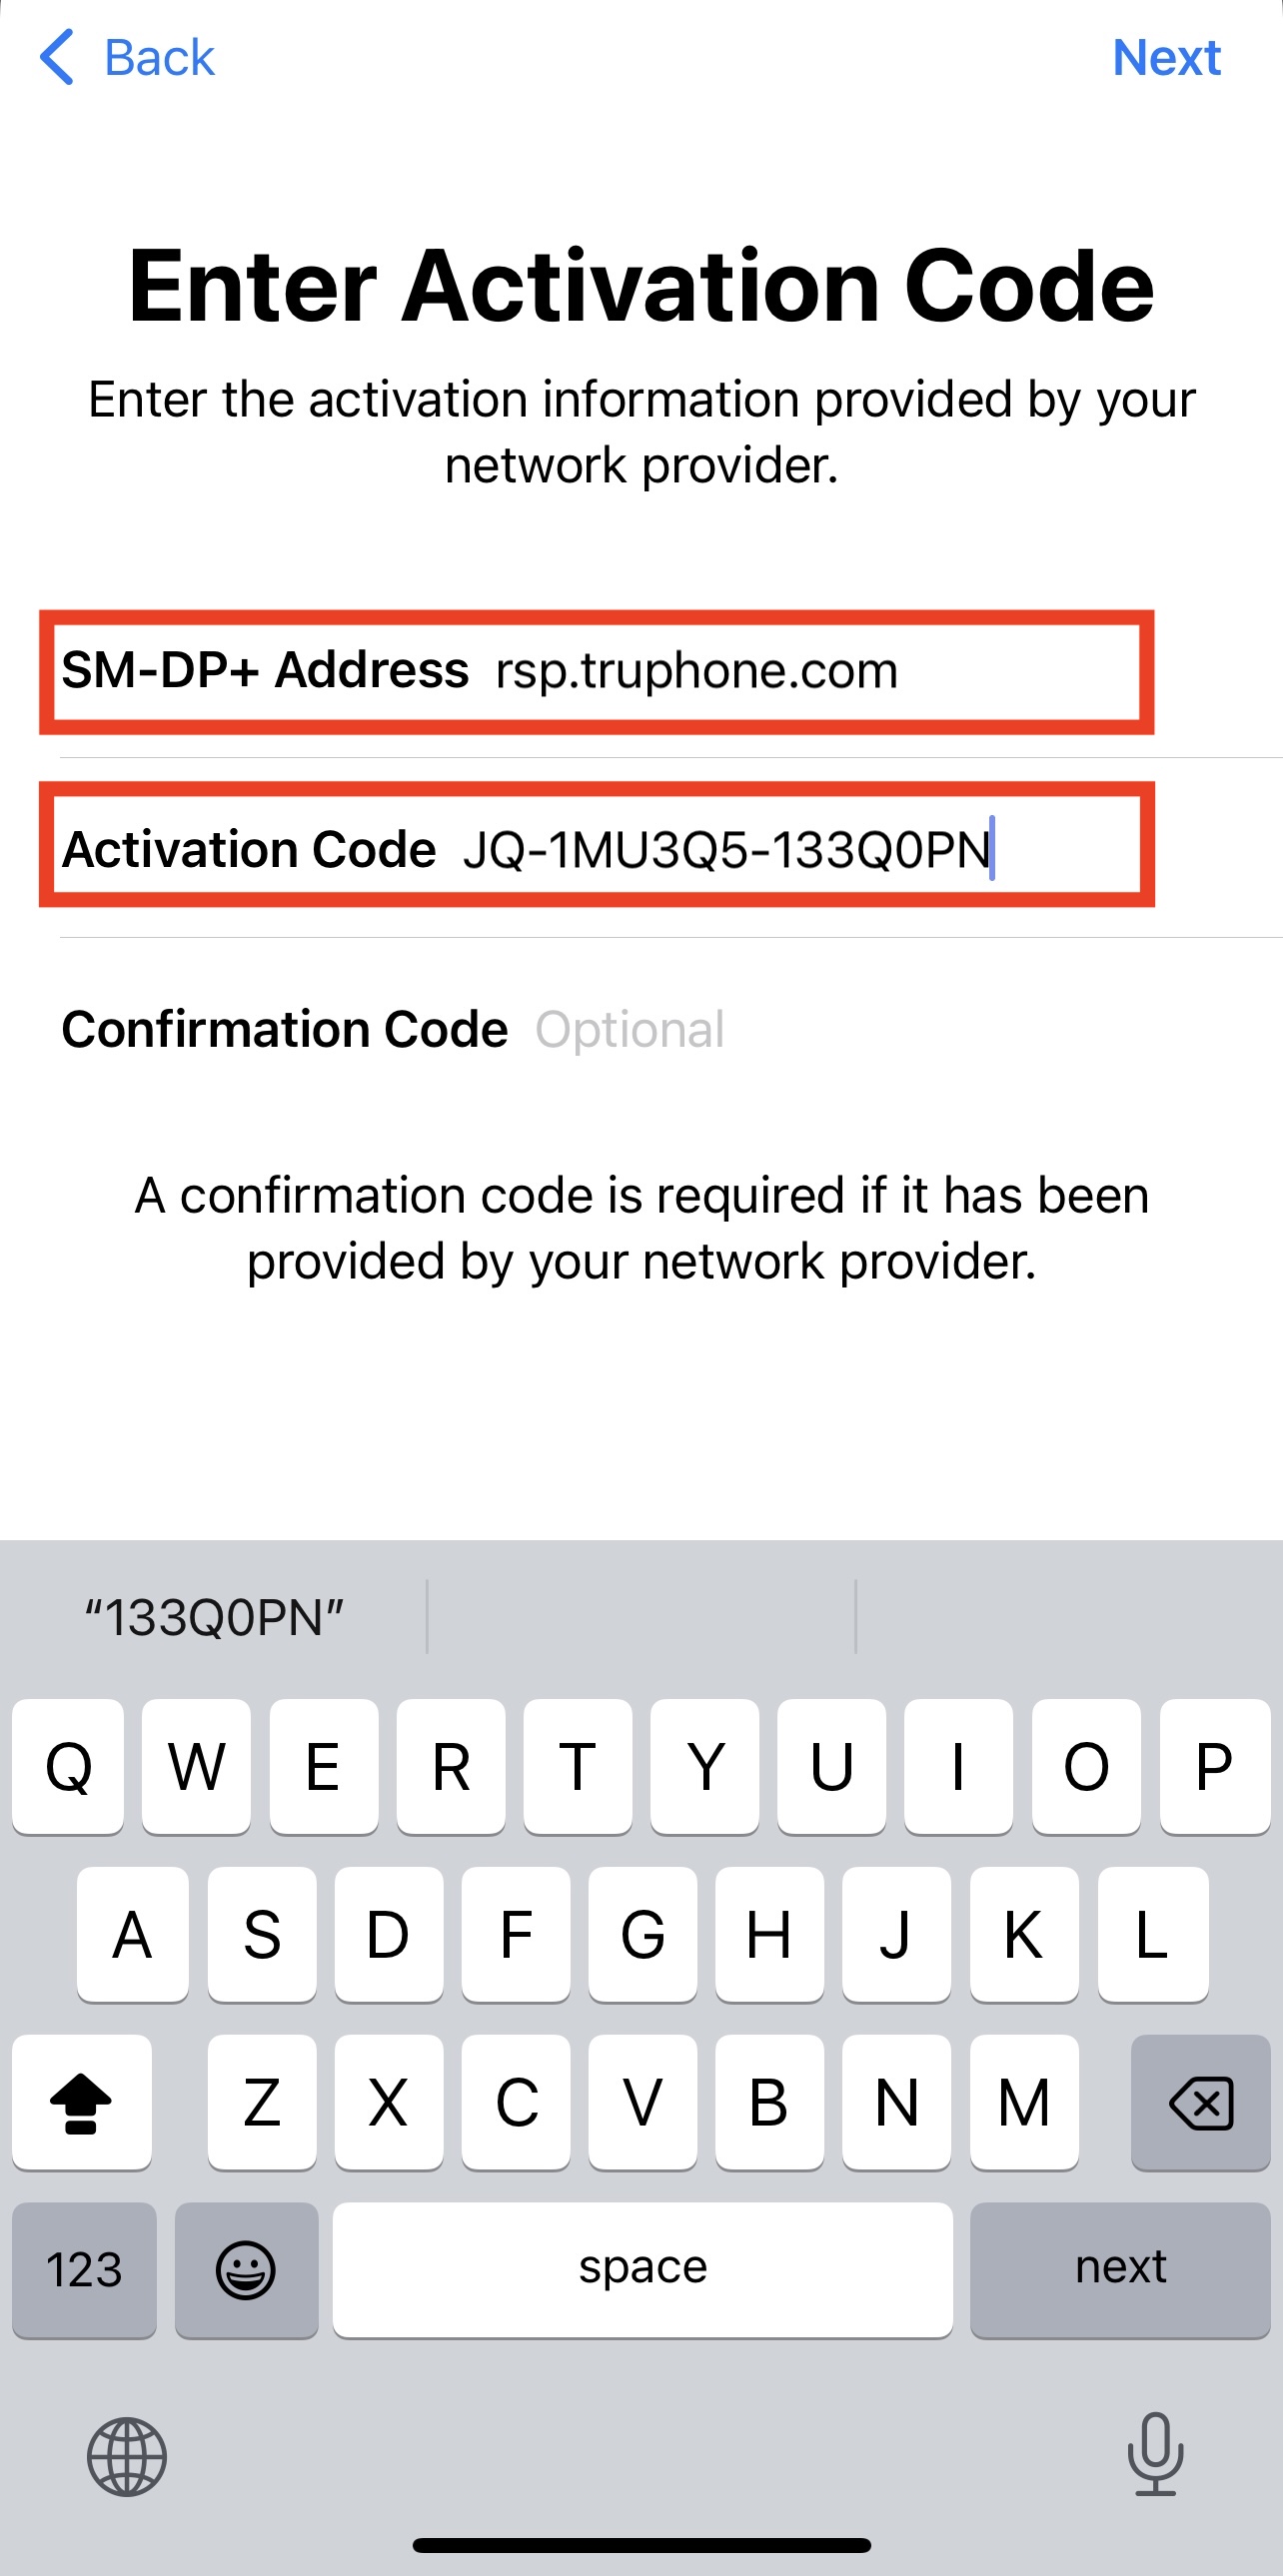
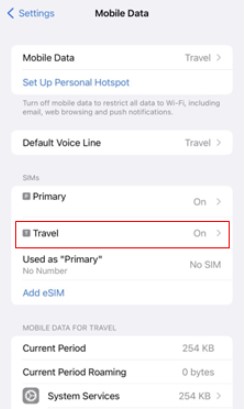
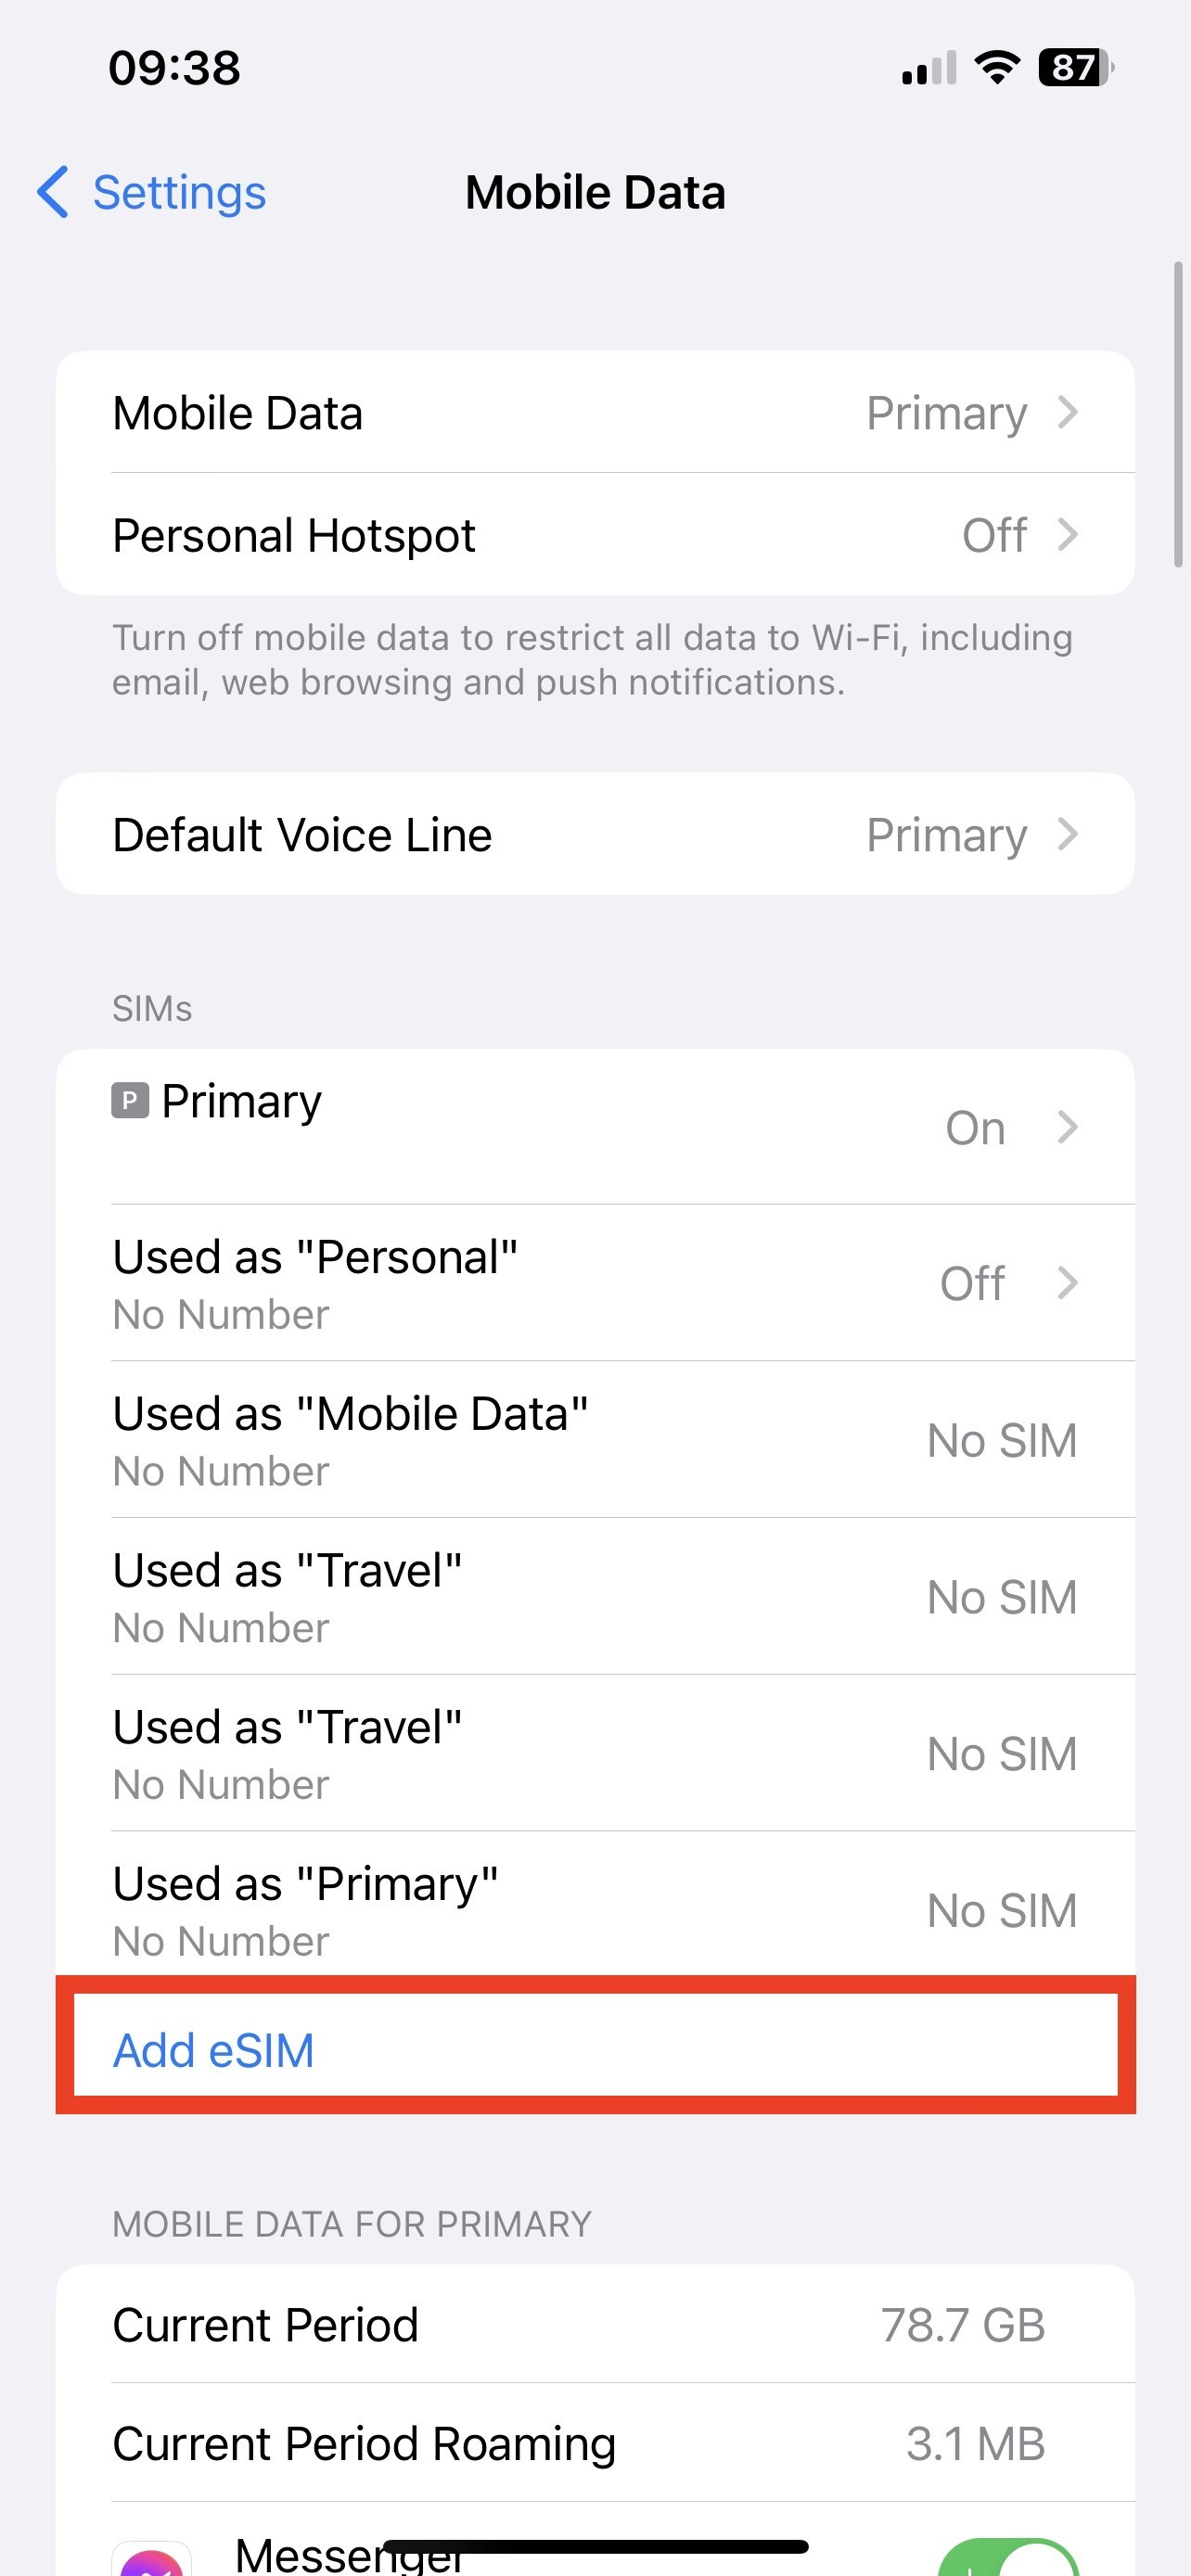
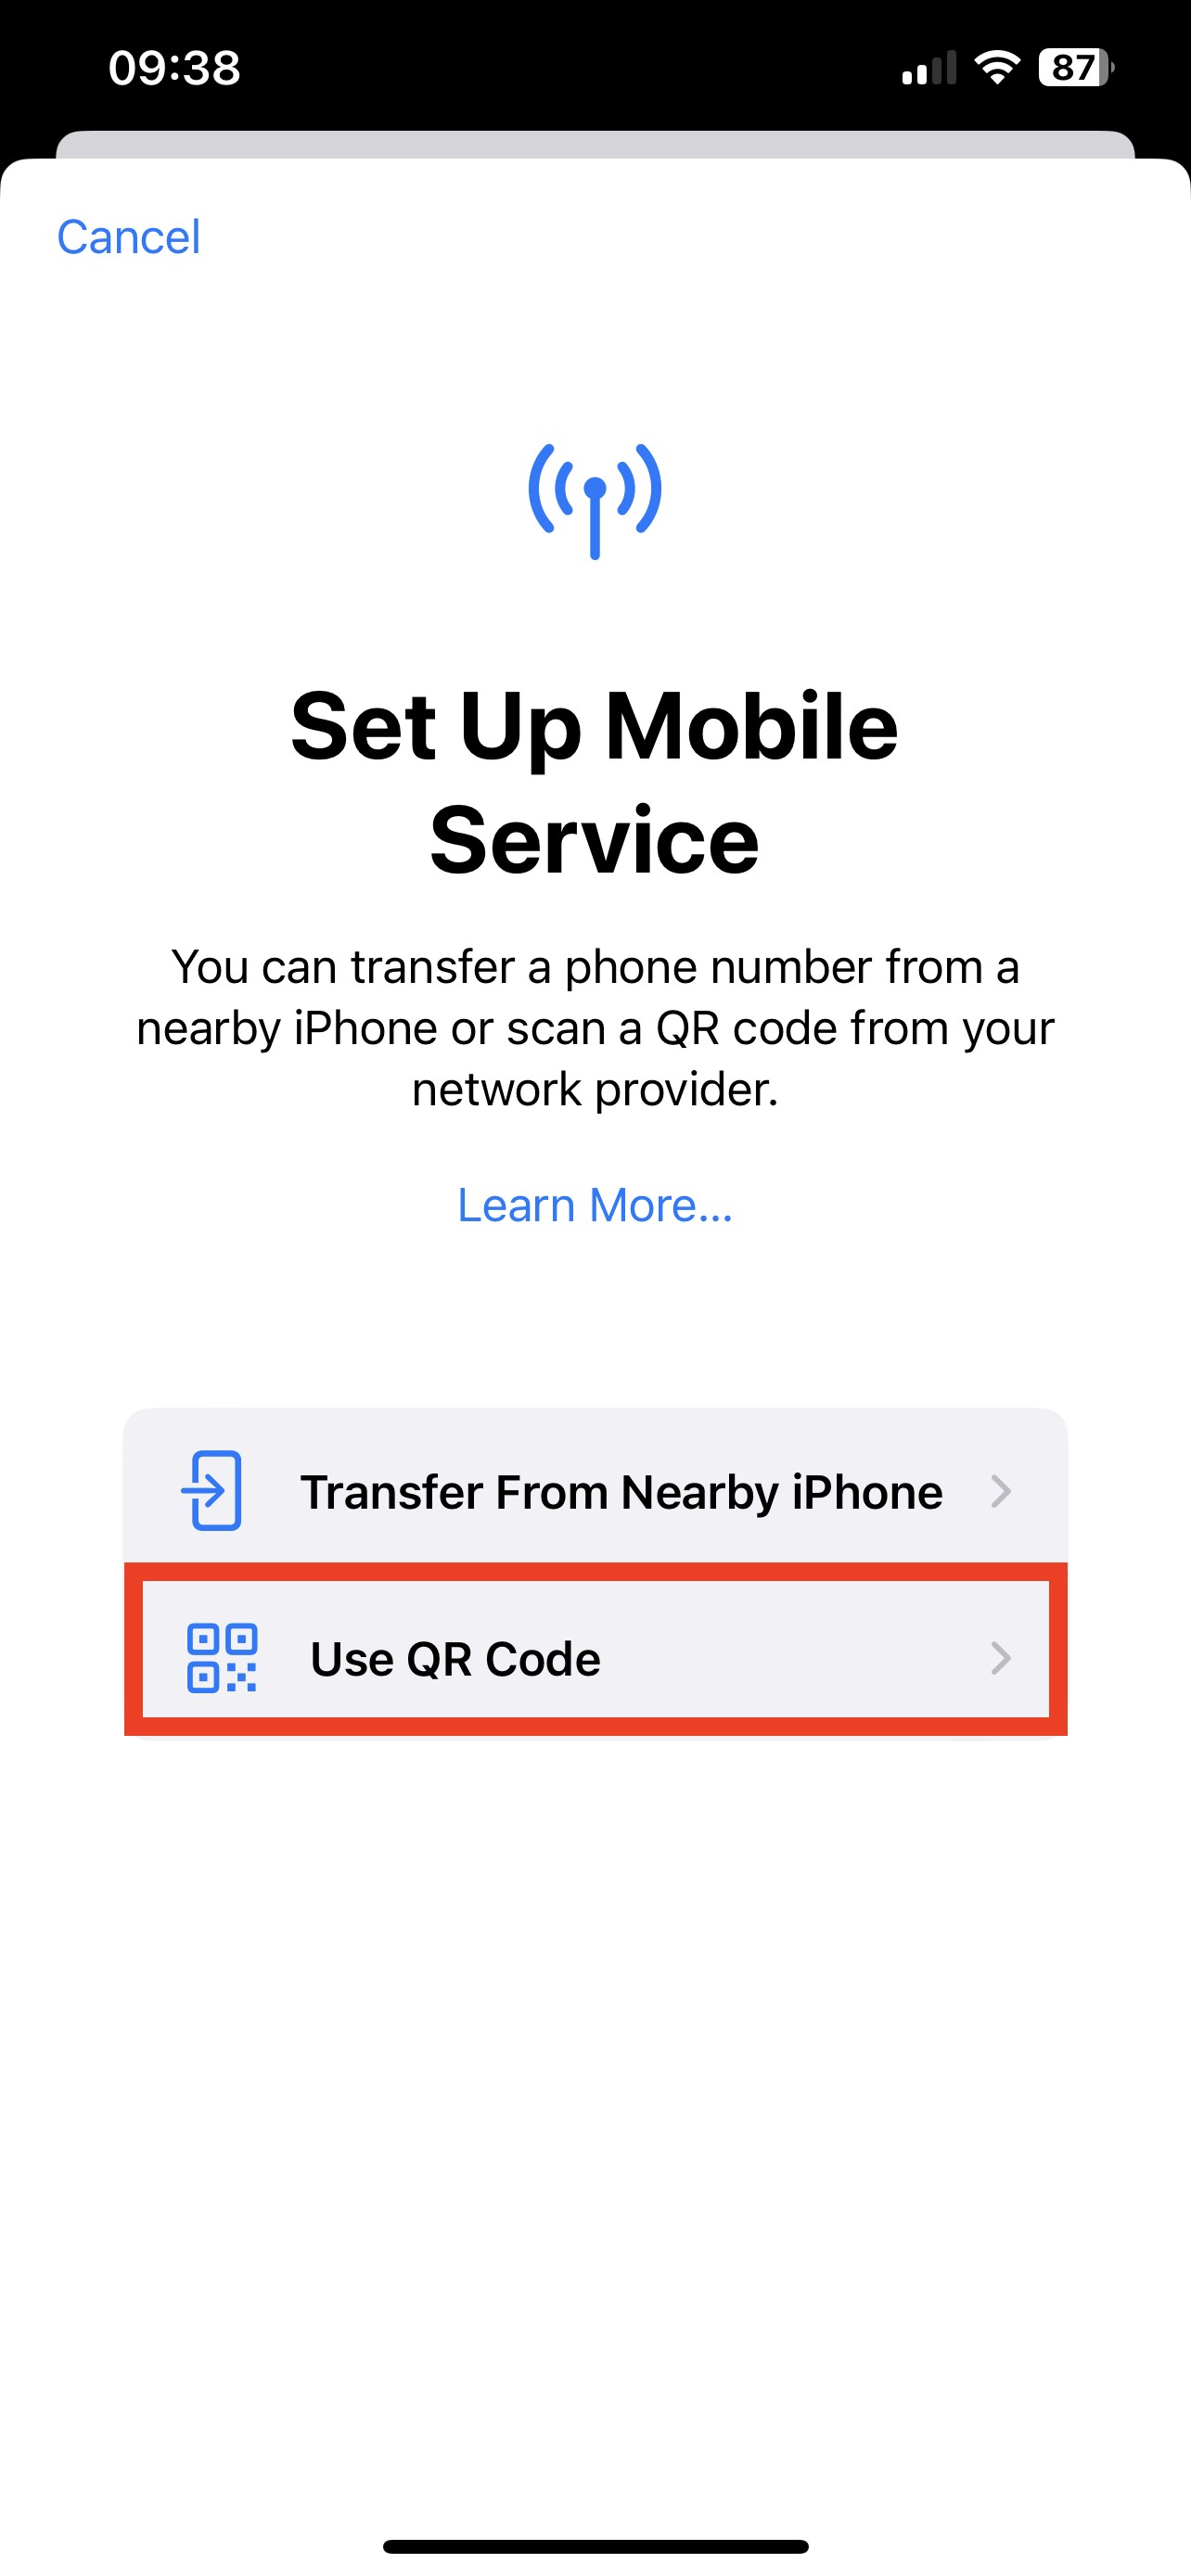
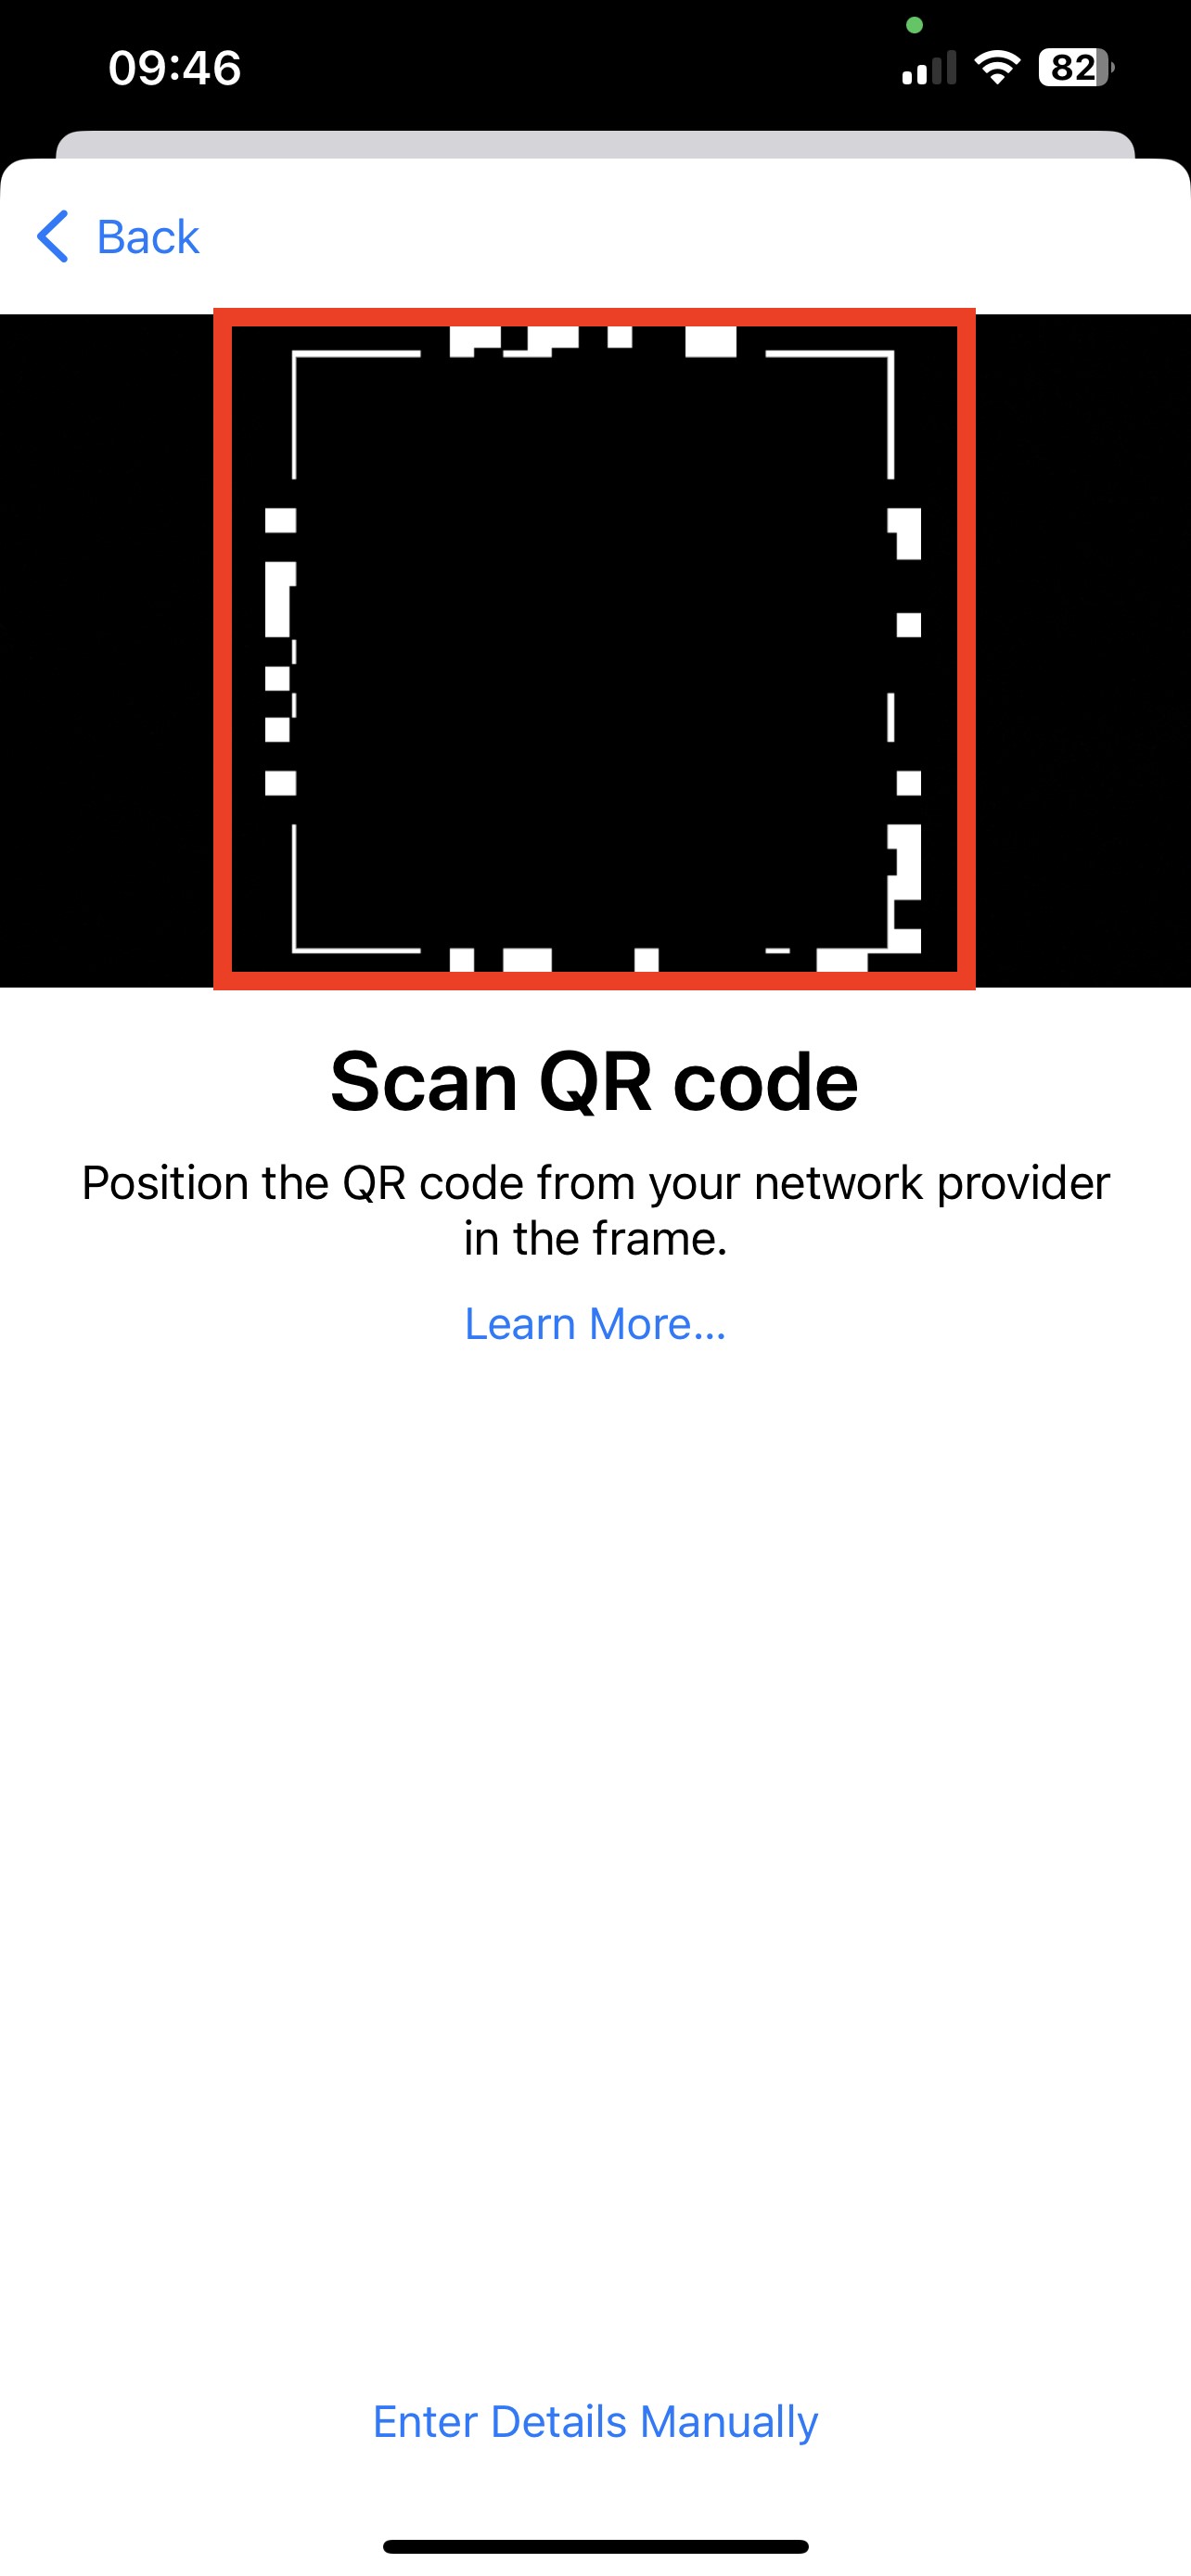
2. Tap "Add eSIM" > "Use QR Code" > Scan QR code provided.
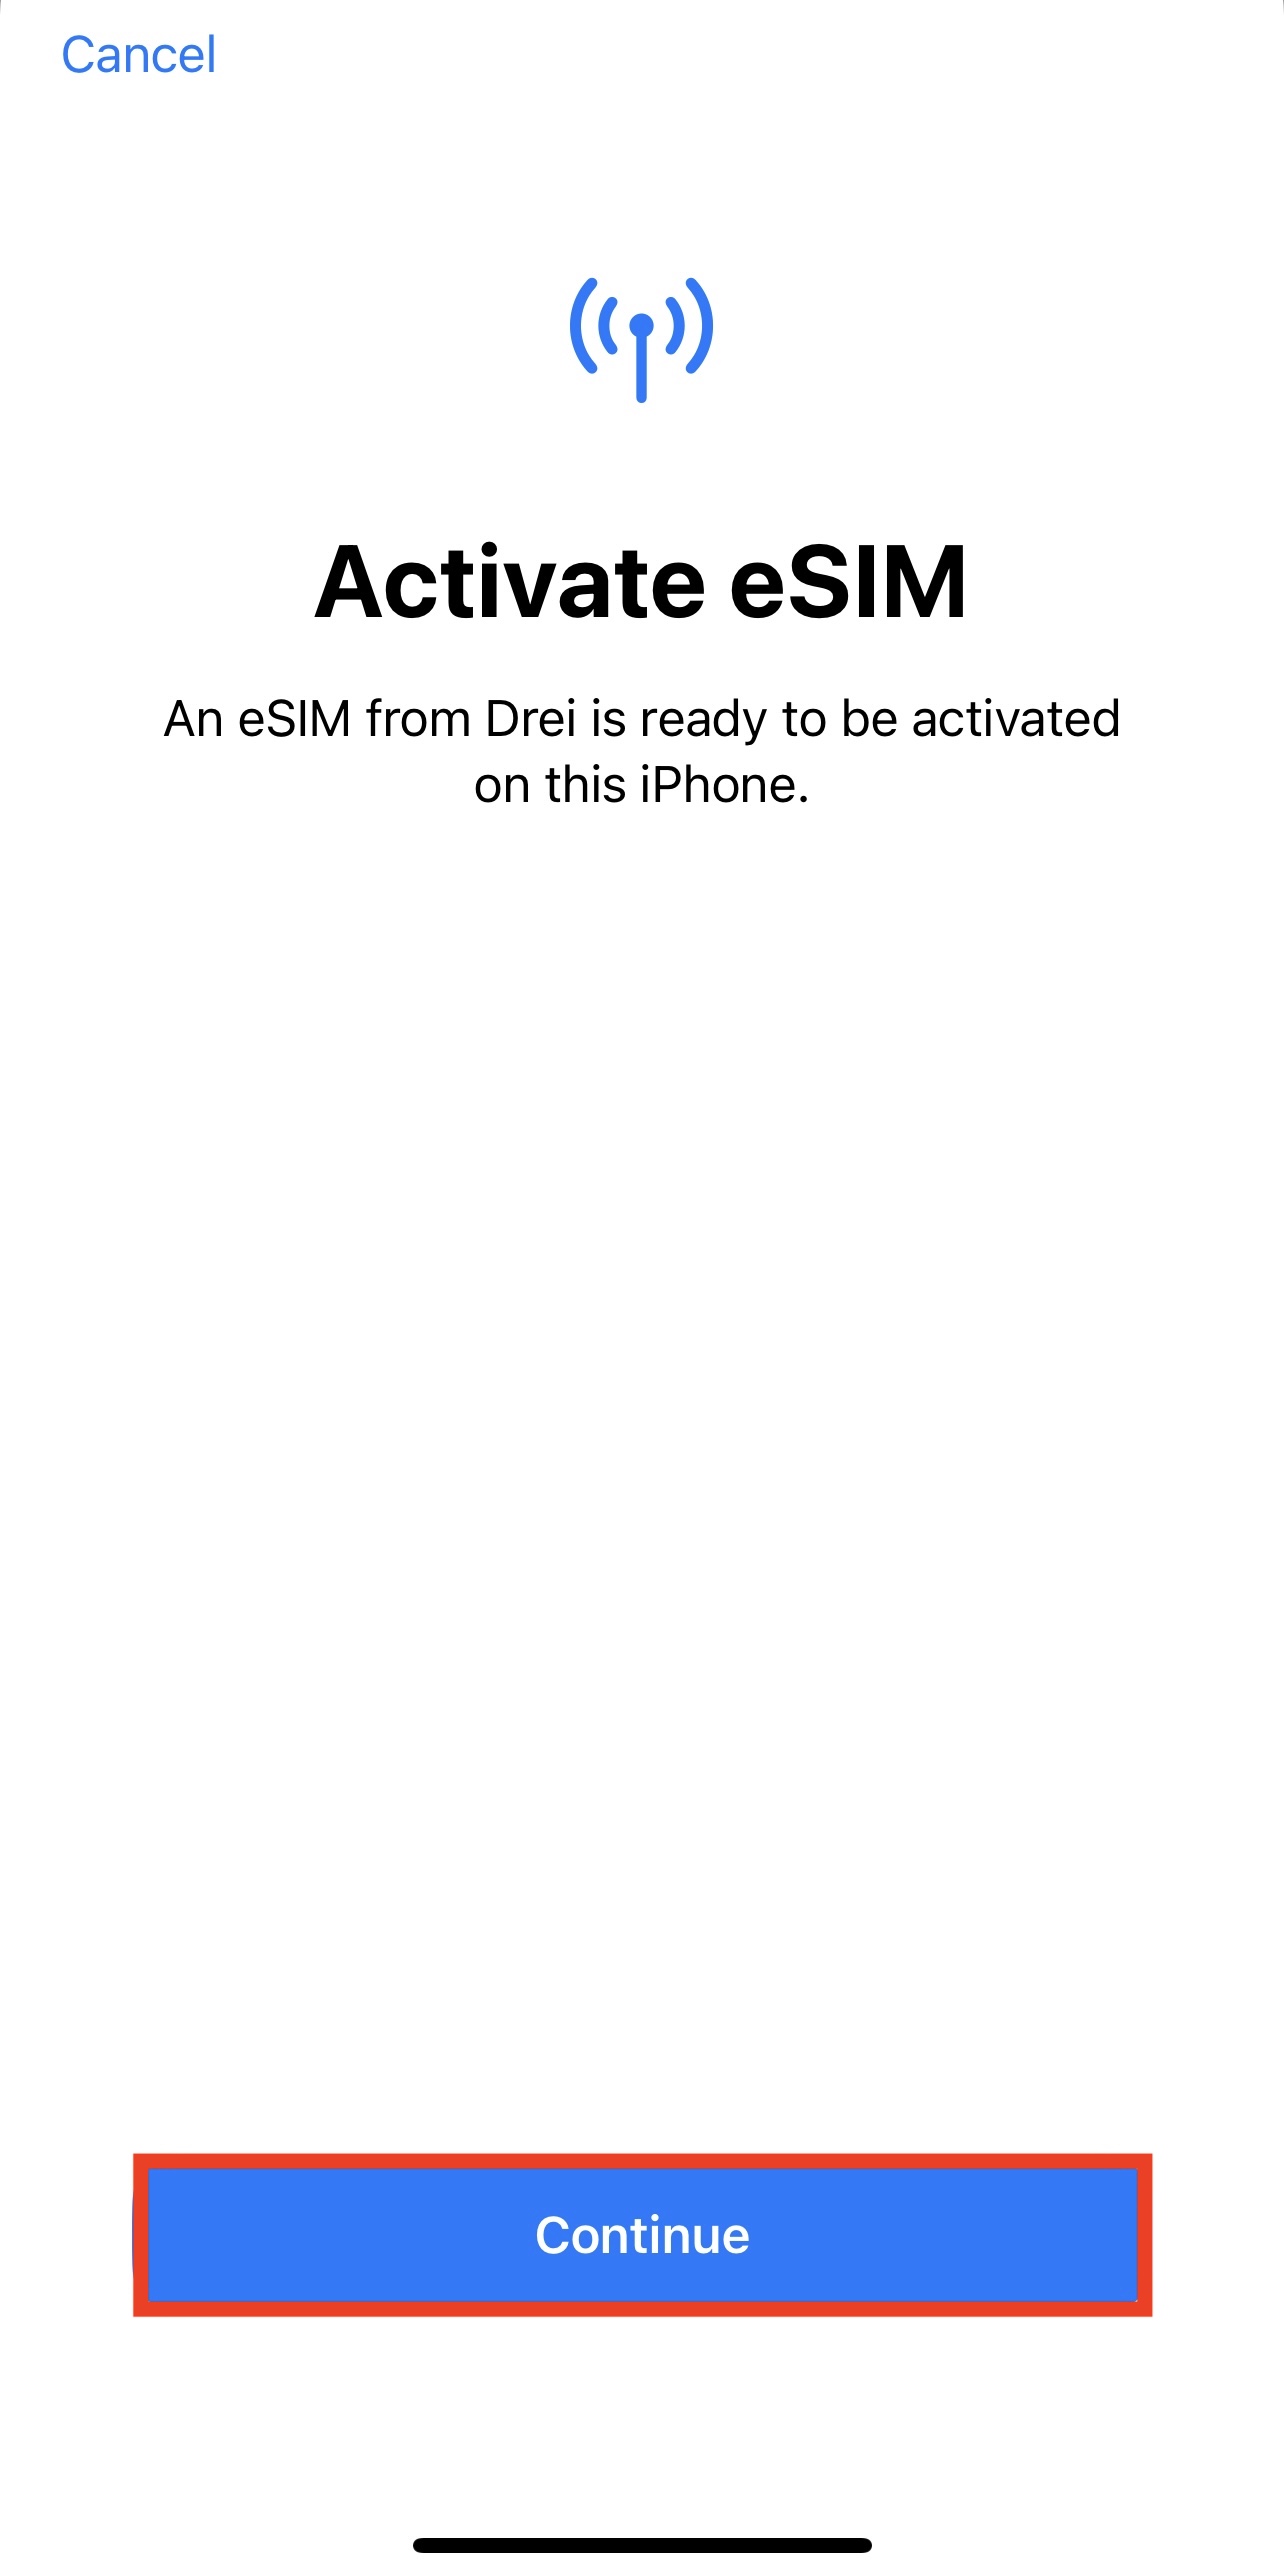
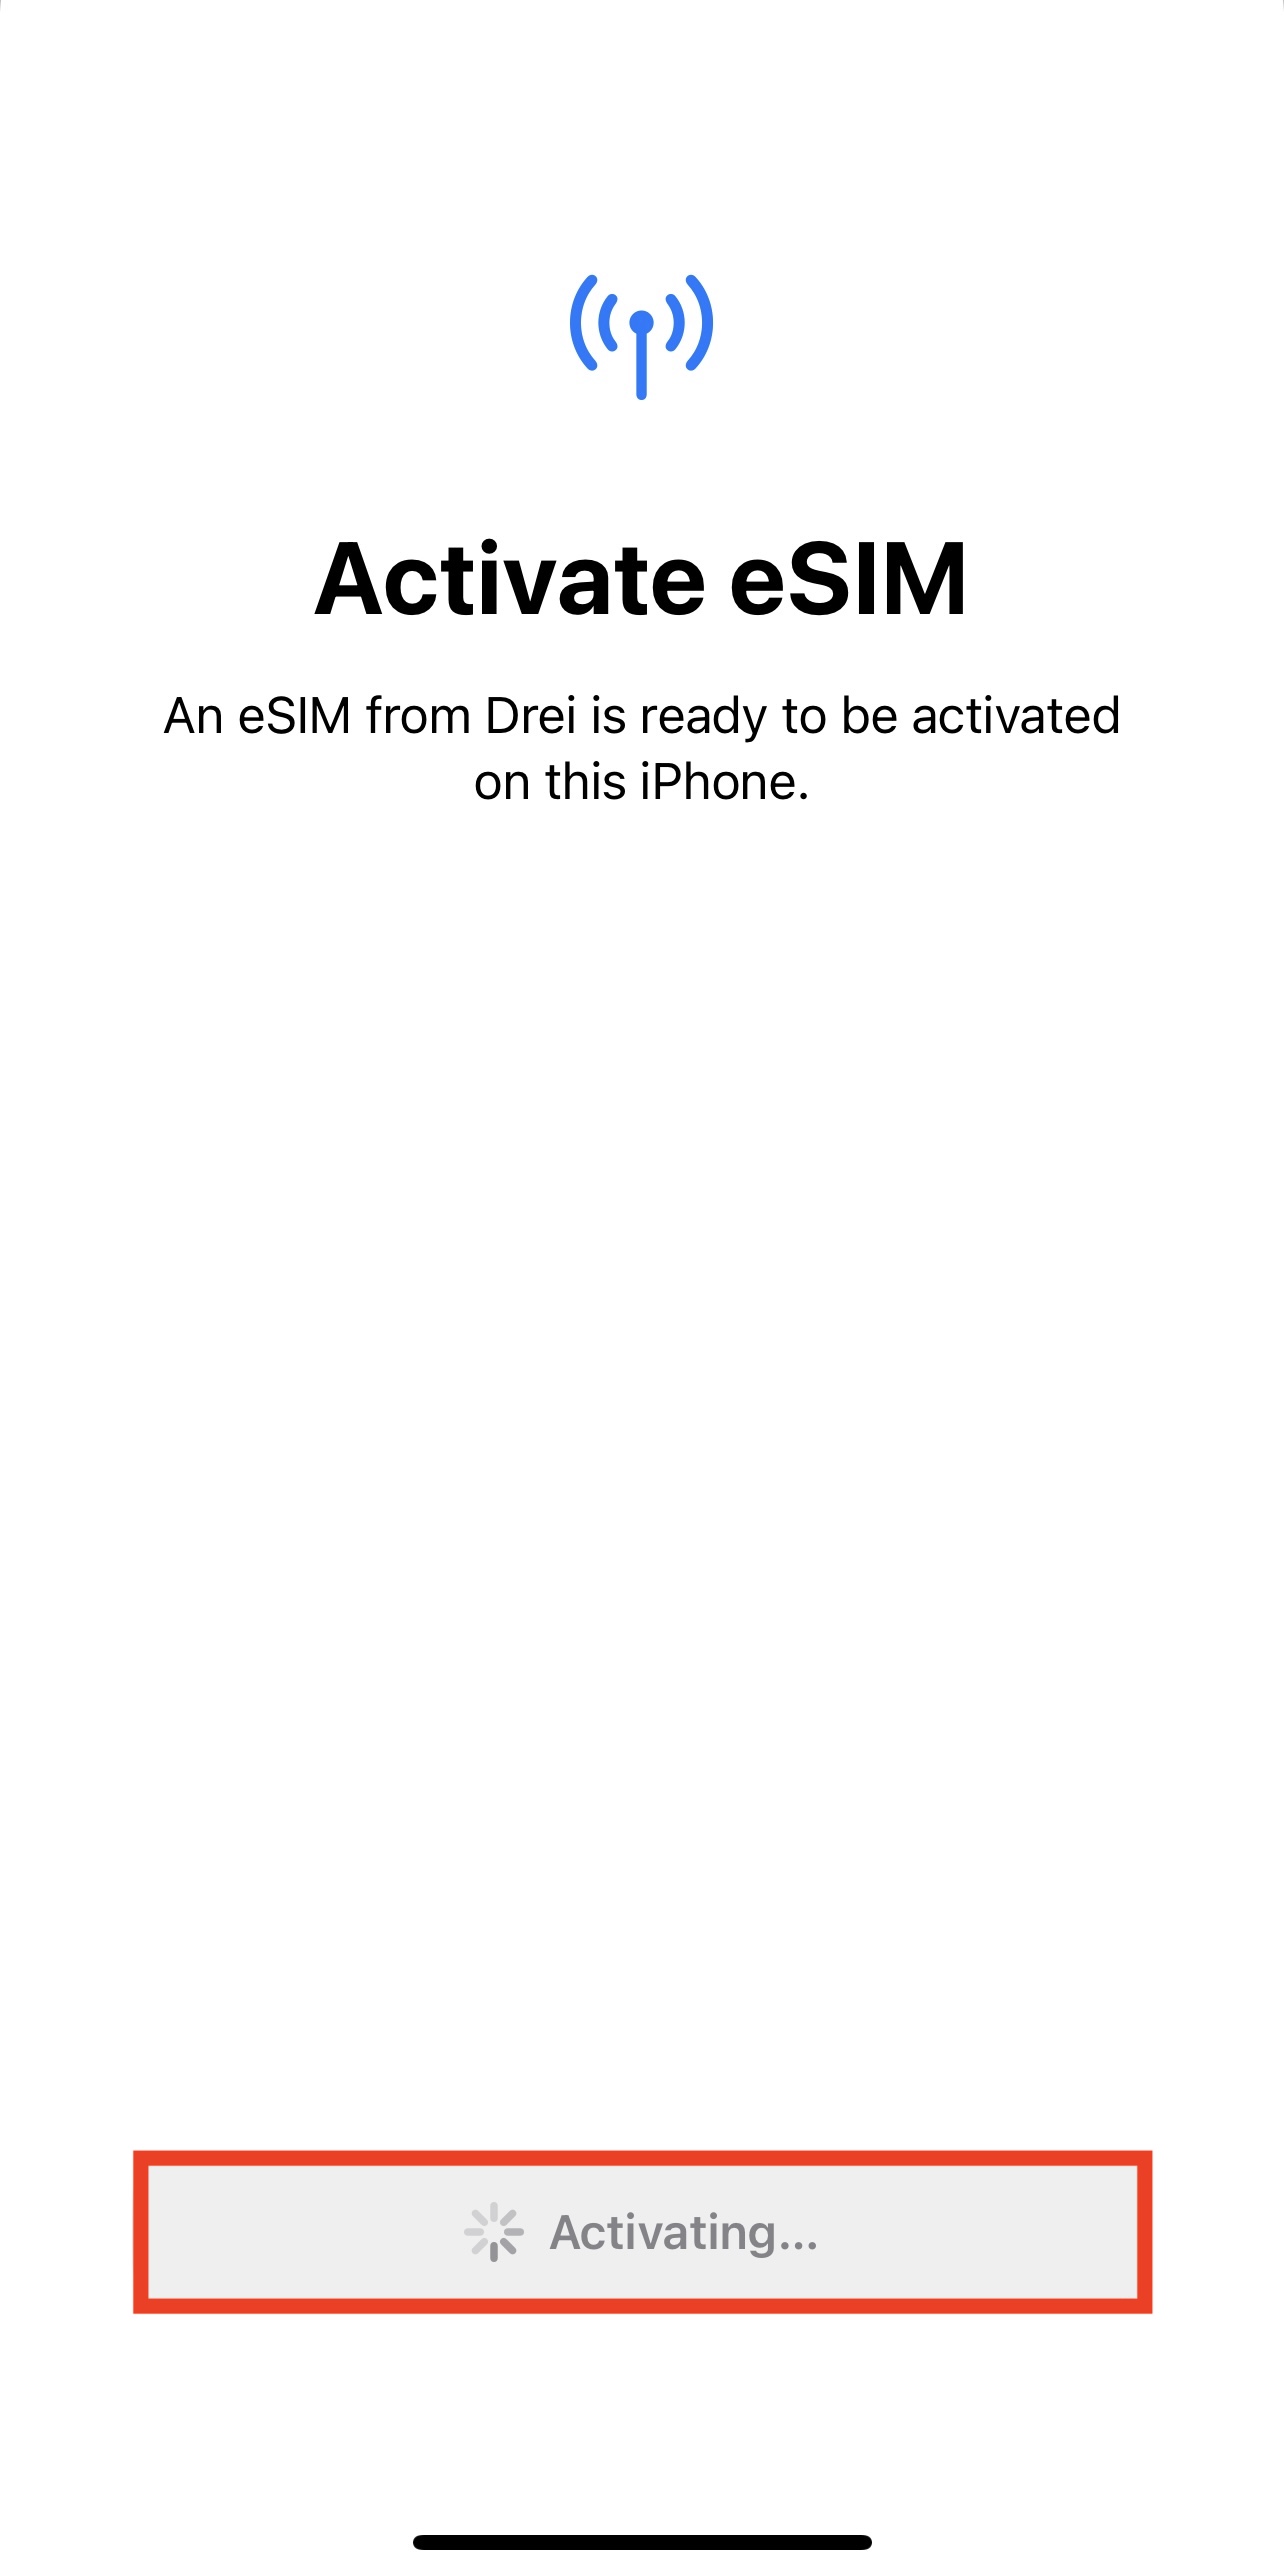
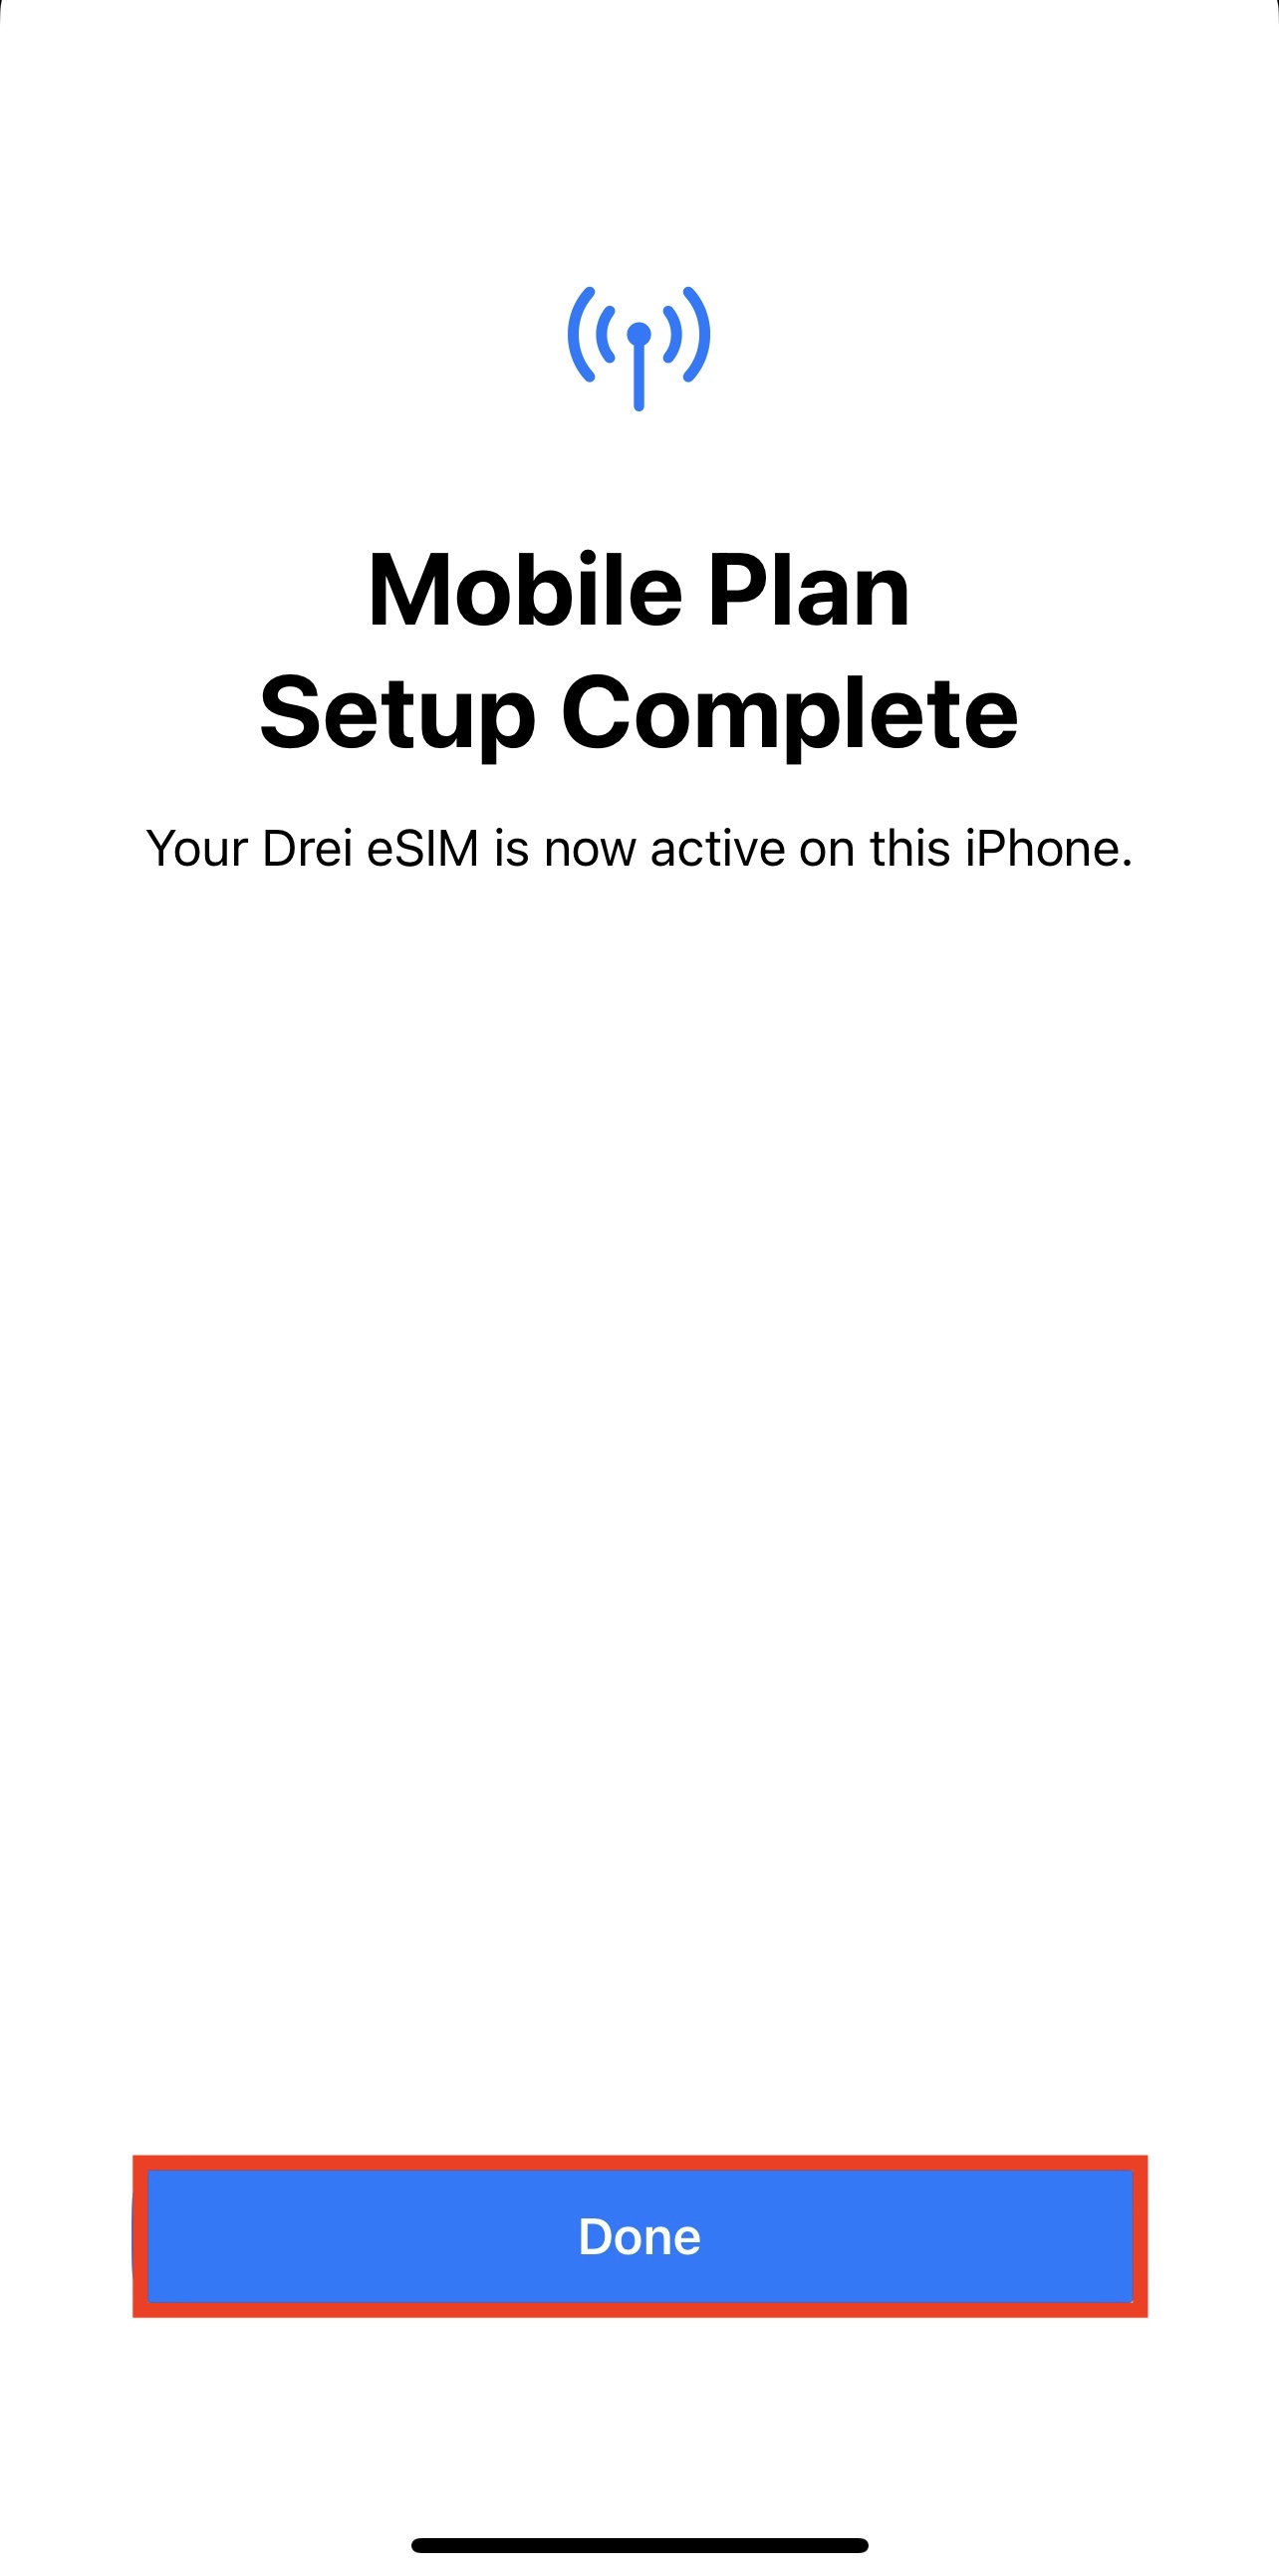
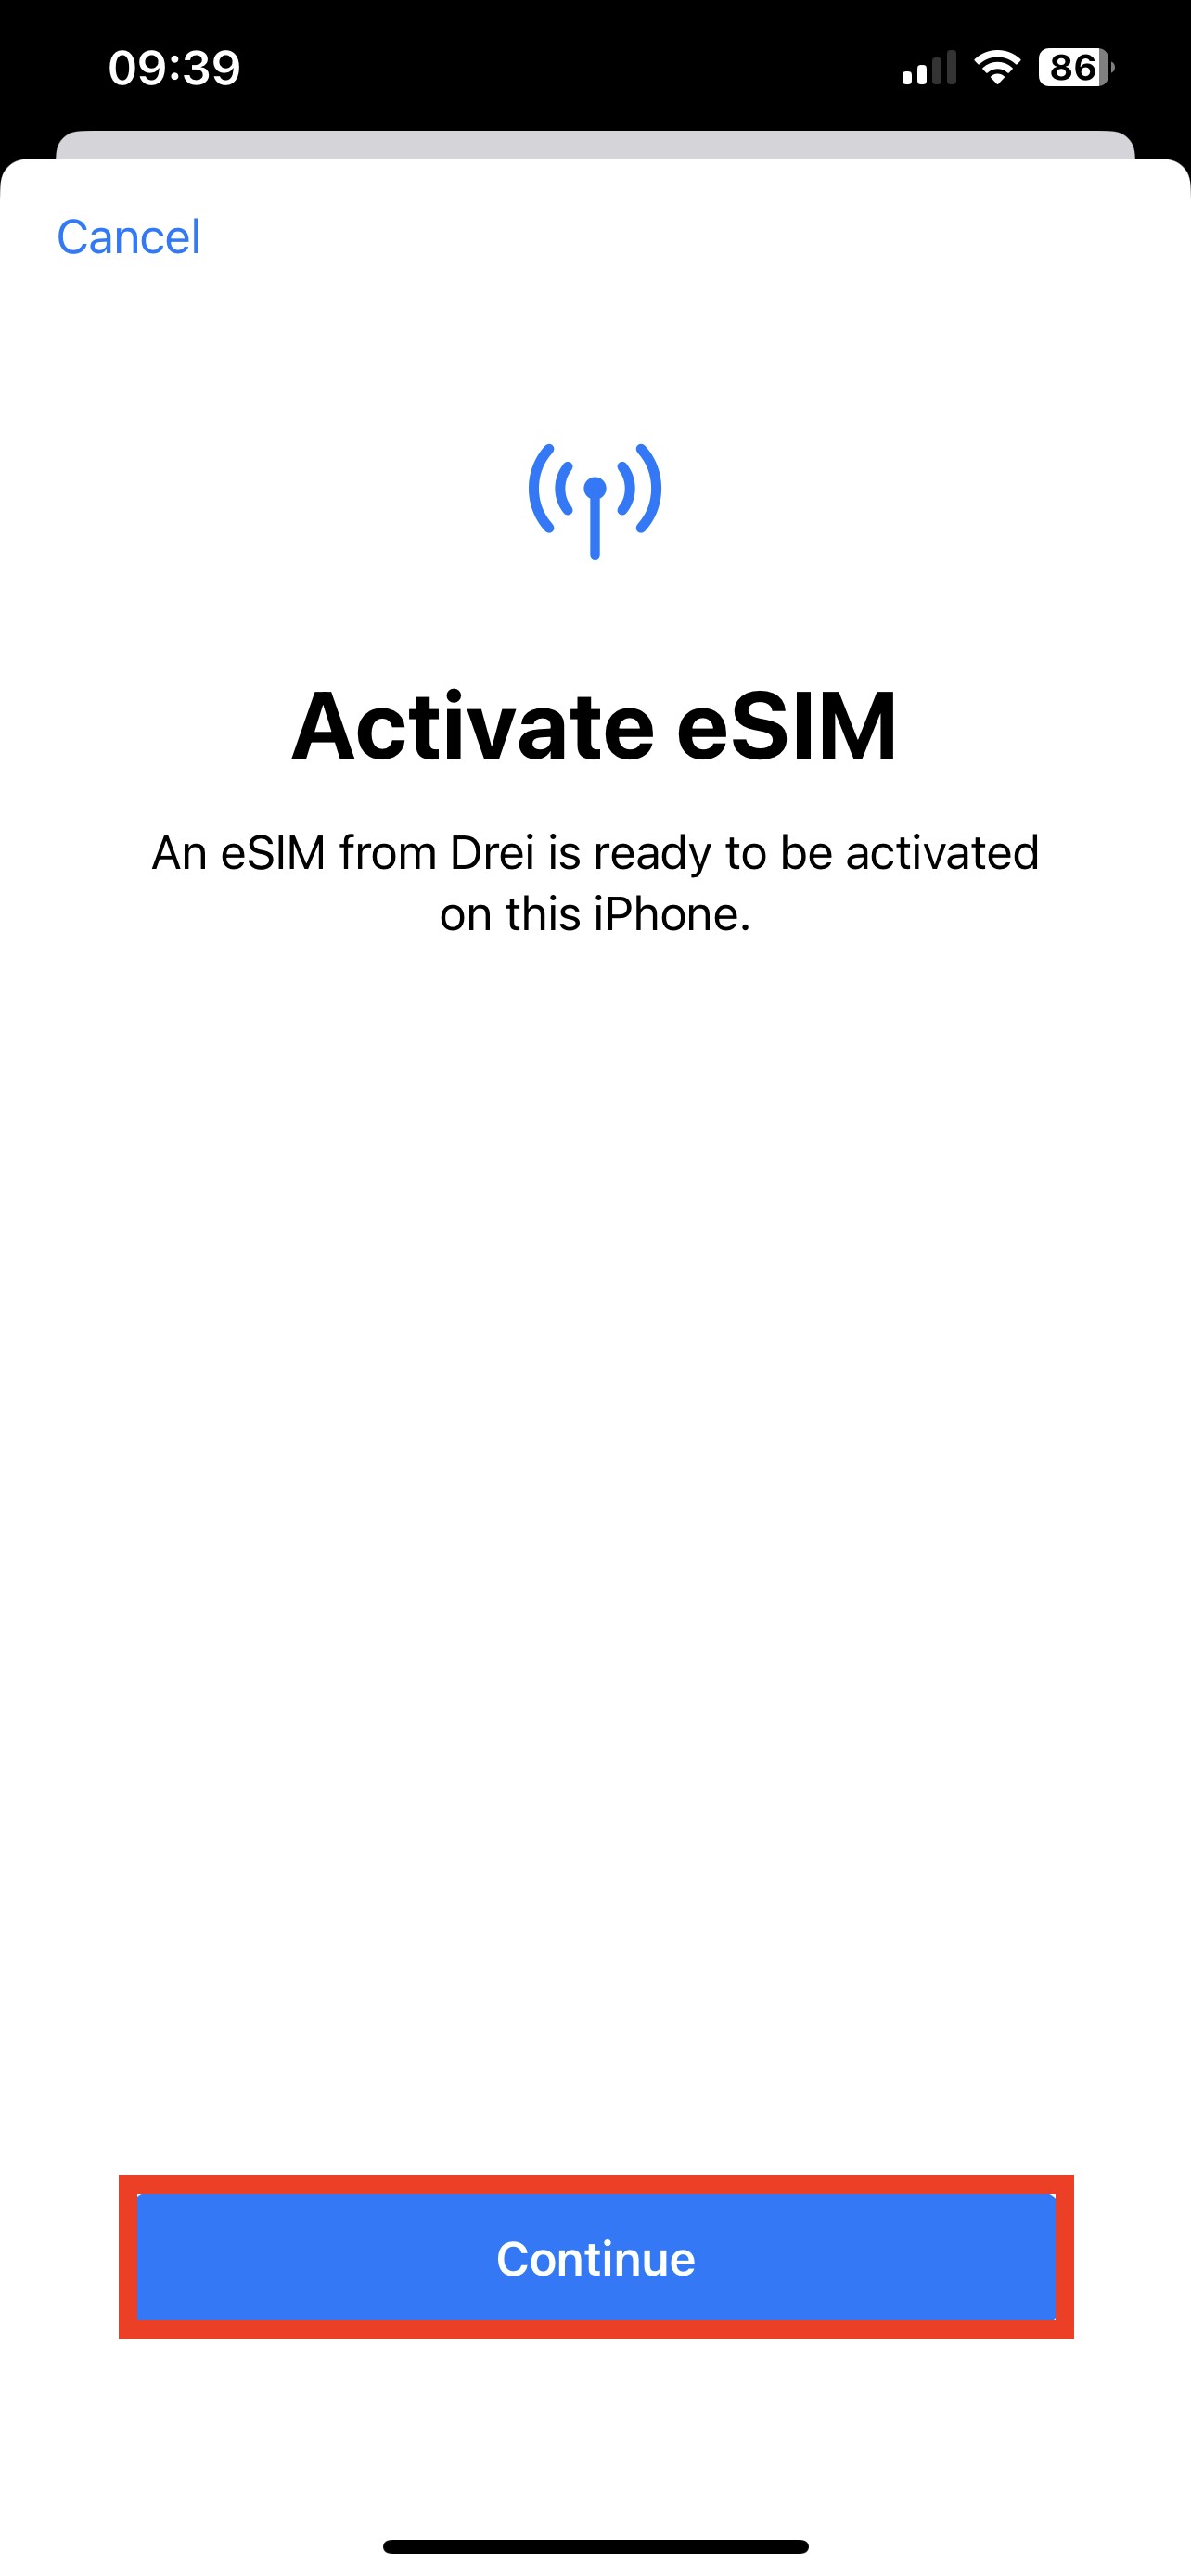
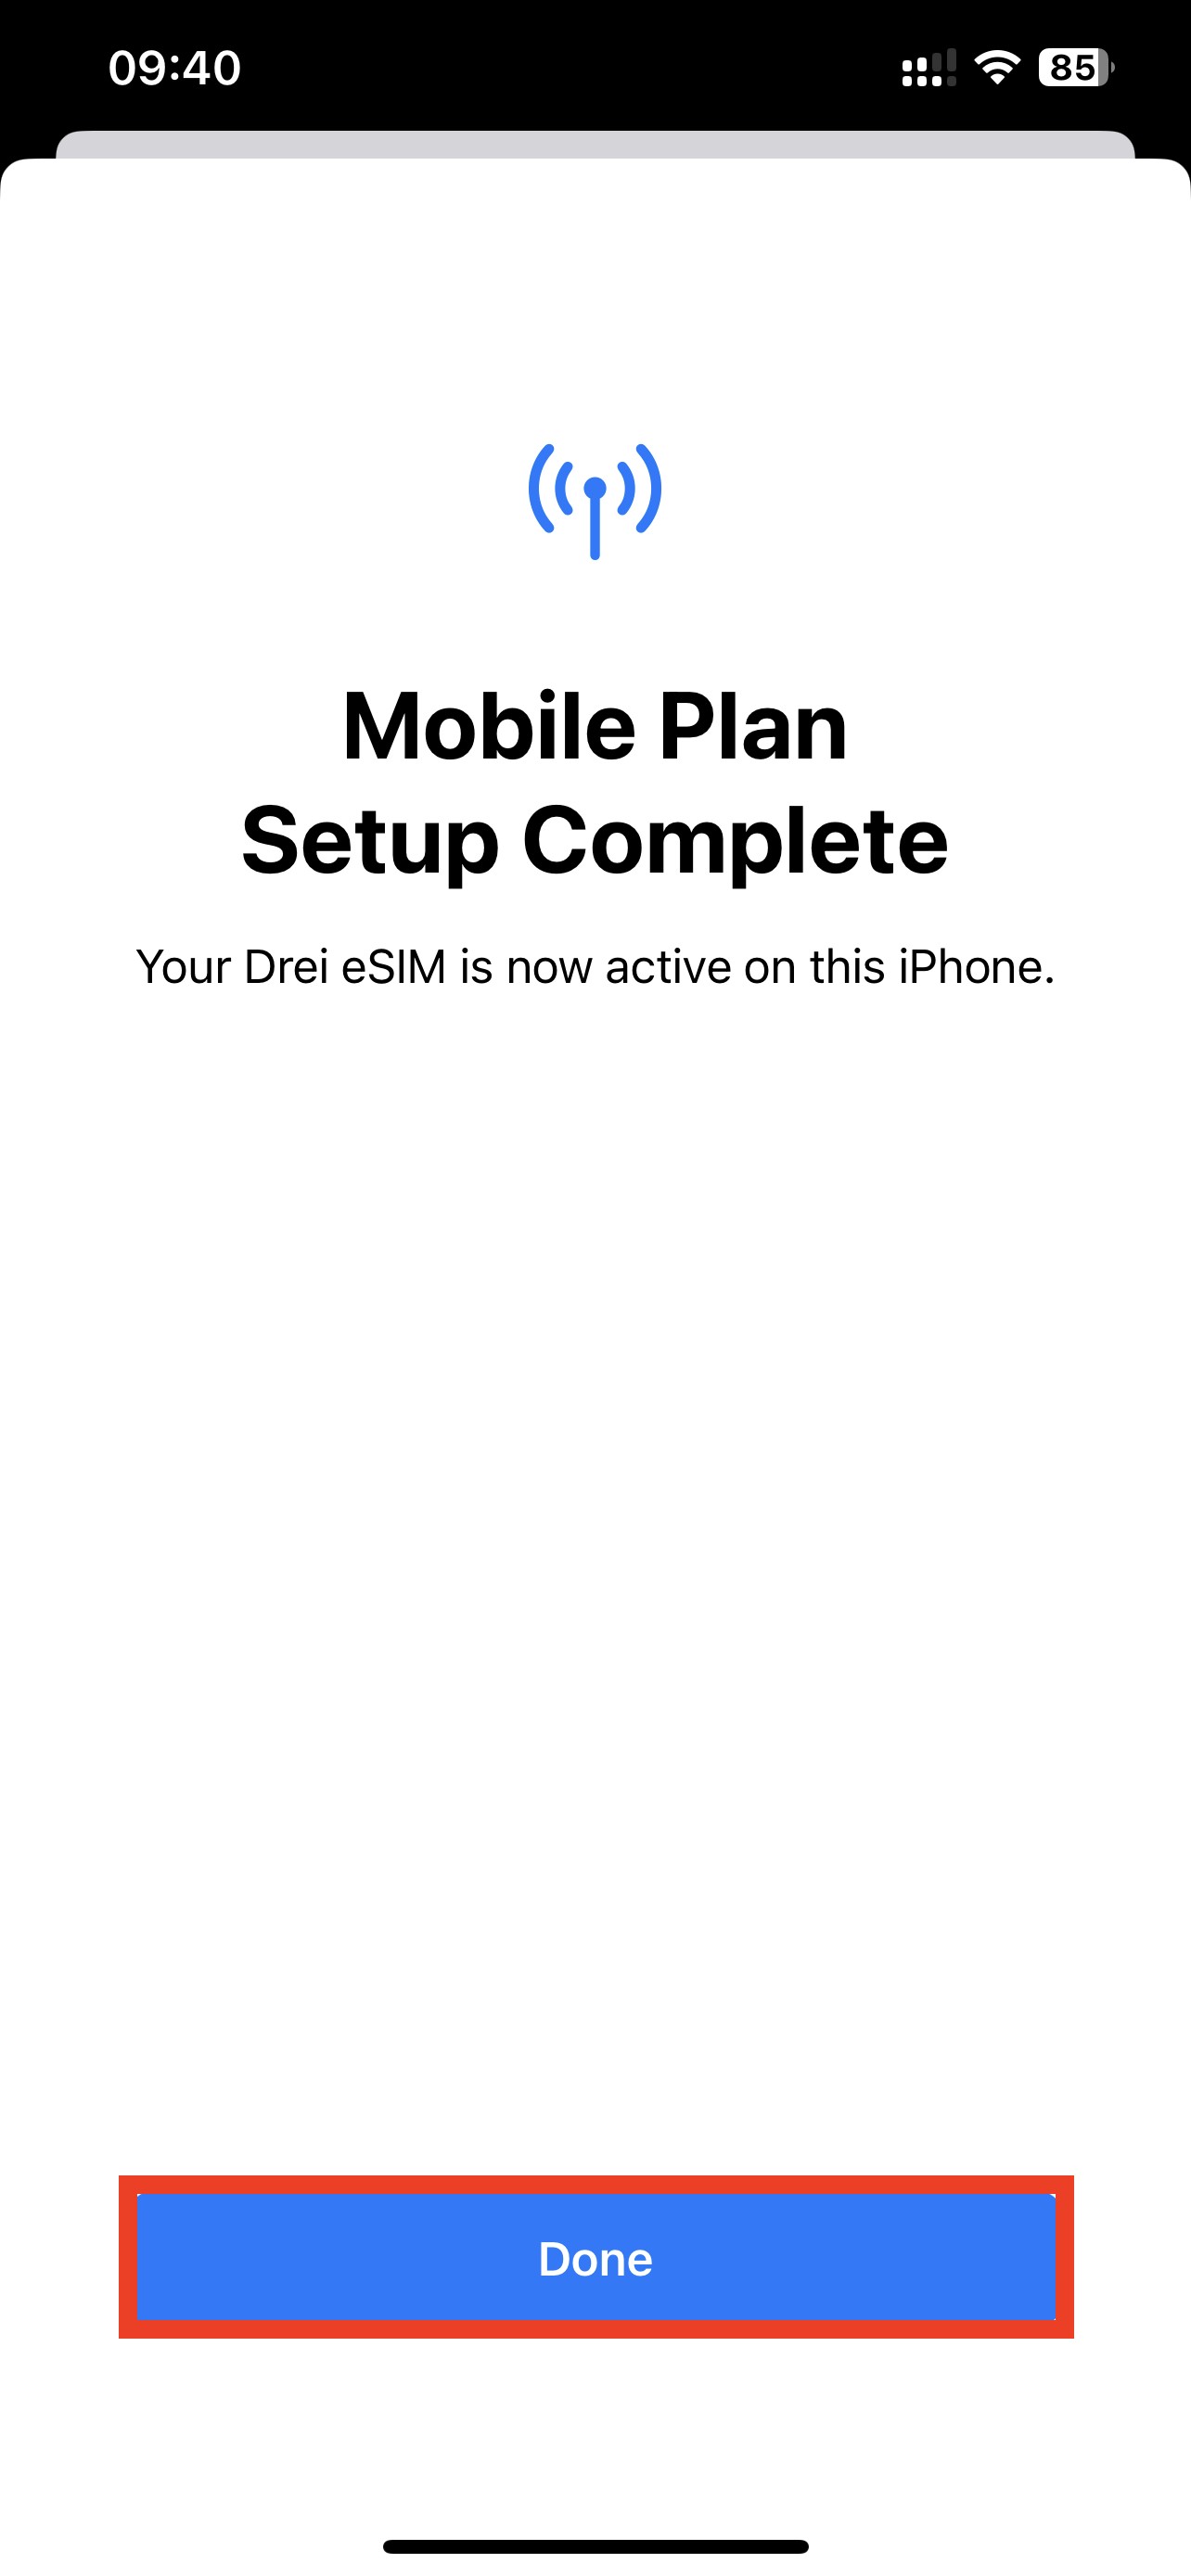
3. Click "Continue" > Allow up to 10 minutes for the eSIM to activate > Tap "Done".
Note: please do NOT close this, or the installation will stop.

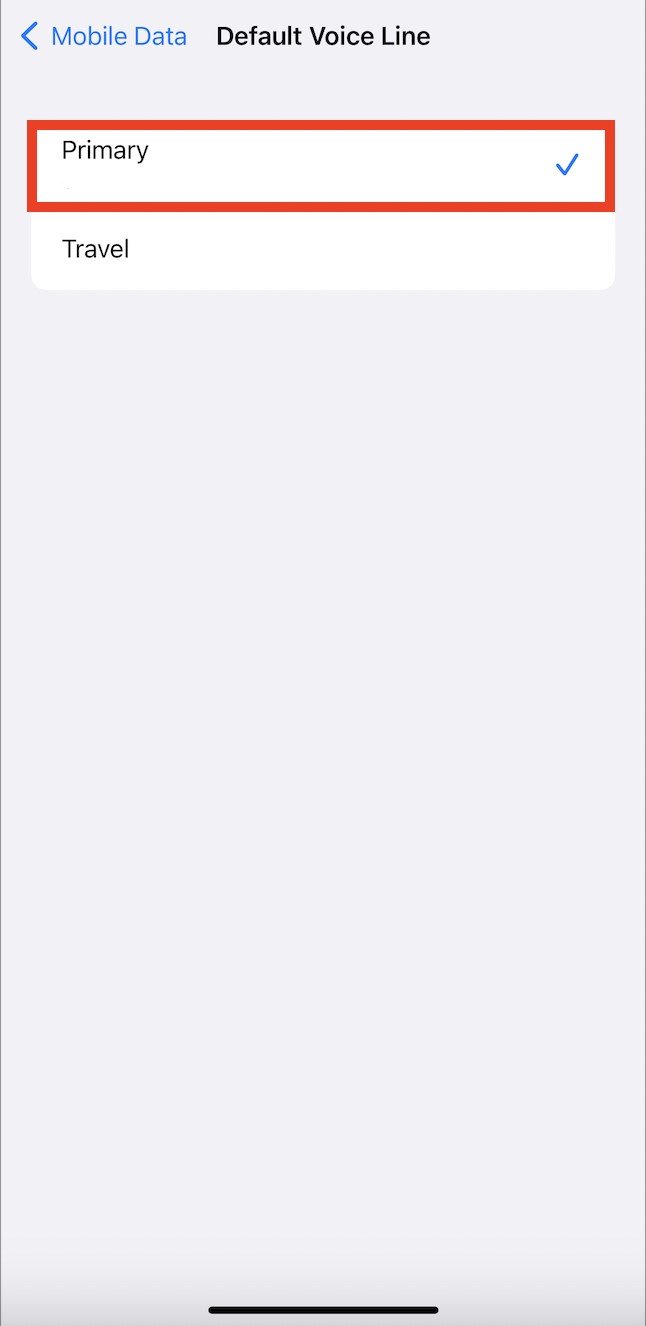
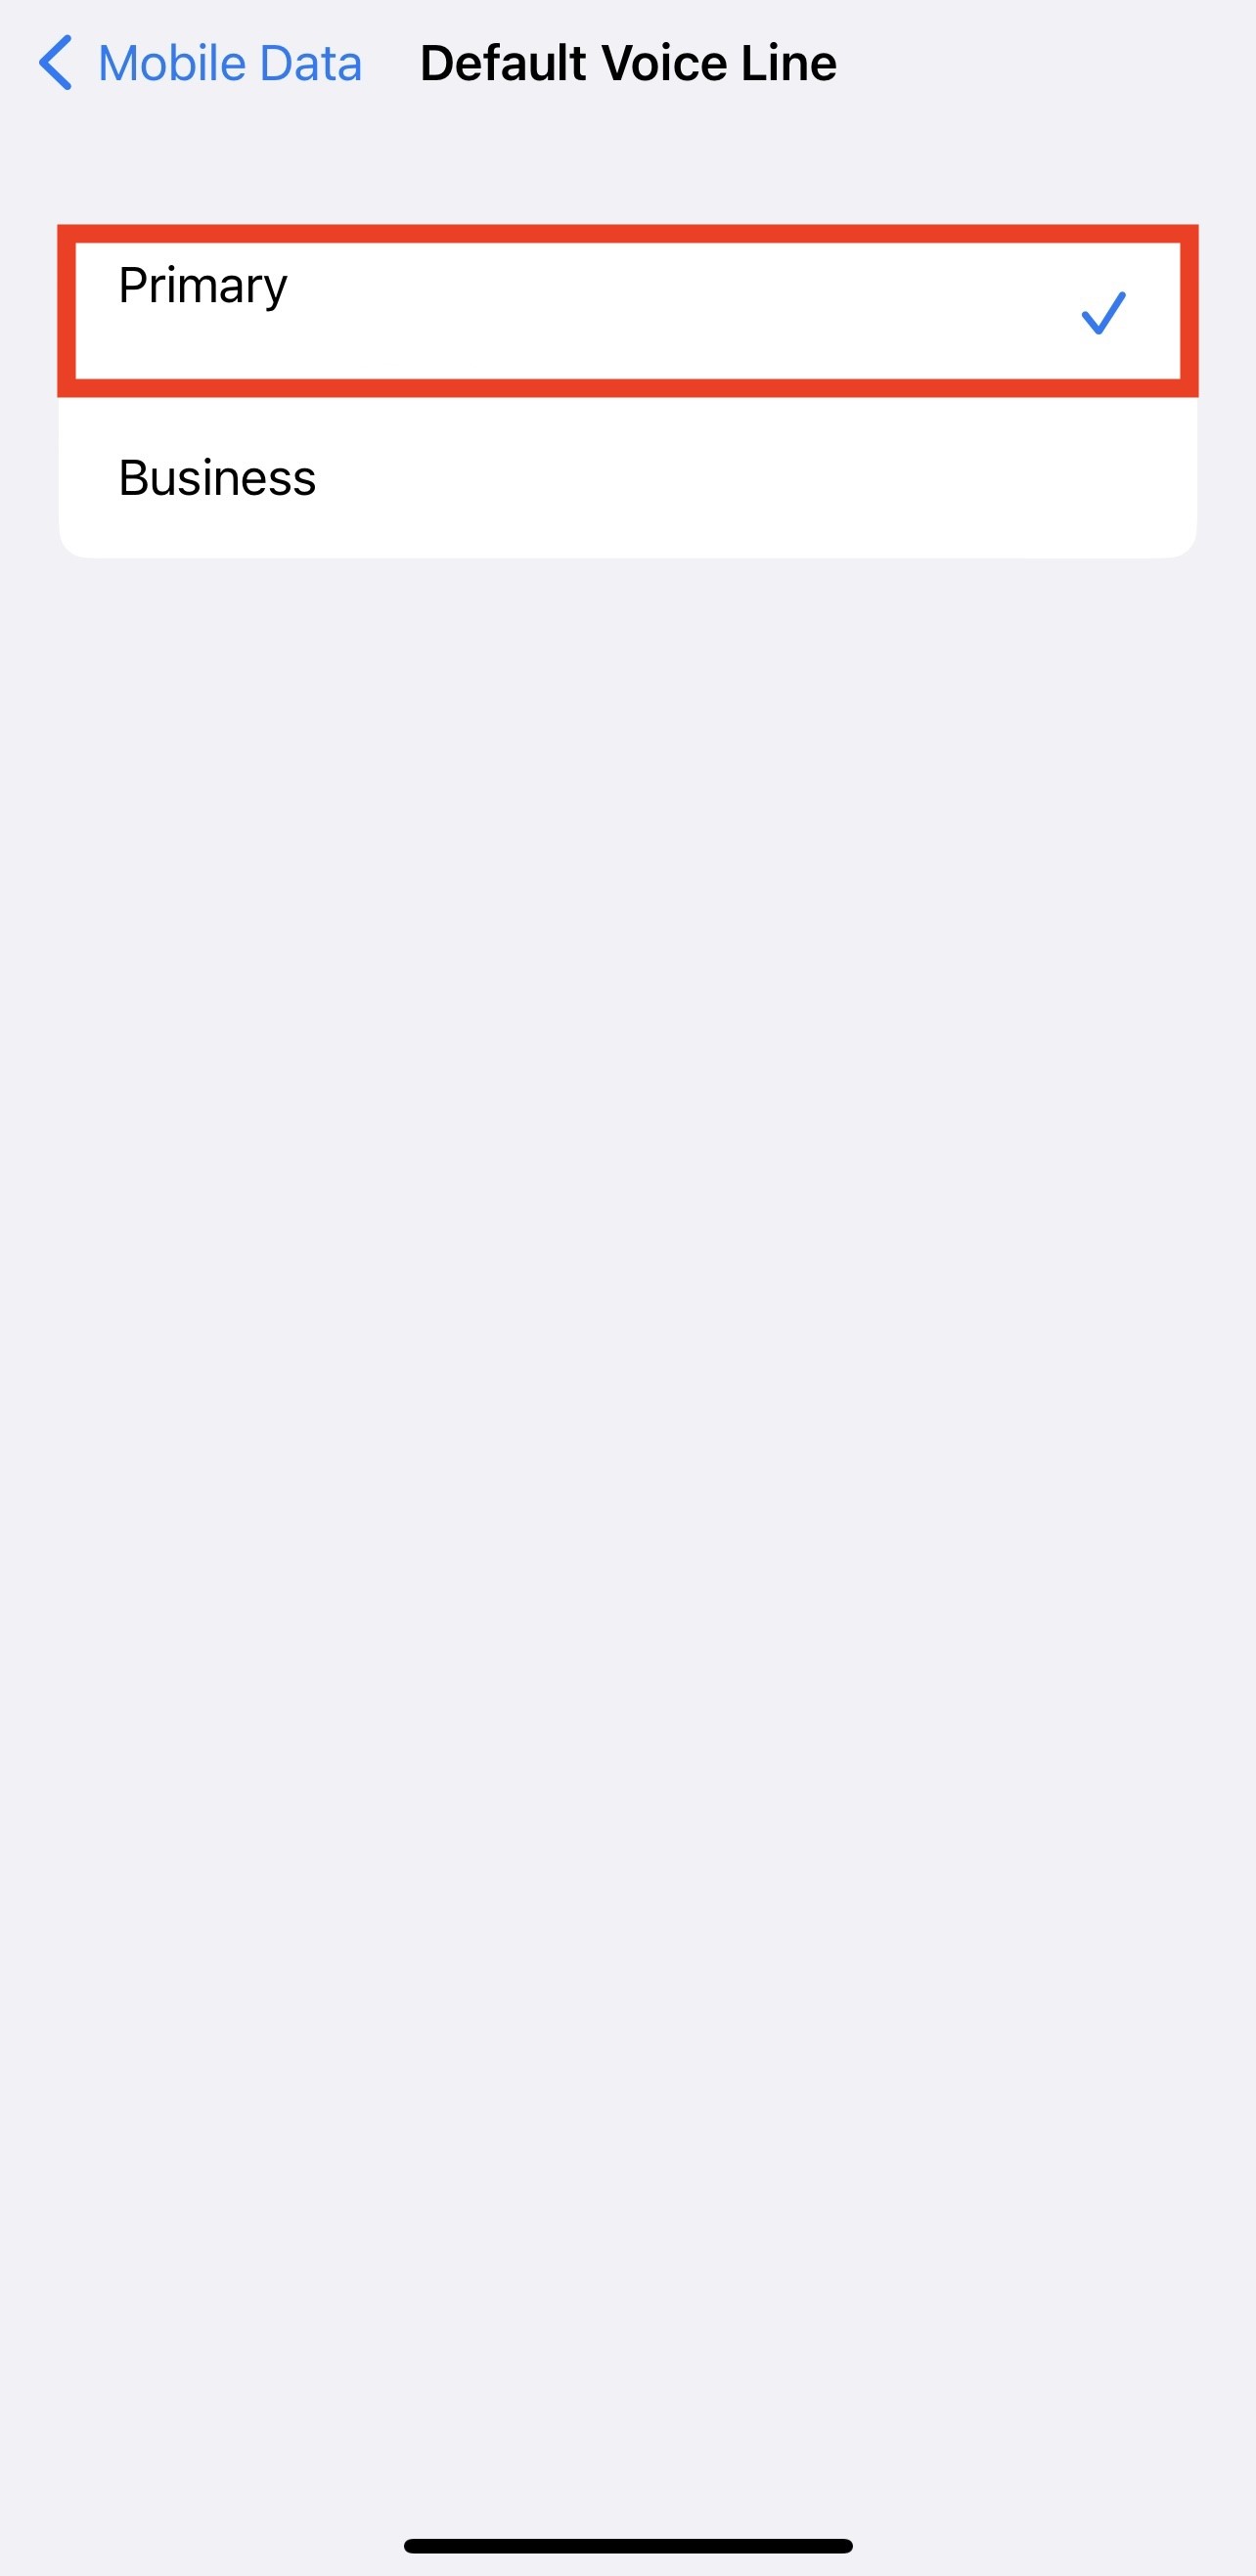
4. Configure the following settings as suggested below:
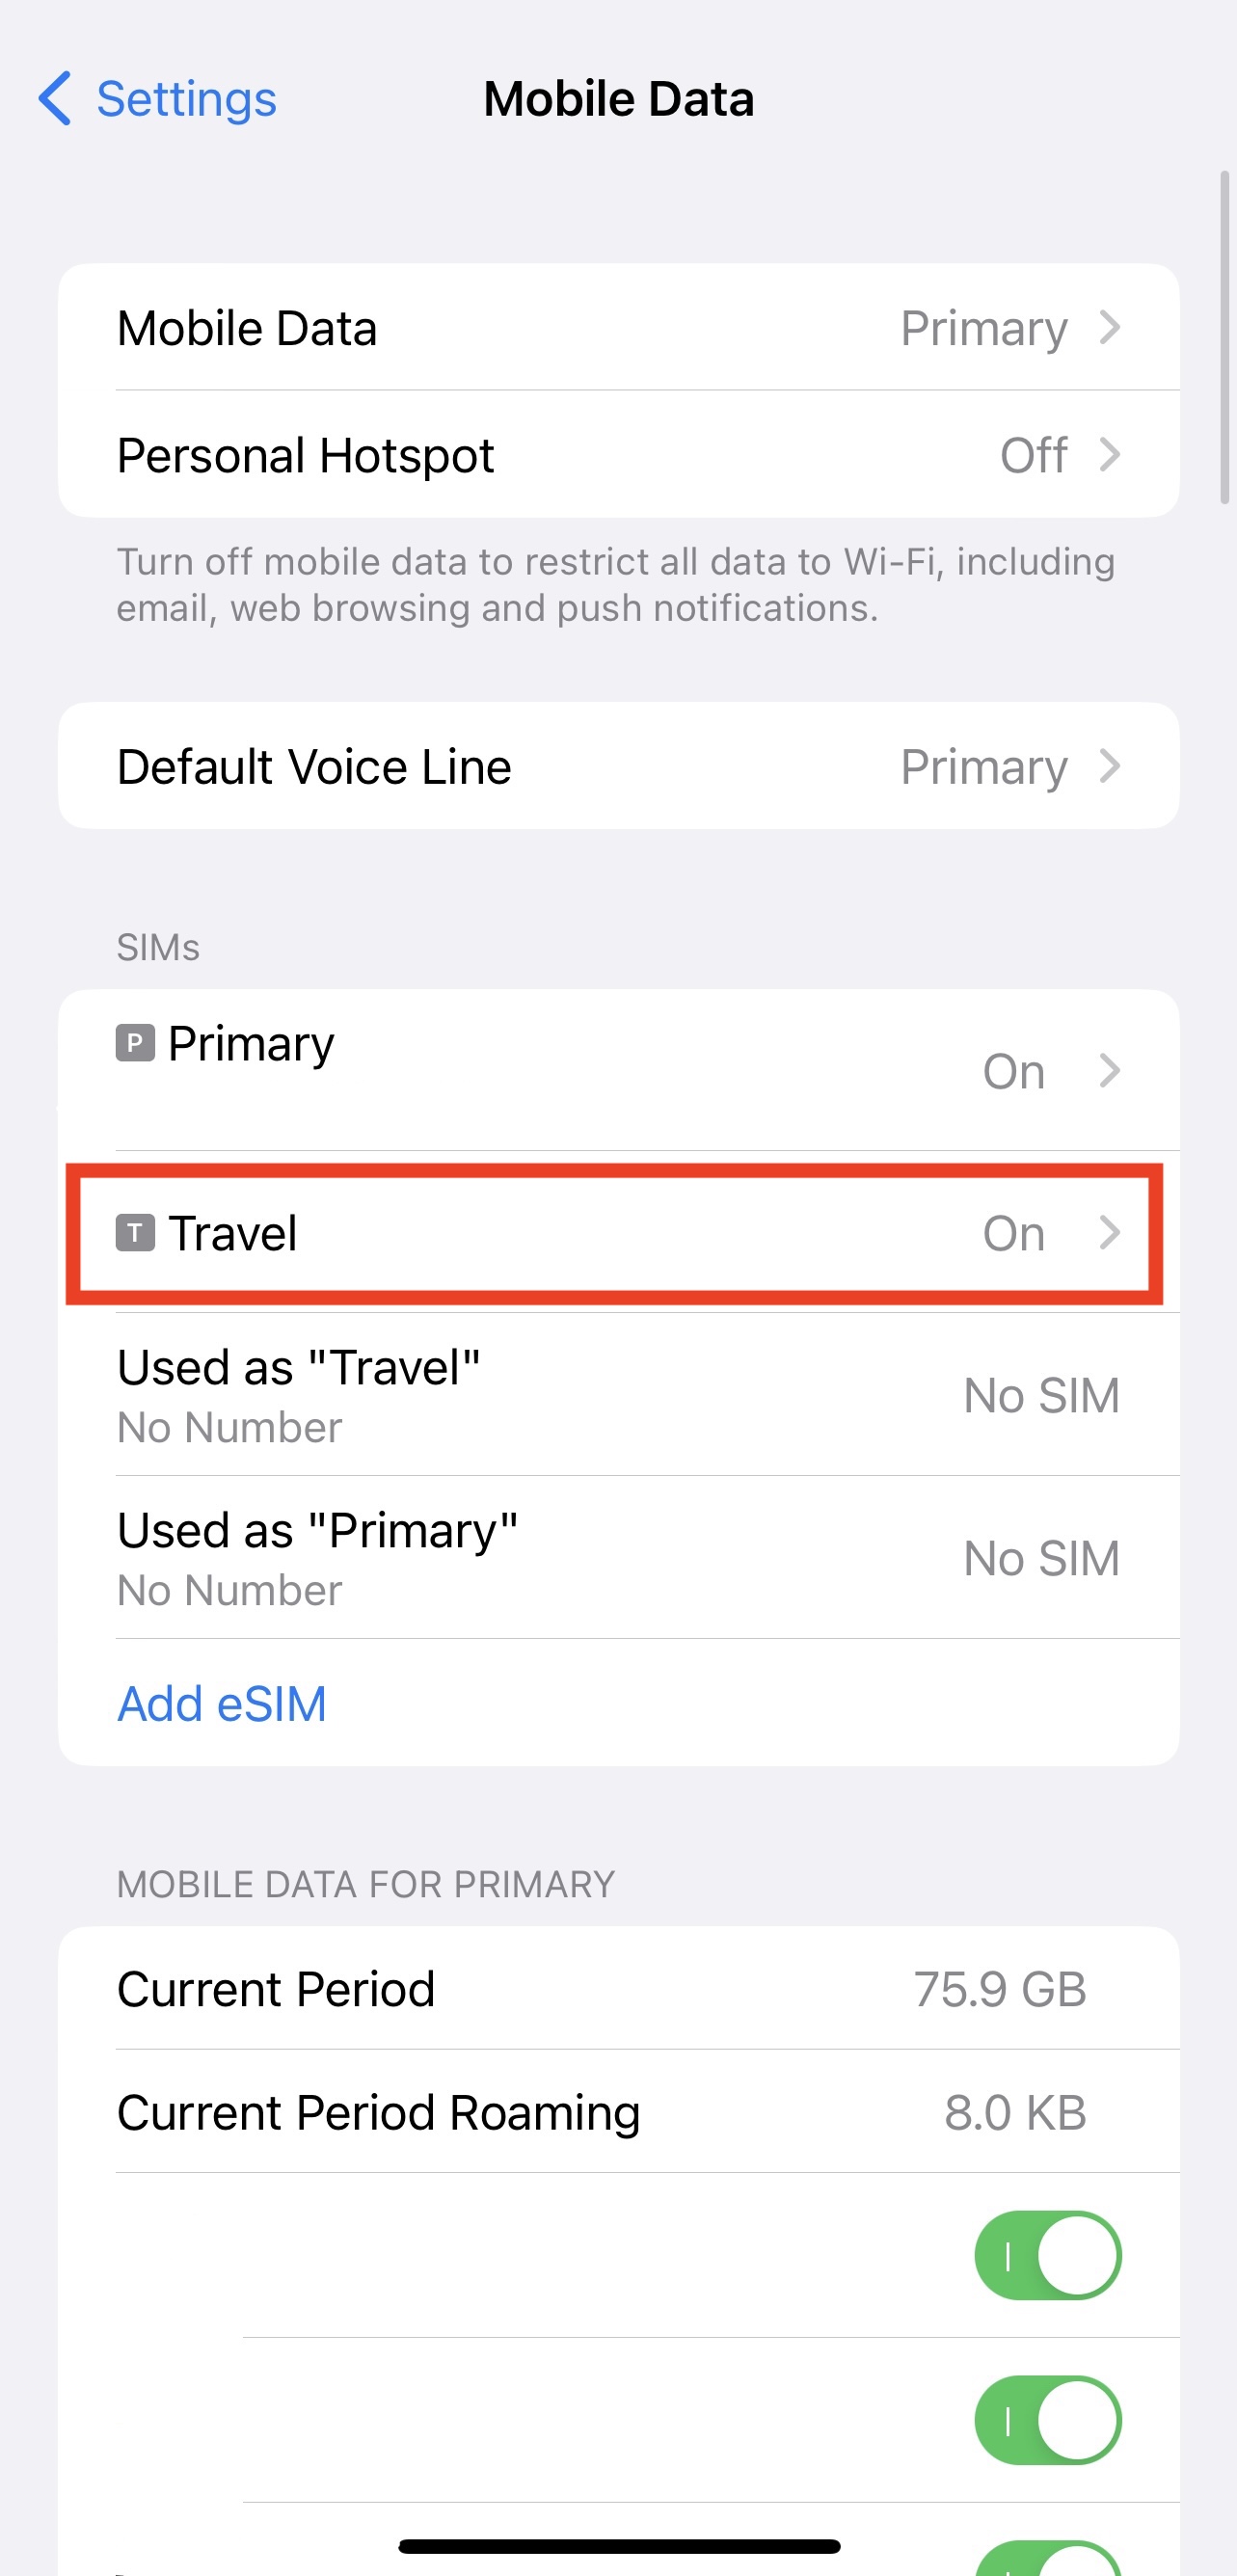
- Set Default Line to "Primary" > Tap Continue
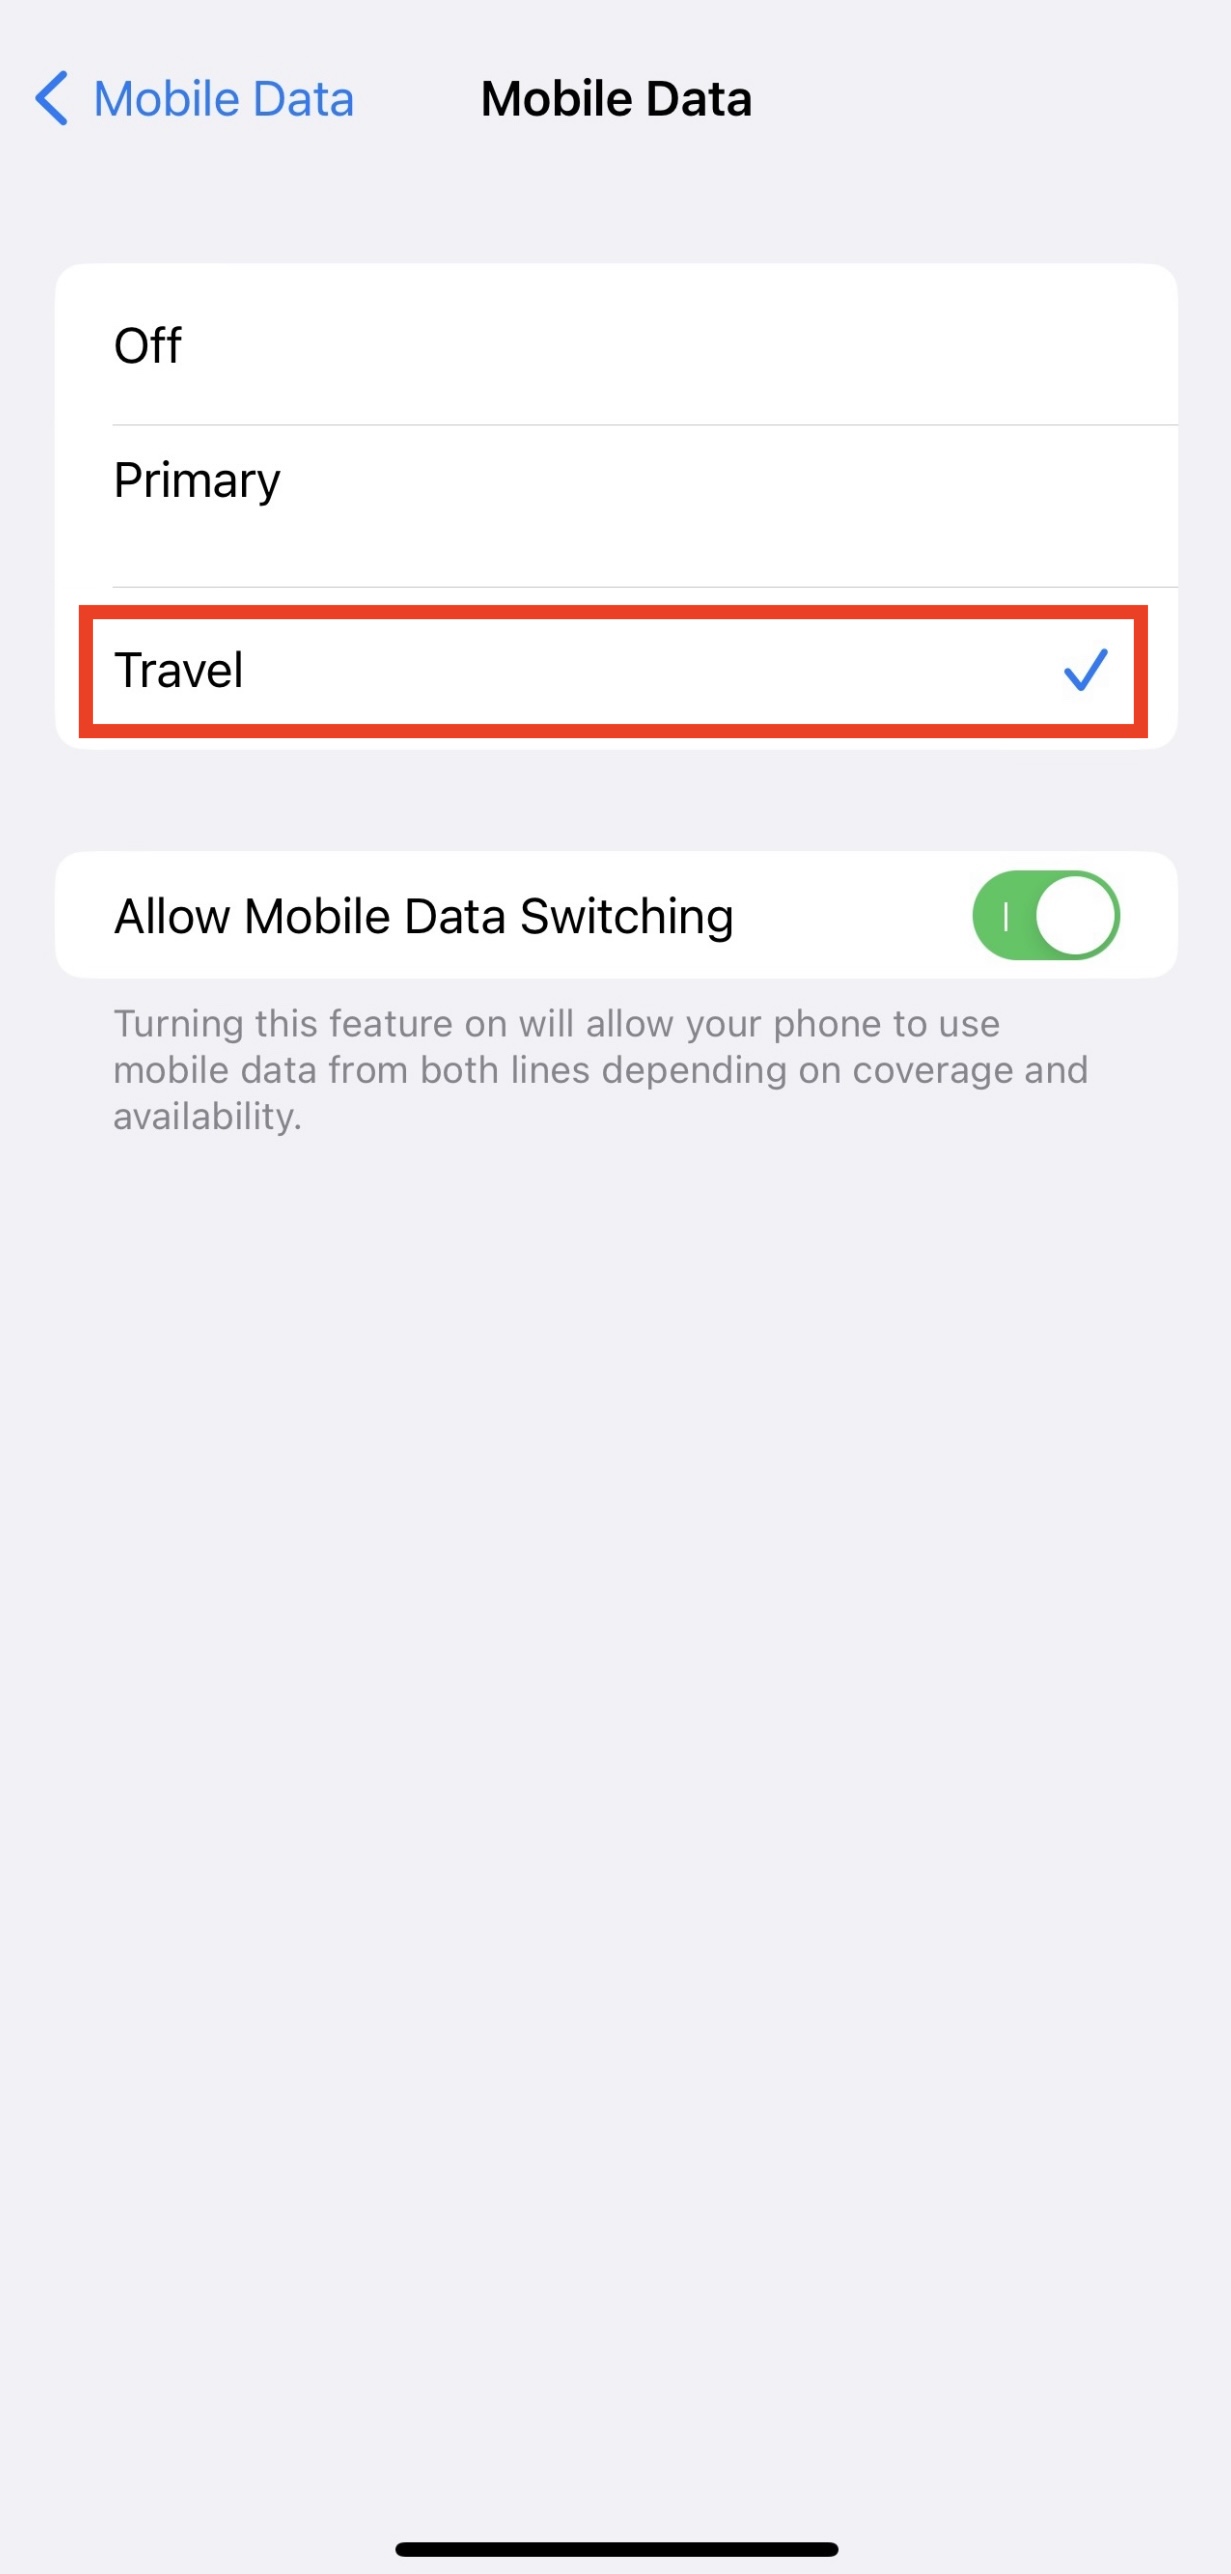
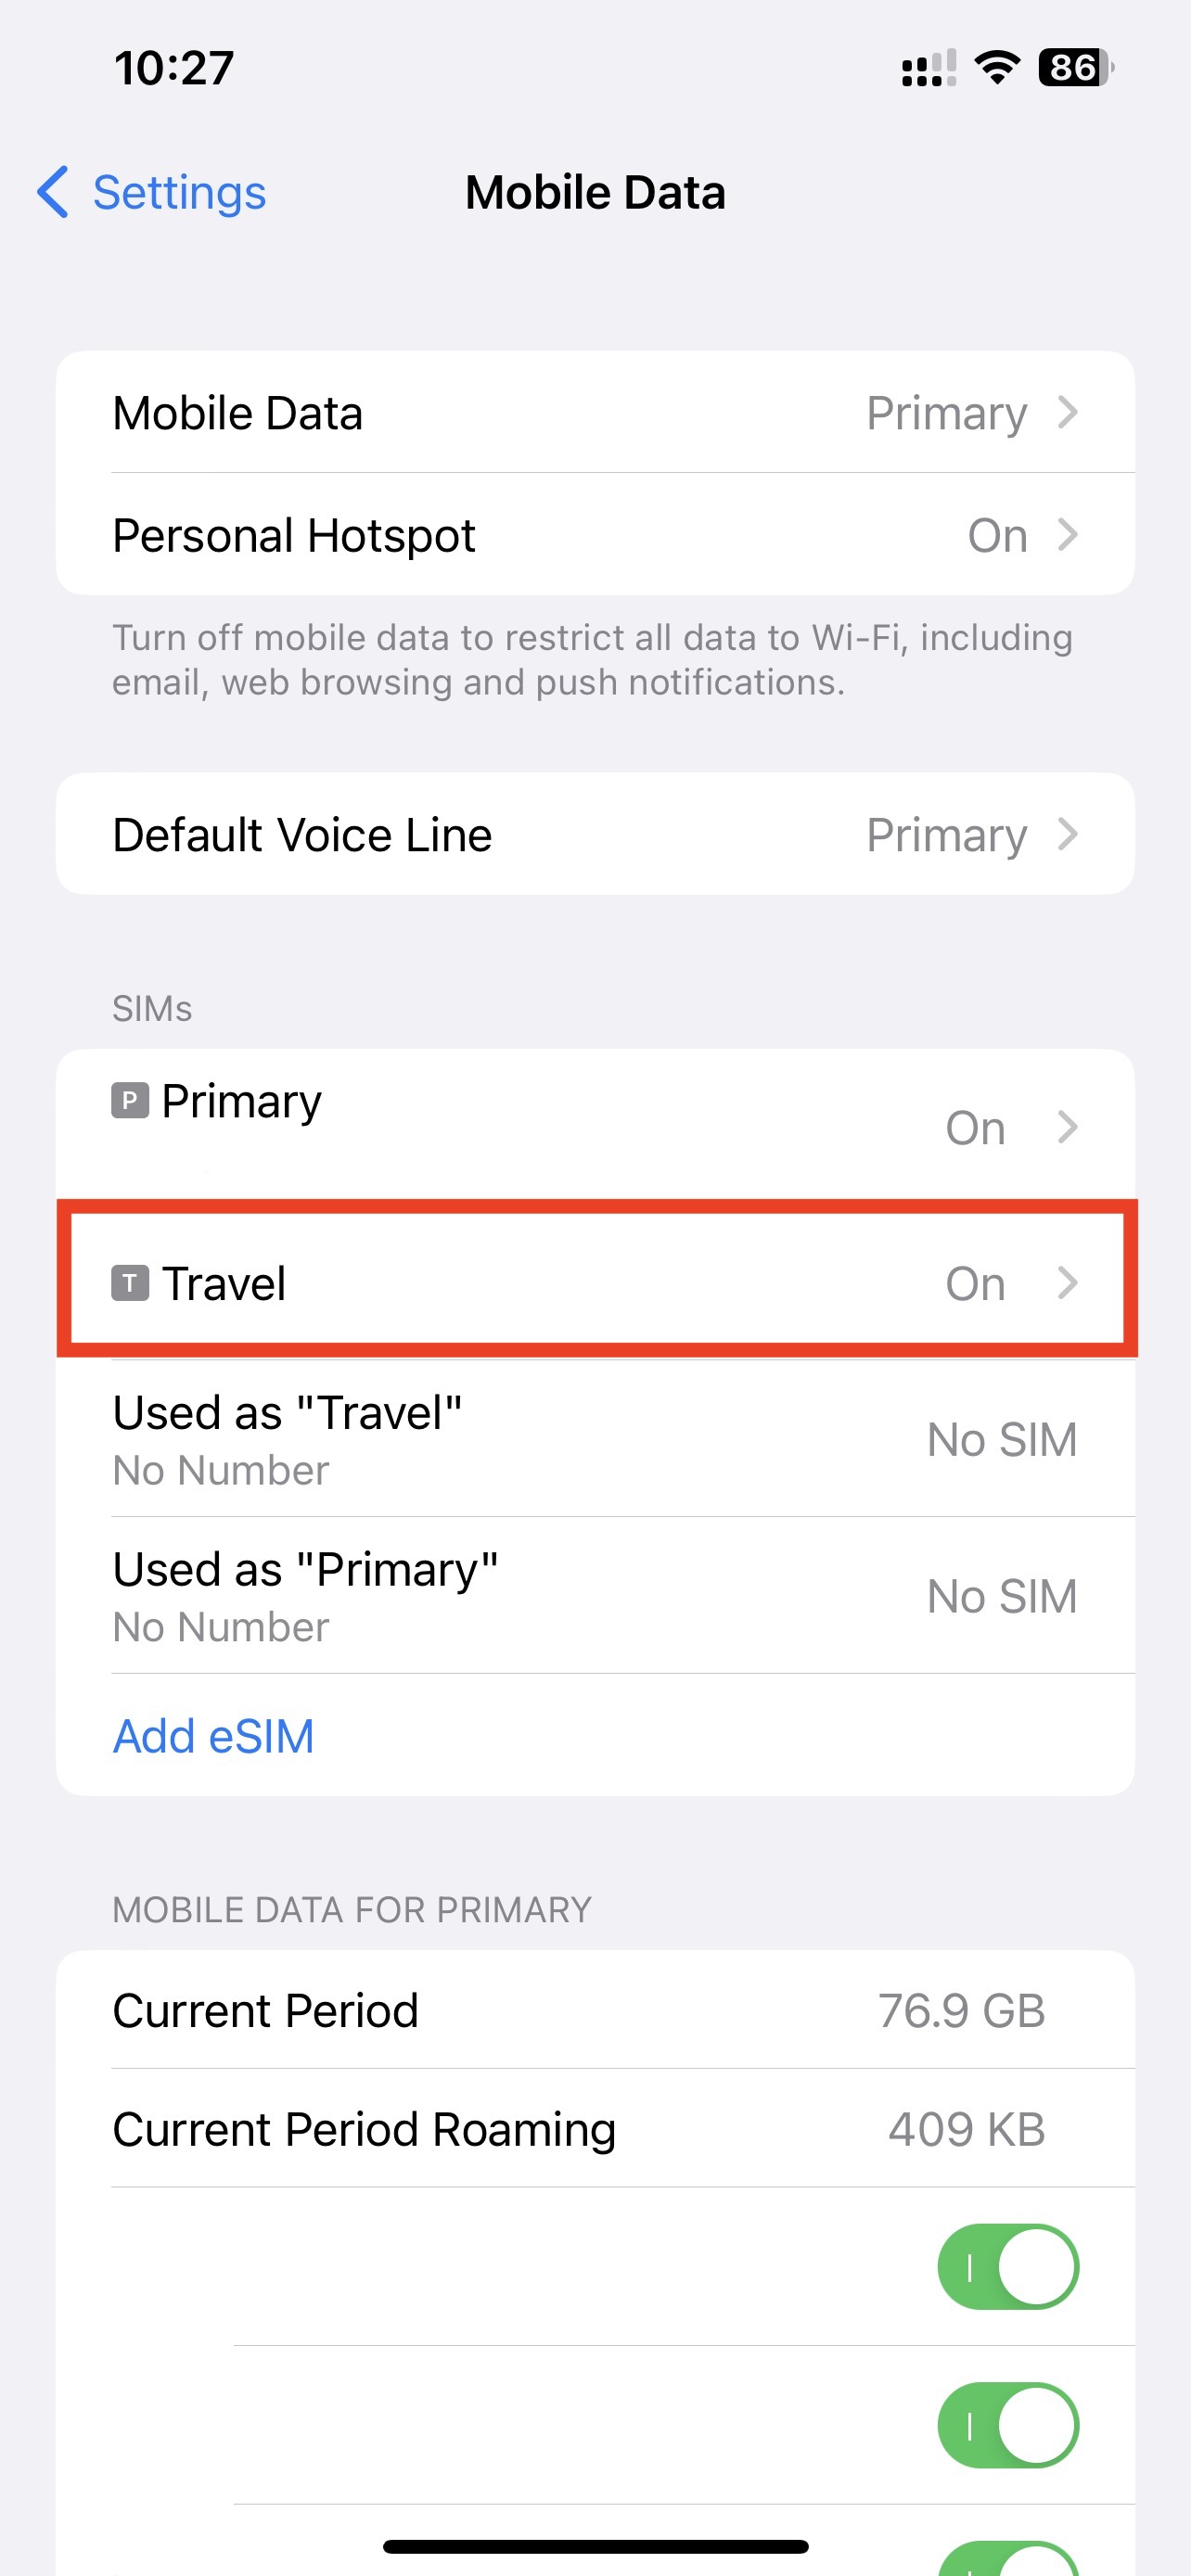
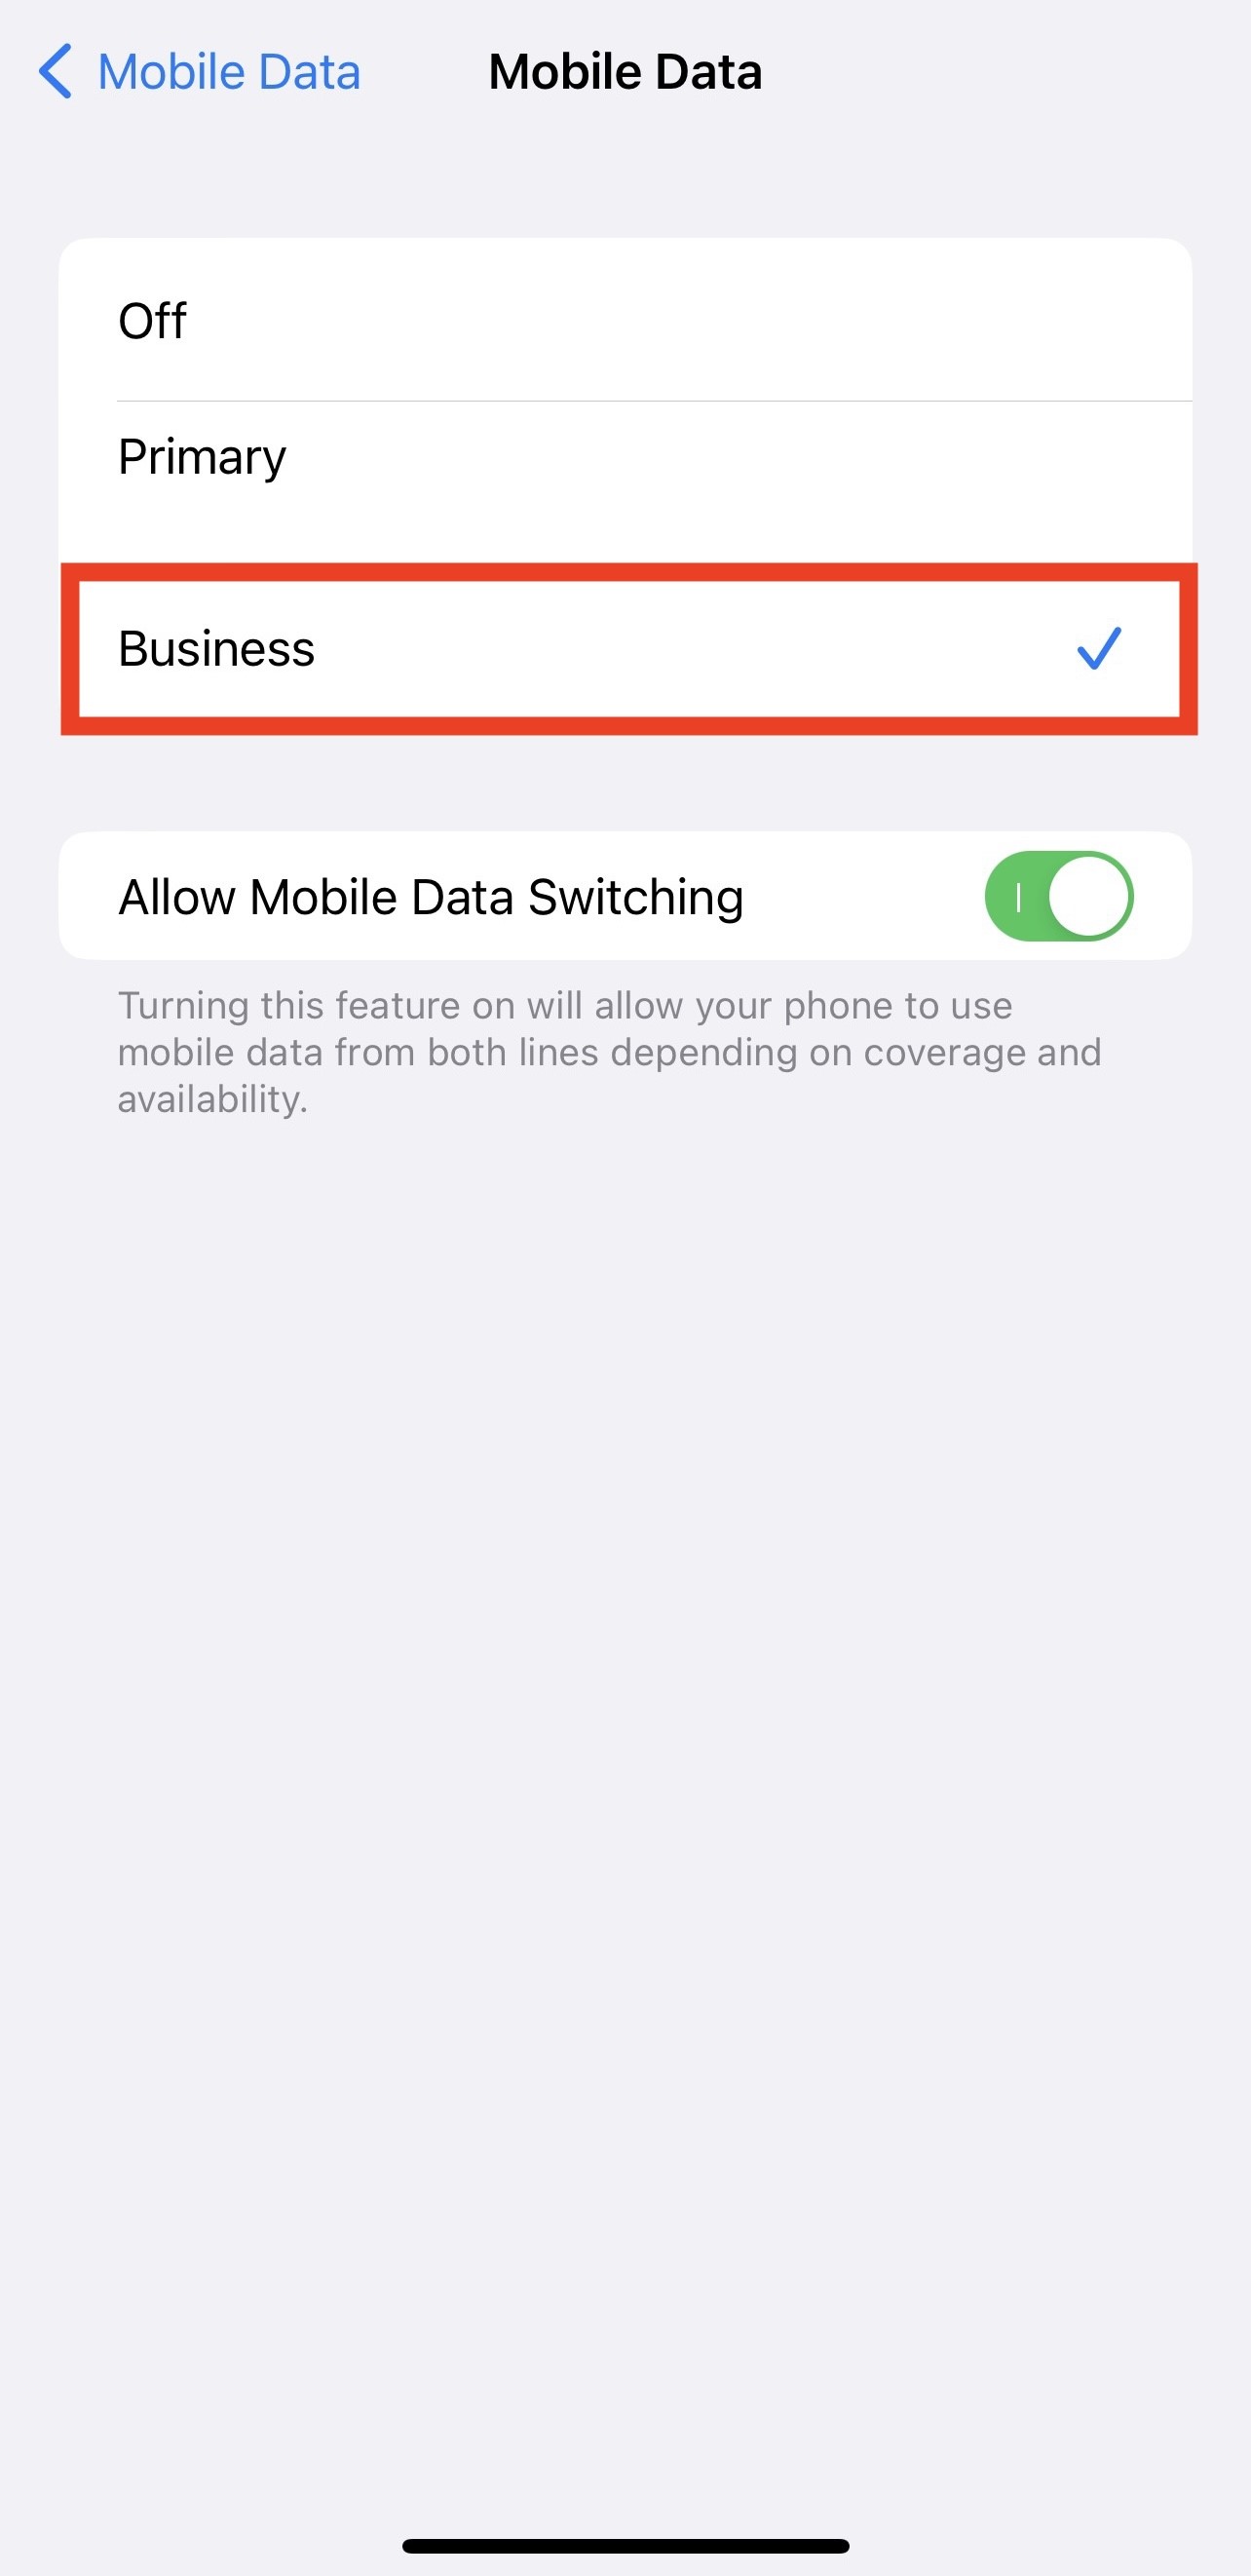
- Set Mobile Data to your previously chosen eSIM, in this example "Business"
5. The eSIM is now installed and set up.
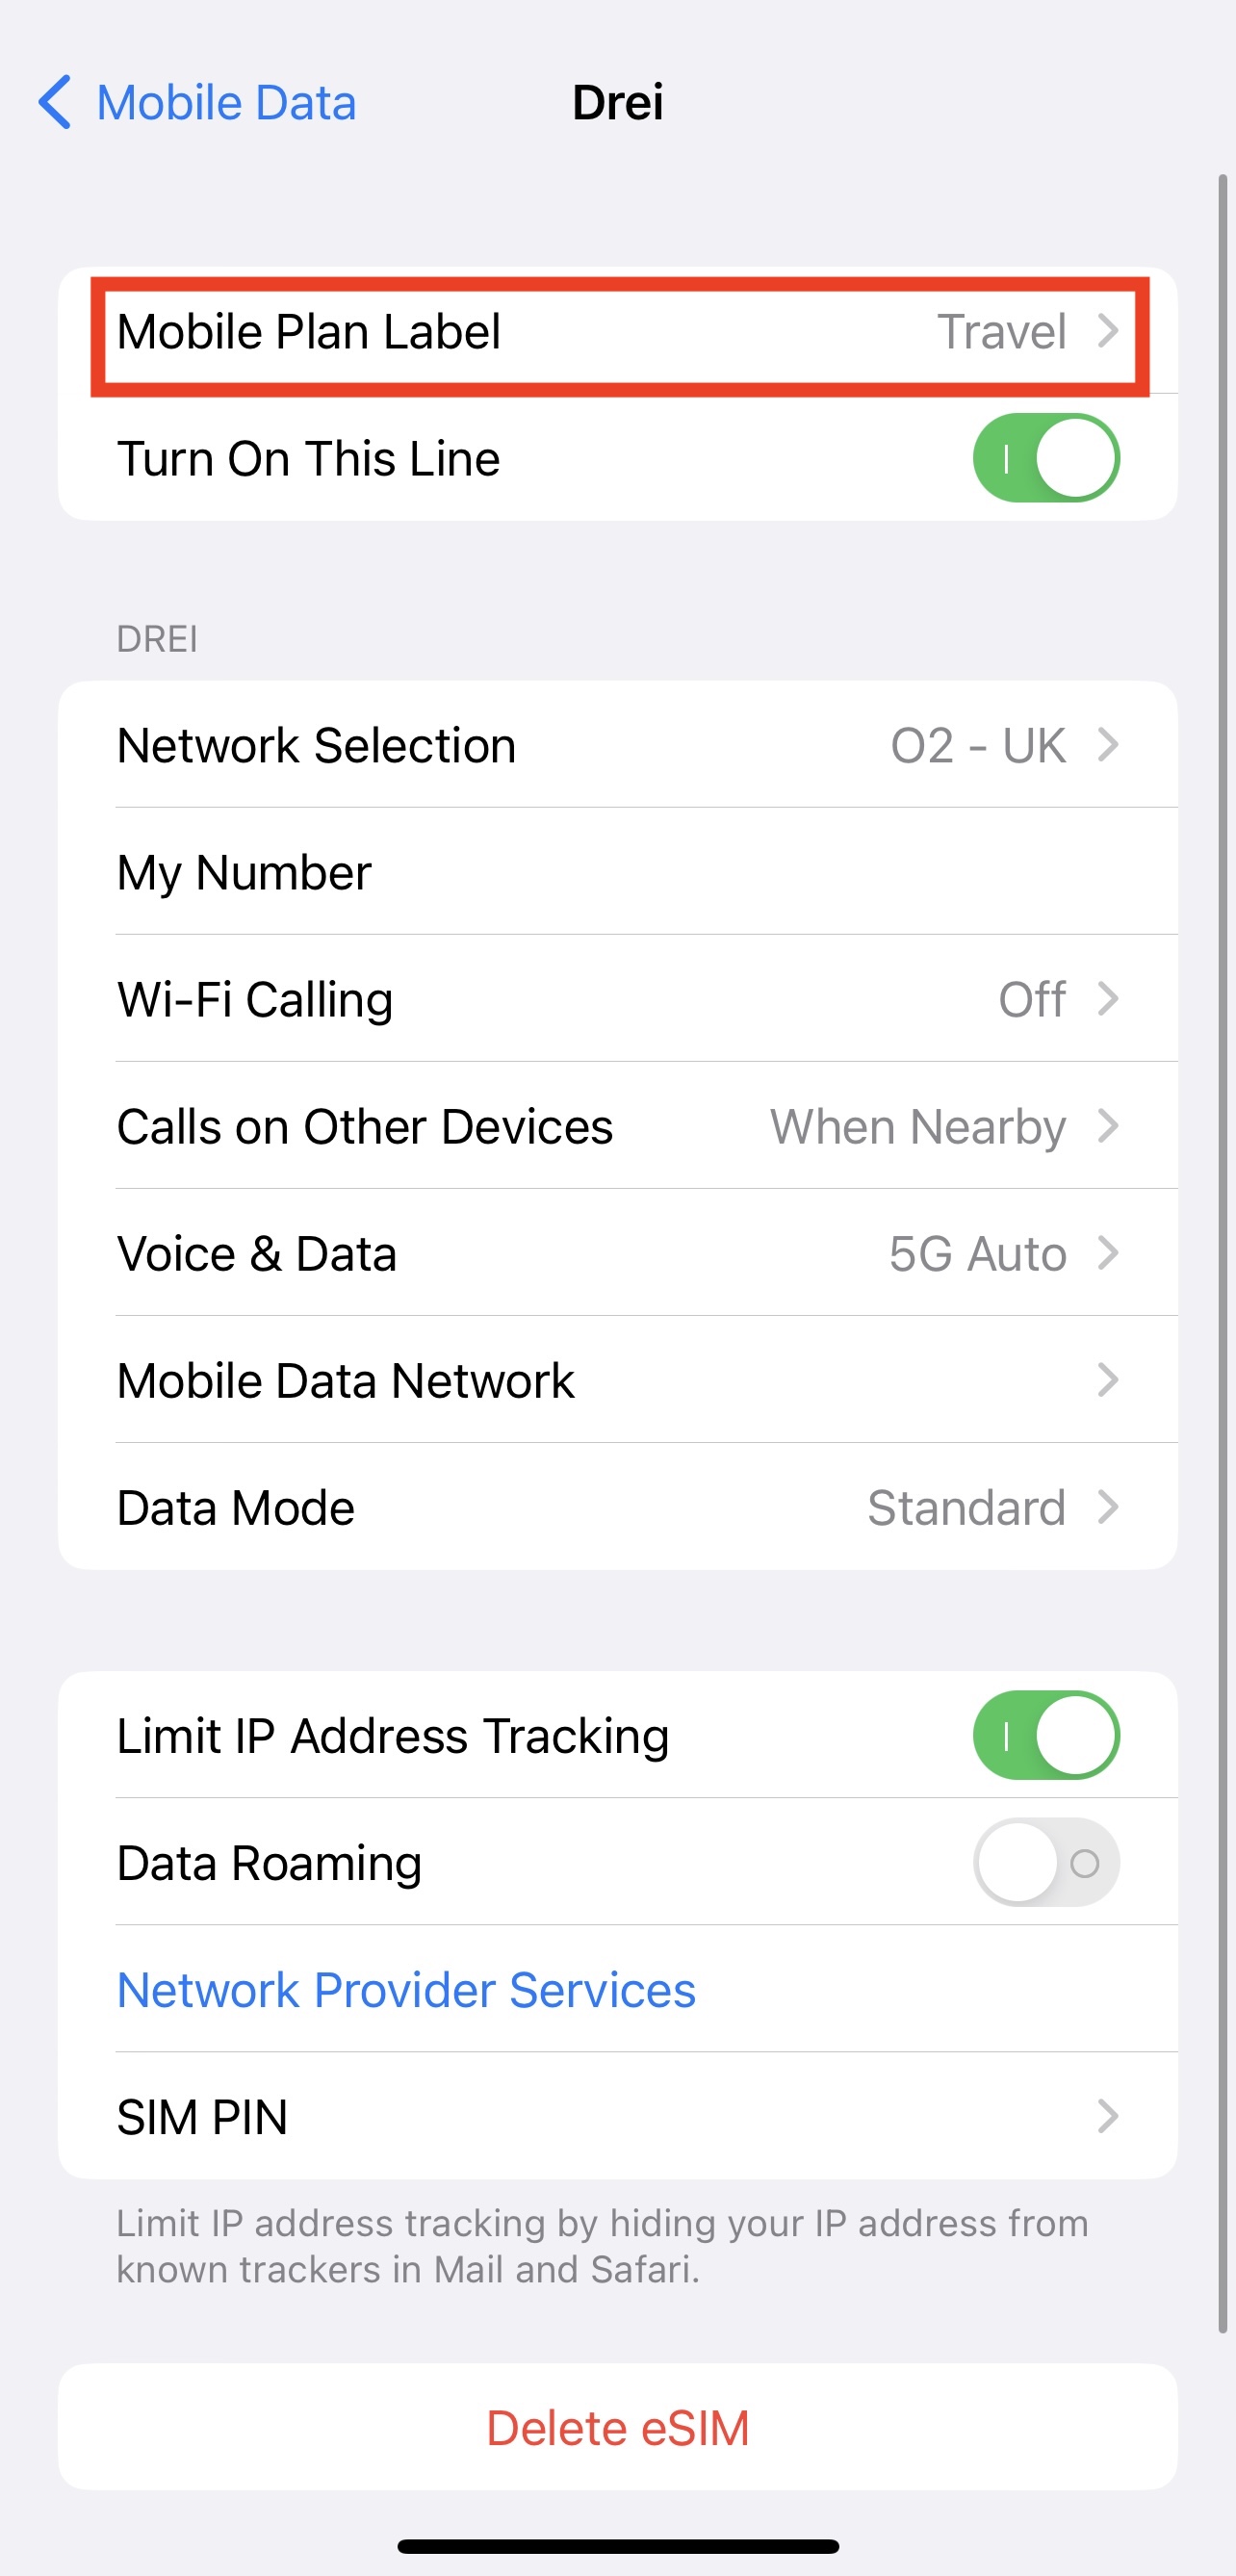
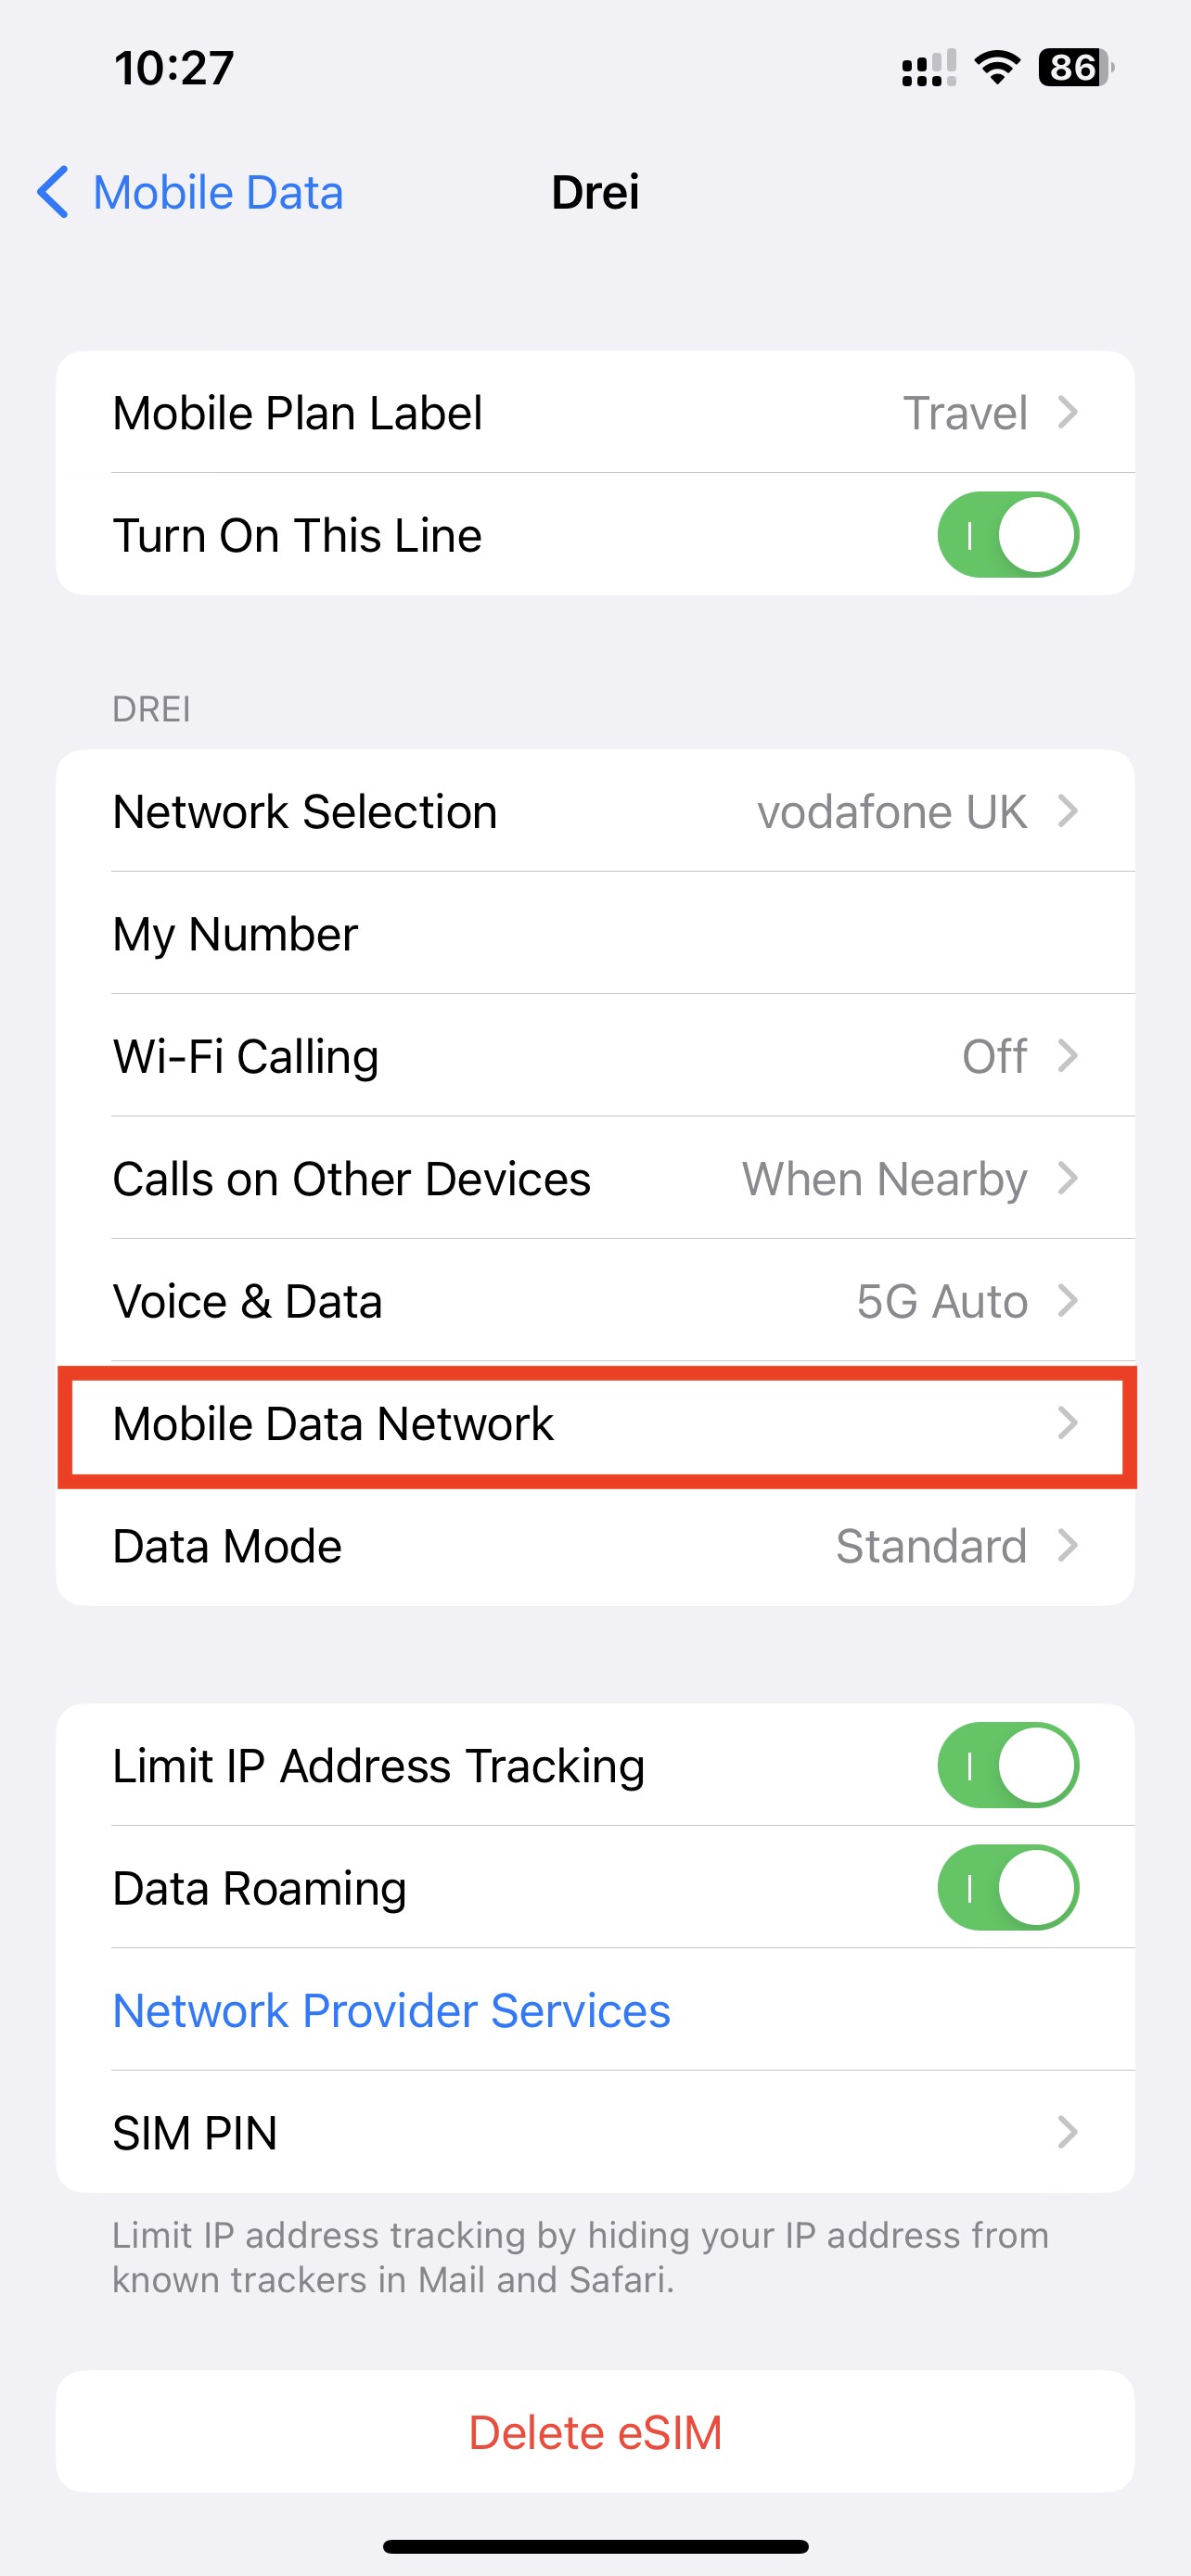
Reminder: Data Roaming MUST be "ON" in order for the eSIM to work.
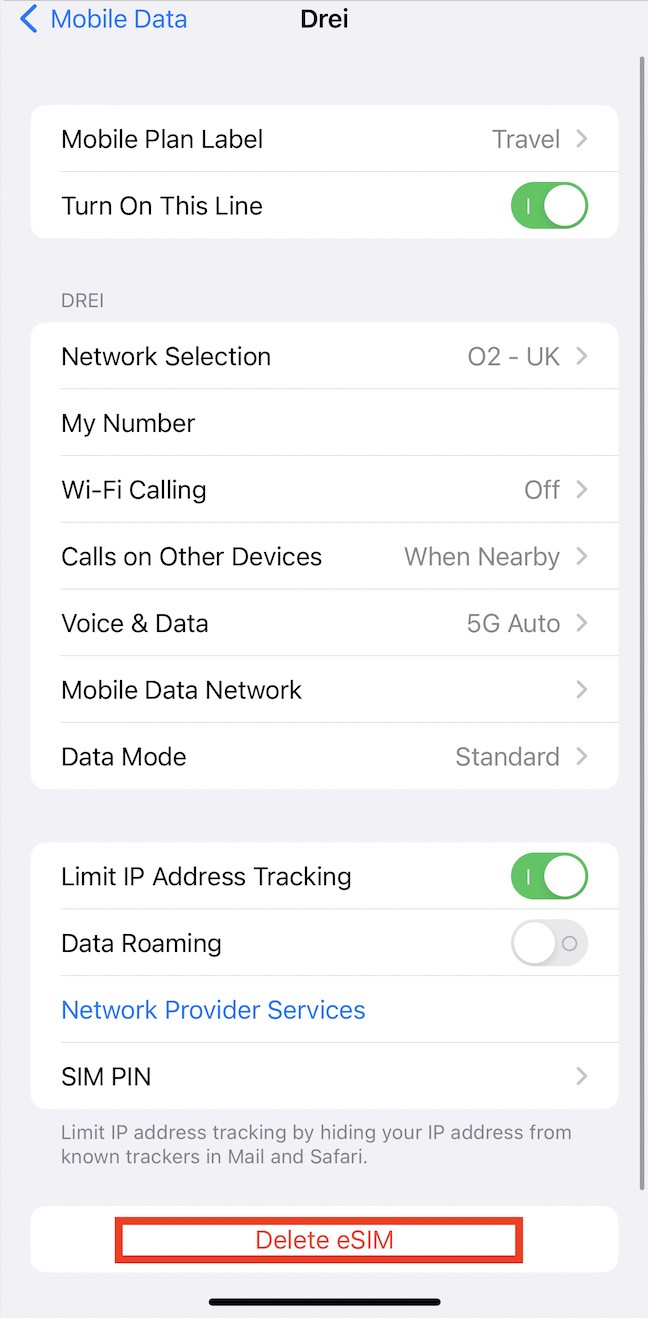
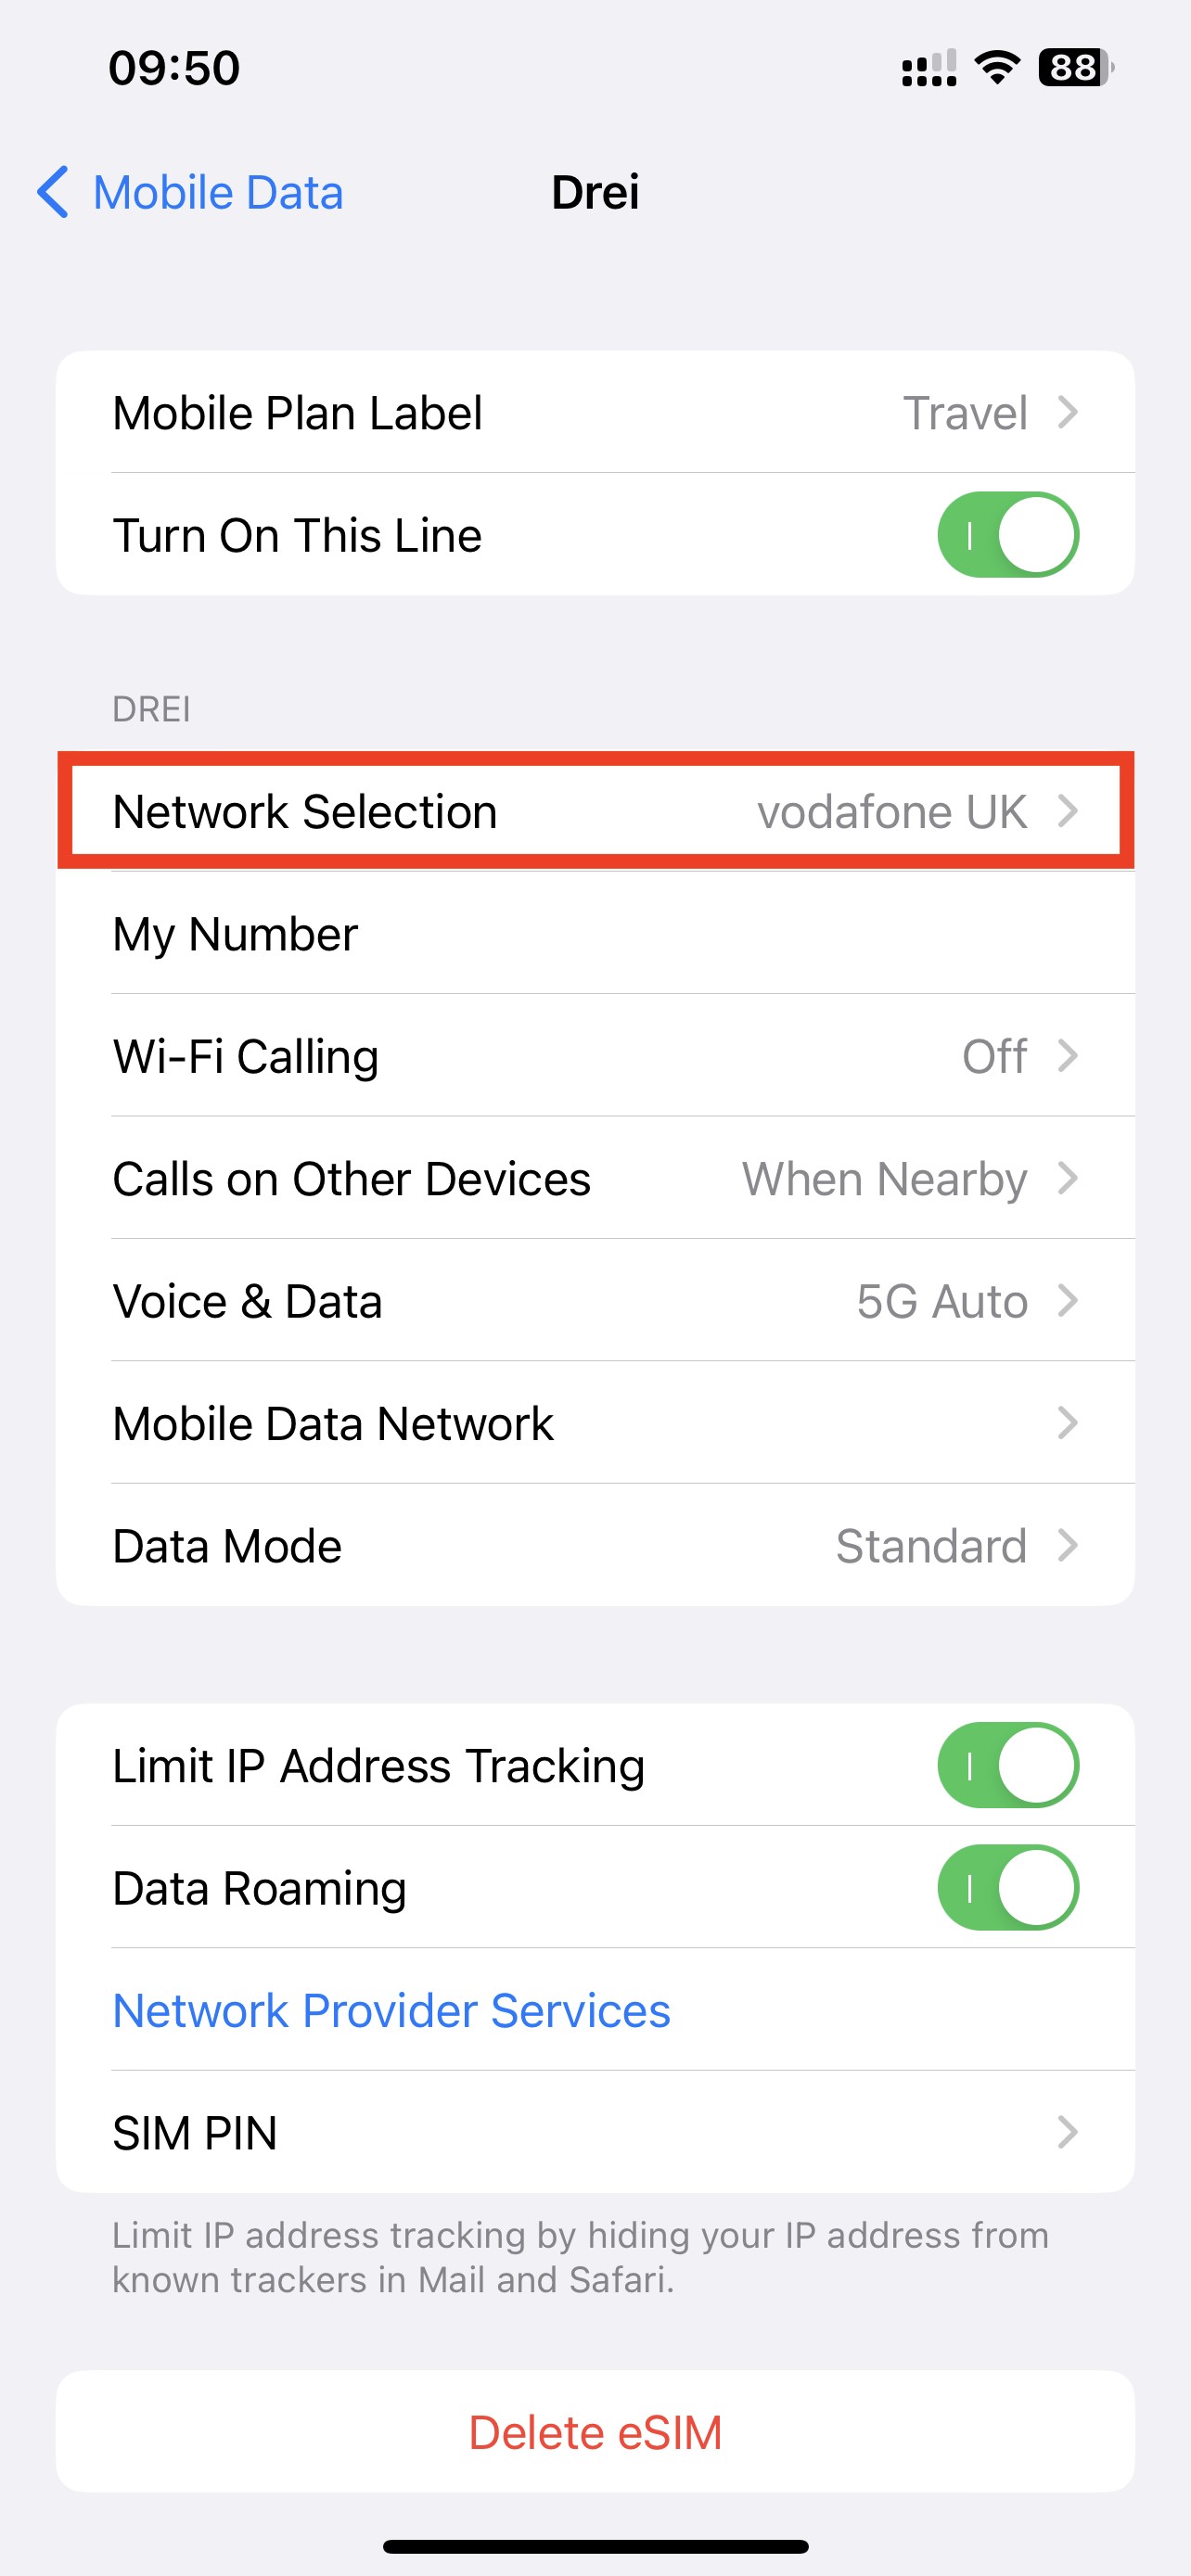
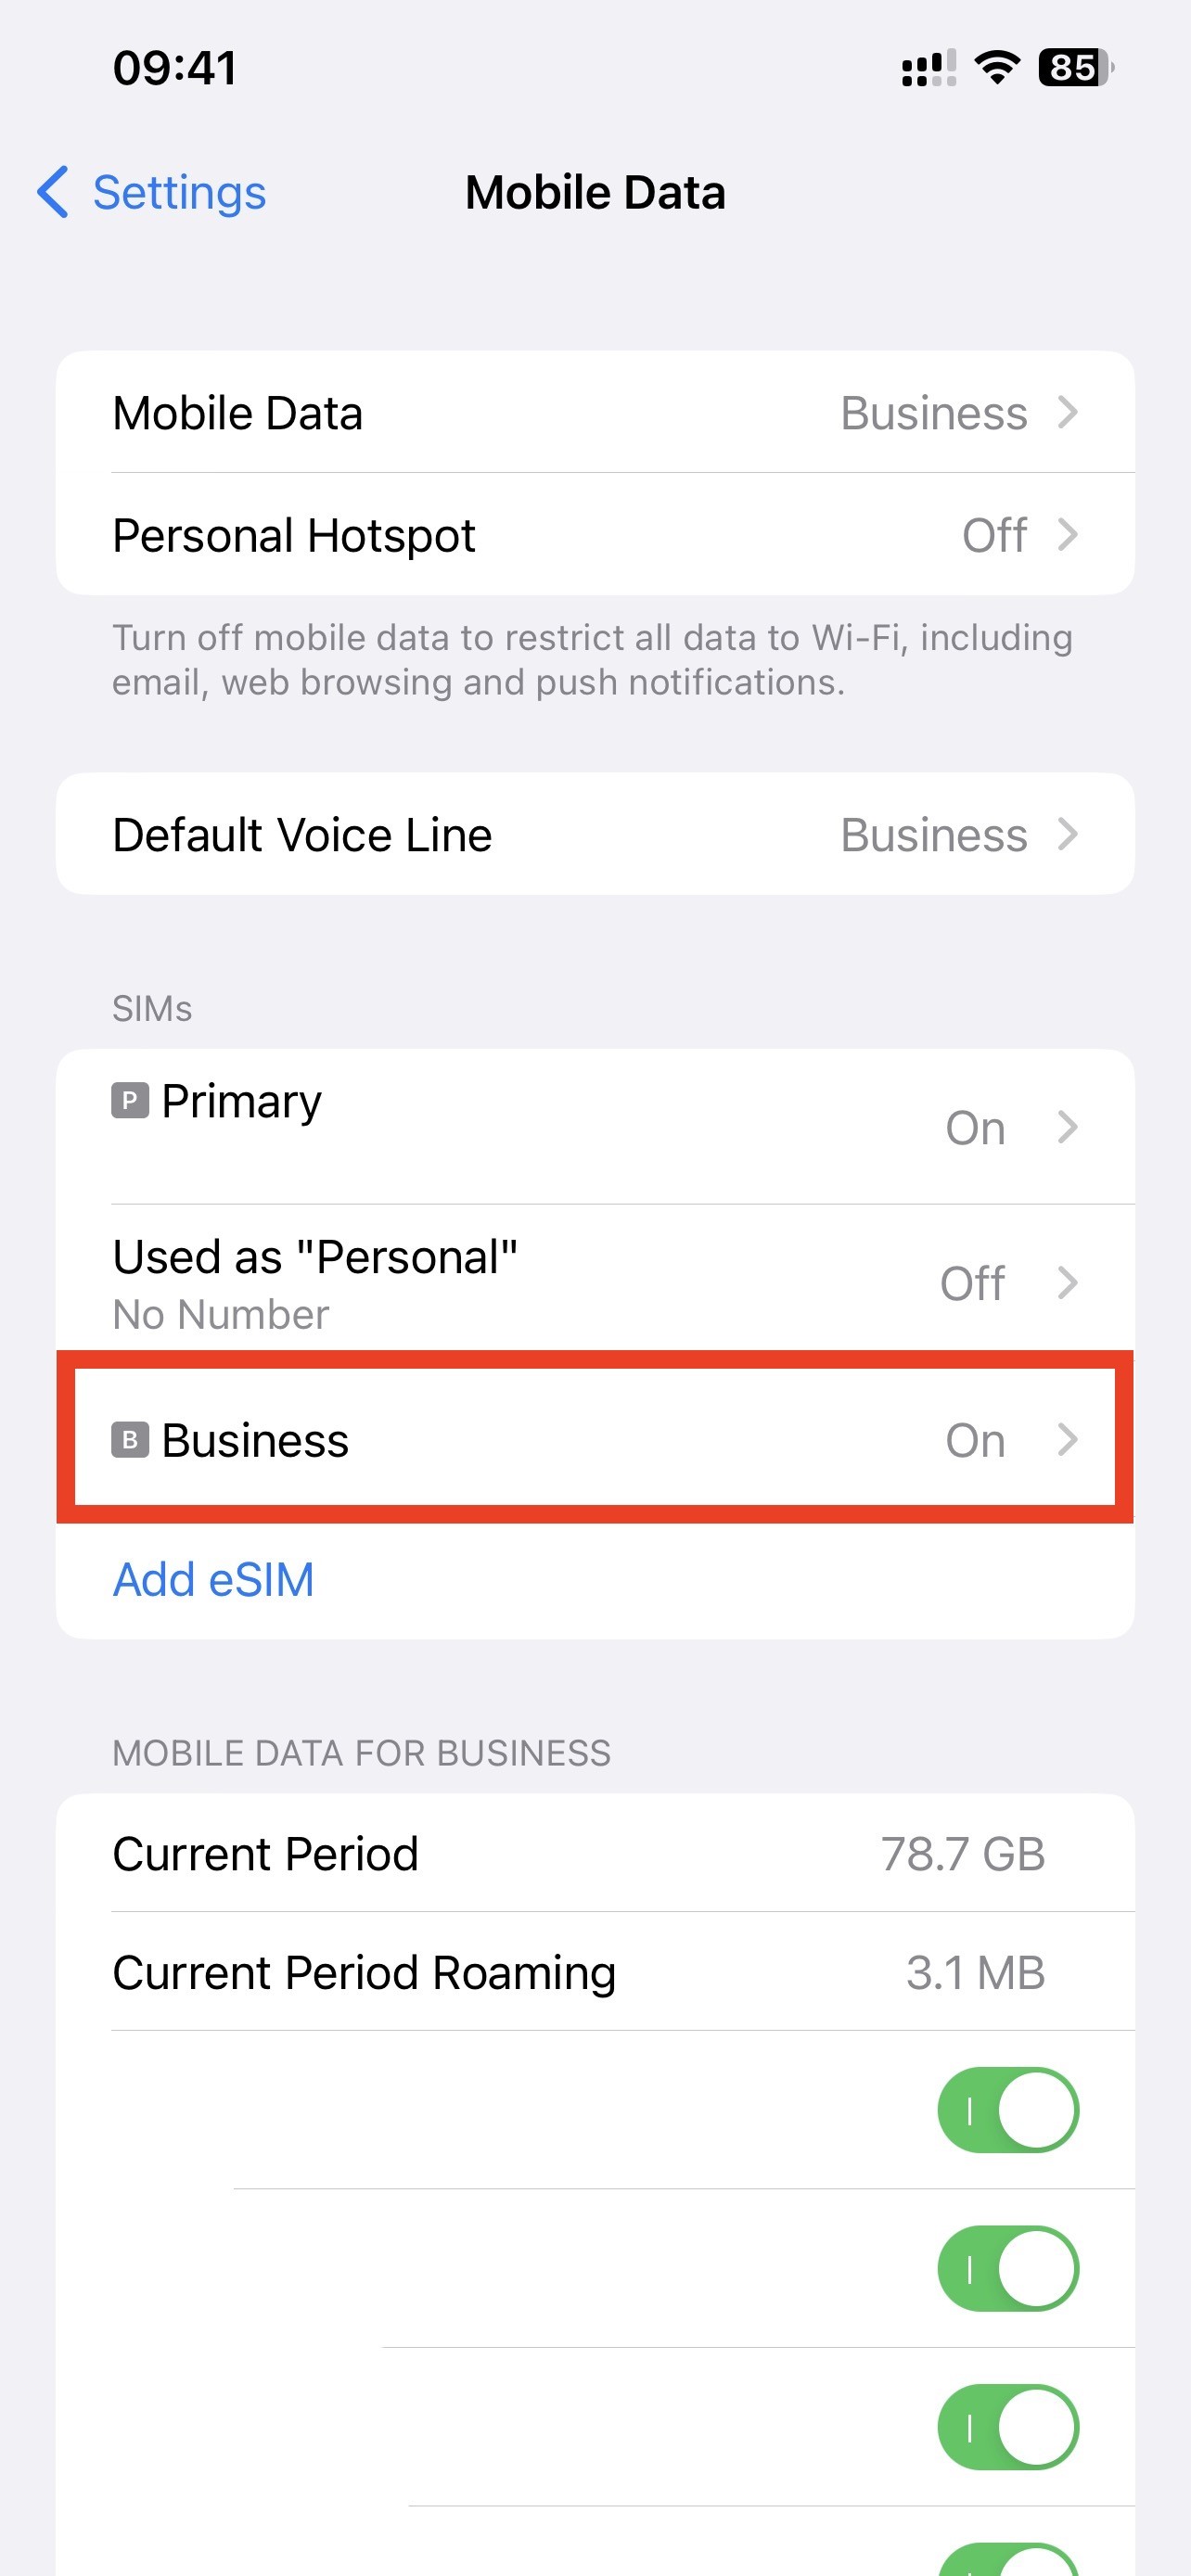
6. Go back into "Settings" > Tap "Mobile Data / Cellular" > Click on the eSIM you want to check Data Roaming for > toggle the switch to "ON".
If you experience any issues when trying to install your eSIM, have a look at our article here: